



Create Year Long Challenge 2023 - A to L
Participants are in alphabetical order by last name. Participants with a last name starting with A-L are on this page.
Participants with a last name starting with M-Z can be found here.
Suzie Aguilar
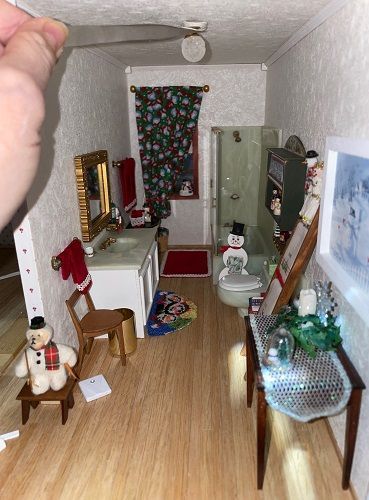
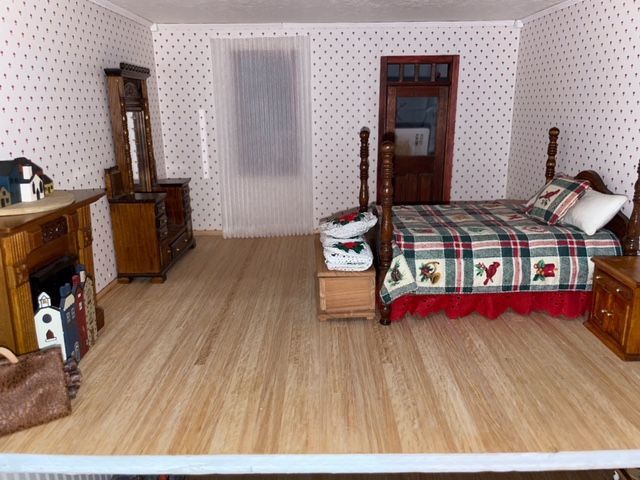
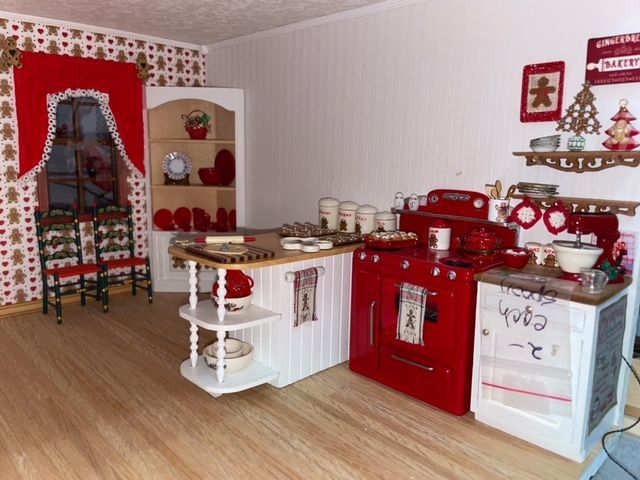
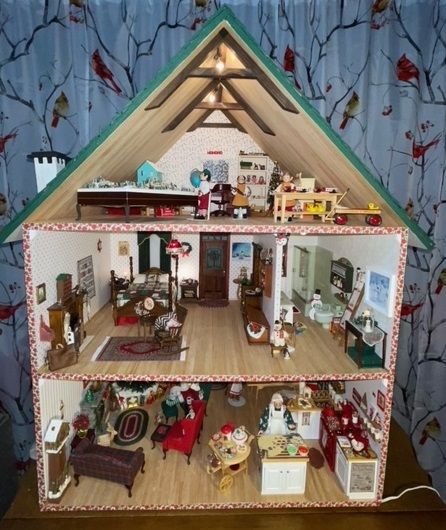
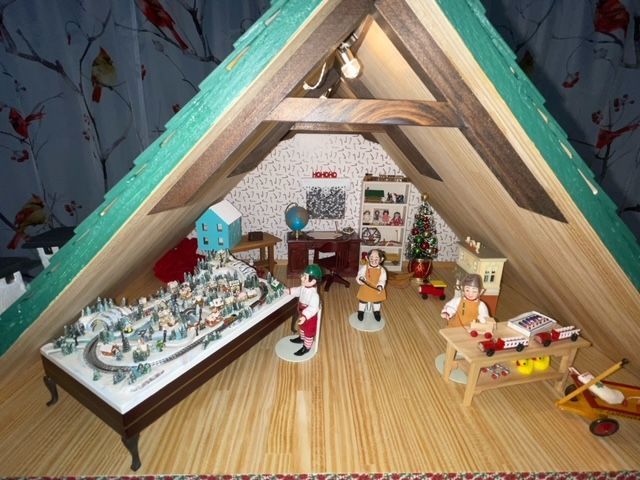
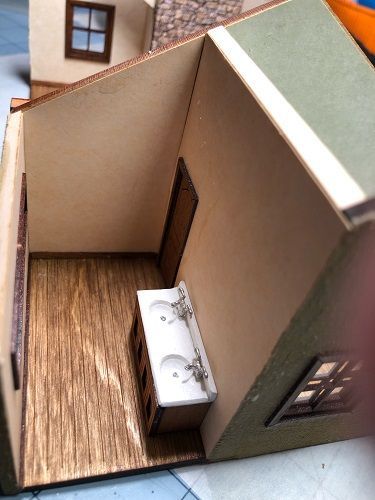
I have so many projects to choose from, but I finally decided on this one I’ve been trying the longest to complete. It is a 1/12 scale house for Santa and Noel Claus. I began over 25 years ago. Many life events have caused this to drag on but my inability to make decisions and then stick to them is probably the biggest slow down. The bathroom is the only room that has pieces glued in place and it still needs lighting to be done. The attic is going to be Santa’s workshop office. I worked on it a bit this December. I hope this challenge helps me get it finished this year!
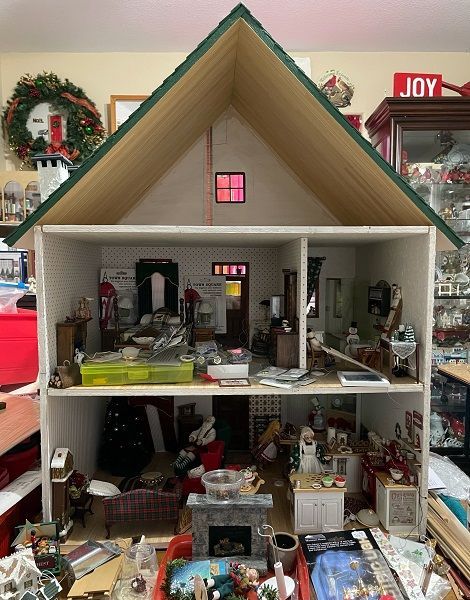
March
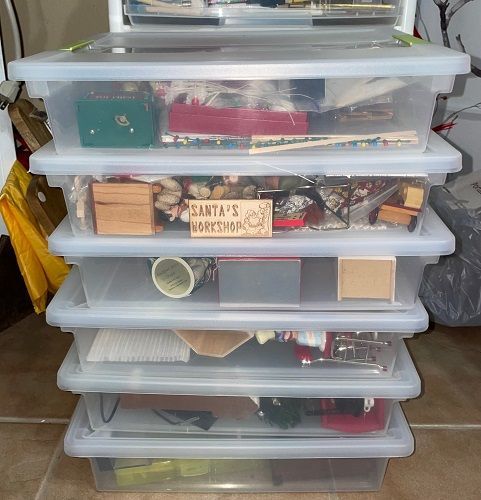
I got off to a great start on my Challenge project. I had made a detailed plan to add crown molding, baseboards, and lighting during the first quarter. I cleared the house contents into storage boxes by room. It was almost like a real house reno! I started with the crown molding but work stopped when I received the news that my mom had passed unexpectedly on February 17. Now in mid March all her final arrangements are complete but I will probably not get back to working on the house before the 31st. I am submitting a few progress photos of what has happened so far. My mom and I shared a love of miniatures so I’ll be recalling those happy memories while I finish this project.
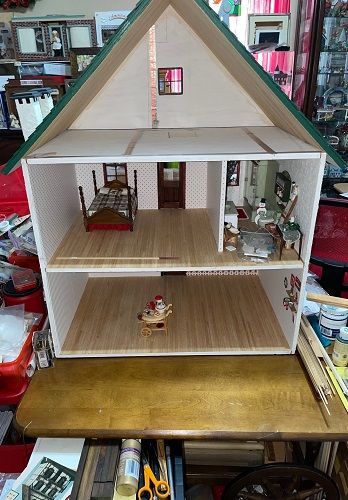
June
Finishing Santa’s house is more challenging than I expected. My husband had shoulder surgery in March and I’ve been taking him to physical therapy three times a week starting the day after surgery. I have completed the crown molding and baseboards. The bathroom is finished except for adding lightly fixtures. (I am watching CR2S videos to learn and get brave enough to add them.) The more I do the more I realize there is left to do!
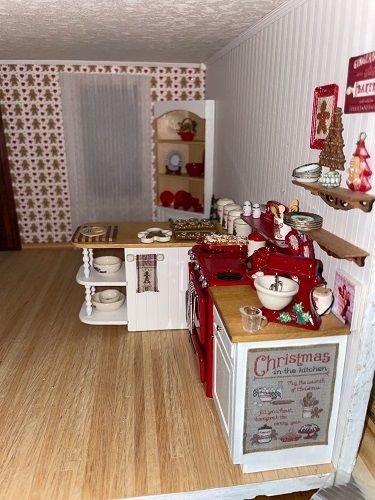
September
I’ve not made much progress but I’ve done a lot of planning and reorganizing. I discovered I didn’t put acrylic in two windows so that’s getting done by month end. I’m still dragging my feet over installing lights. I bought all the tools to make it easier but now I’m not sure I even put the tape in the right places. I just may not put them in at all. 😳
Final Update
Barb Antol
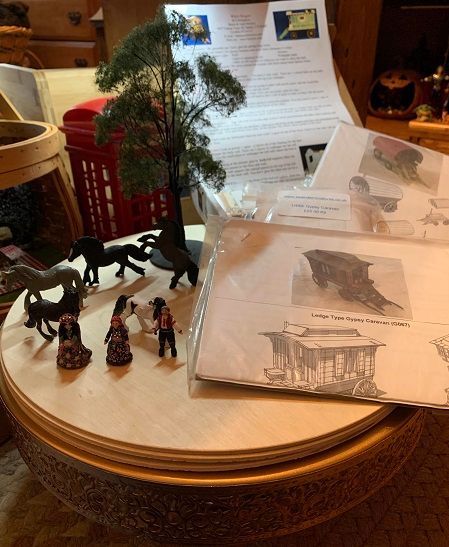
I’ll be working on a Quarter Scale Gypsy Caravan Scene. This is a project I’ve wanted to do for some time, so this challenge seems like the perfect opportunity for me to finally get it done. The scene will be mounted atop a round filigree cake stand and will feature 3 or 4 little Gypsy Caravan Wagons (all different). I have various kits from BJ Minis, Seaside Miniatures, and others, so I will build them and see which ones work best. One of the most fun parts of this project will be deciding on the color scheme for each of the wagons. I’ve been collecting photos of caravan wagons and I find them so beautiful and colorful. To complete the scene, I have three little Gypsy figures I commissioned from Sally Reader. I also have several little Gypsy Vanner and Friesian horse figures which will be part of the scene. I’m really looking forward to this project.
March
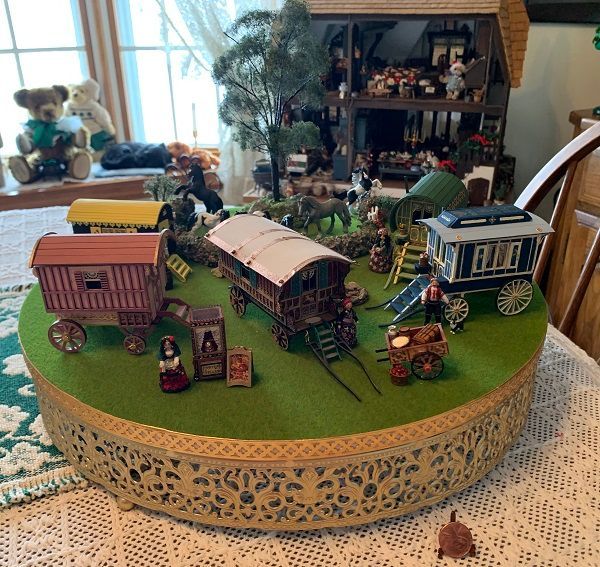
Here’s a photo of my Year Long Challenge project, which I completed much earlier than expected. This is a project I wanted to do for several years, so thanks to the Create Team for this challenge which prompted me to finally do it! I had intended to work on one wagon kit every couple months, but I had so much fun, I did one after the other and finished them in two months. For the remainder of the year, I plan to work on additional 1:24 caravan kits I have in my project stash.
June
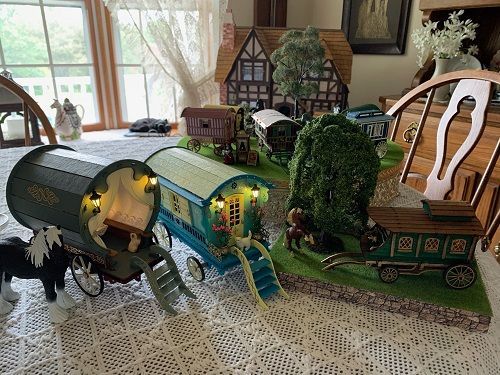
Since I finished my 1:48 scale Gypsy Caravan Camp project in March (way earlier than I planned), I decided to continue with some additional caravan kits I had in my stash. The two on the left are 1:24 scale. The one on the right is a 1:50 scale kit, i.e. 28-33 mm gaming scale. They were all fun!
Brandi Bacon
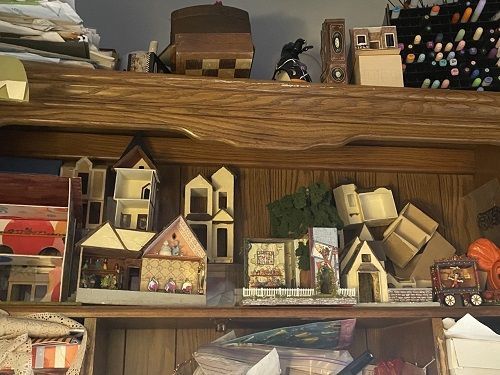
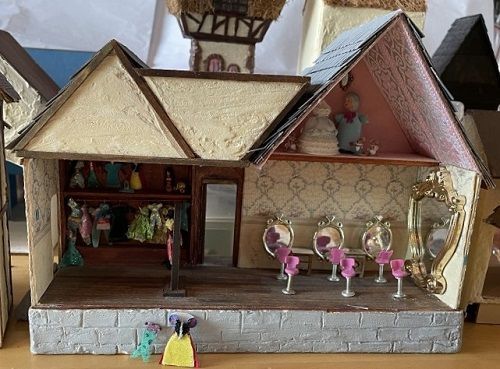
My goal is to finish my Disney scene. I started it a few years ago as a tribute to my kids and my mom. I made the Bippidii Boppidi Boutique. It's the girls favorite thing at DisneyLand and my mom makes them costumes. It is almost finished, lol. But THEN .... I bought samples from Sue Herber at a miniature show and while I used a lot for kids' projects, I could clearly see them as Disney Stores. And so began Fantasy Land. So now I have finished a Disney Pumpkin photo spot, a Mickey Mouse playground is almost finished, a Mad Hatter House, and A Winnie the Pooh photo spot and shop. When it is finished it is going to be all the FantasyLand shops -- the Mad Hatter's hat shop, the Villain's Lair, BBB, a Christmas Store, a Disney Store, and multiple other stores.
March
I have worked a little on the buildings. They are already built, but they need the painting, trims, windows, etc. Some of the styles and colors have changed and I'm trying to decide if I want to redo them. Finished completely are - Winnie the Pooh Meet and Greet and kiosk (except for characters and signage), Pinocchio the real boy puppet theater for the parade, and the chain link the Halloween Pumpkin photo spot.
June
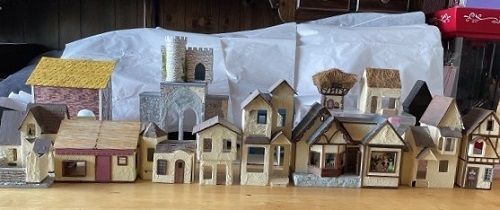
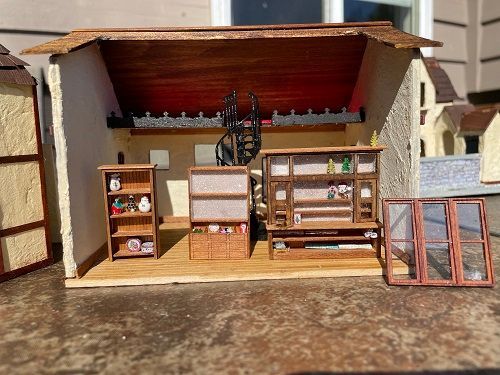
For the first half of the year I focused on the inventory, the decorations, shelves, furniture, etc. There are over 10000 items, so far. The last couple of months have been spent on the exteriors. I've actually added a few extra buildings. I don't have a particular plan in mind for them and may not use them. But I did find that it is much harder to start over mid project -- matching paint colors, wood colors, sizing etc. it is easier to paint and shingle them all at once, instead of trying months or years later.
Most recently I have stained dozens of beams, cut pages of shingles. I am cutting and fabricating windows, doors, and frames from scraps and laser poop. I went back and pulled the "stone" from the Castle (where the princesses will perform) and the meet and greet house. I also completely bashed the Christmas Shoppe, made a roof from scraps, the second floor from scraps, and the railing from trims.
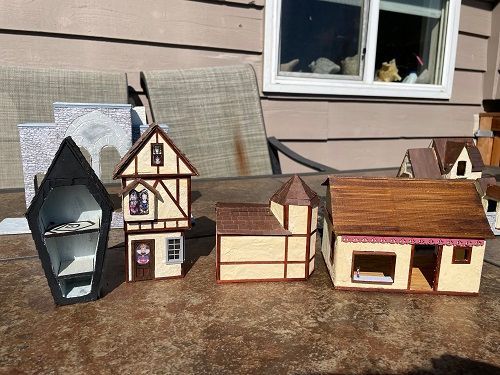
The Villains' Shoppe is done once I place the interior items. I am pleased with the windows (stained glass villainesses). I am on track to finishing!!!!!
September
The Christmas Shoppe is part of the traditional part of Fantasy Land stores. The facade is the same Tudor/European Village that the other shops feature. I have finished all the decorations and am now busily placing them.
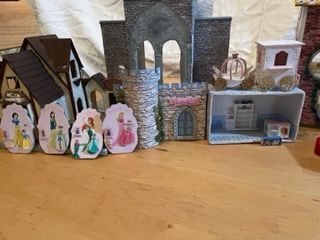
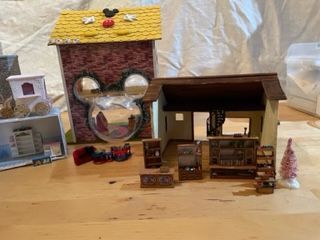
The Disney Store is getting decked out with thousands of items. There are toys, clothes, costumes, snacks and more. I finally affixed the Mickey dome. It is a unique store on Main Street (one of the few stores that don’t or haven’t really existed at Disney in this form). But it is designed that the majority of the front is a massive Mickey dome where shoppers and cafe goers can view the parades and fireworks indoors.
My proudest area right now is the Princess Area. This is the area of Fantasyland where the princesses meet and greet. I’m excited about how it’s turning out.
Final Update
This challenge has been amazing. While I finished what I had intended -- this is a project I intend on keeping forever and adding to and adapting forever. So the Disney Store with its parade viewing area is one of my favorites. It has the store, bakery and parade viewing. My absolute favorite is the Bippiddy Boppiddy Boutique (which I spell differently each time). My kids have been there so many times and have the best memories.
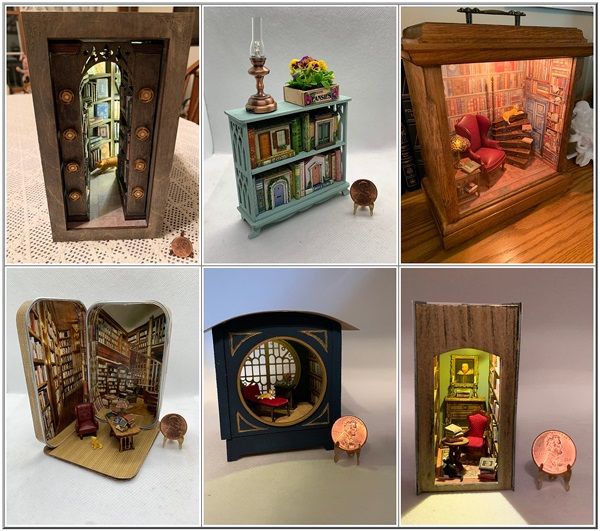
The Christmas shop was so much fun making. Added to the project was the carriage to be placed by the outside princess cart. And the shops from fantasy faire. Those shops are only facades adapted into my scene from Debbie Young’s book nook kit. And Cinderella's tiara shop. There’s also the Mad Hatter's hat shop, the princess meet and greet pavilion, the fairy tale theater, and the villains' lair. I’m working on a mini parade where Pinocchio’s theater will go down the street, as will Jack Skellington's lab, and more.
And I have to thank CREATE for making this happen!!!
Alice Barber
It was hard to pick just one unfinished project but this is what I’d like to do-Ruth Stewart’s Yule Log House and furnishings. As you can see, nothing has been started yet.
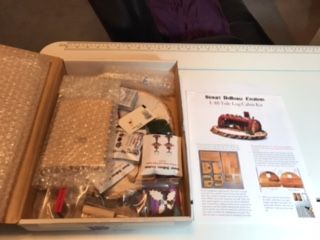
March
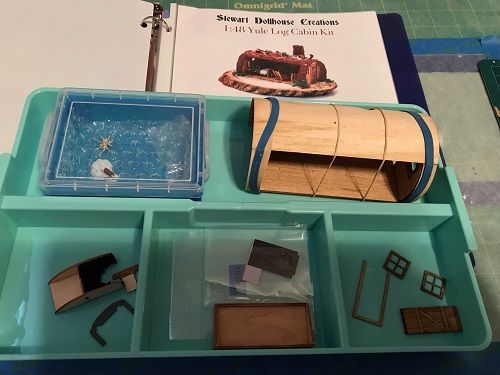
June
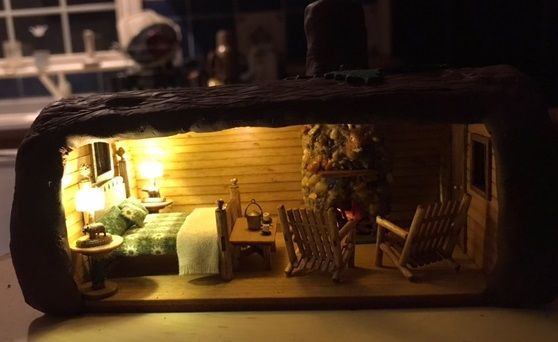
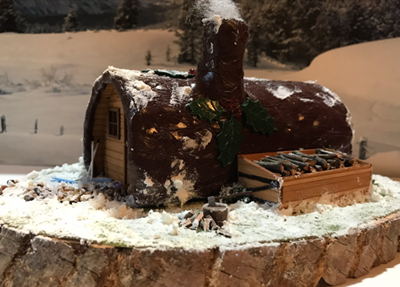
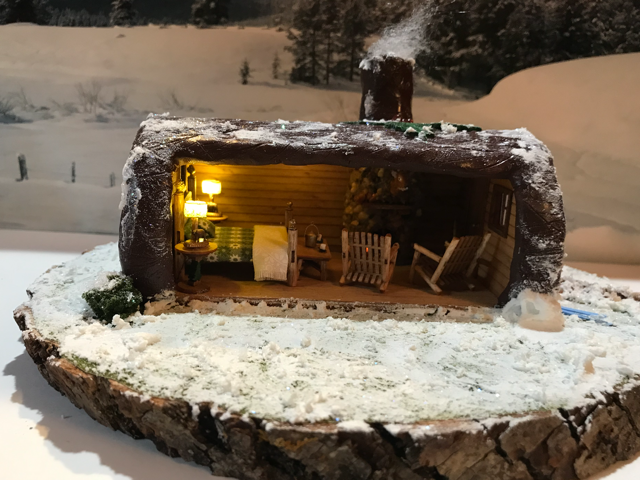
Here is my progress on the Yule Log House kit by Ruth Stewart. My biggest challenge was the Fimo house covering which I initially burned when my toaster oven got too hot. After chiseling away the worst of the burned areas, I had to reapply and re-bake another Fimo layer. I plan to finish all the interior furnishings in the next quarter.
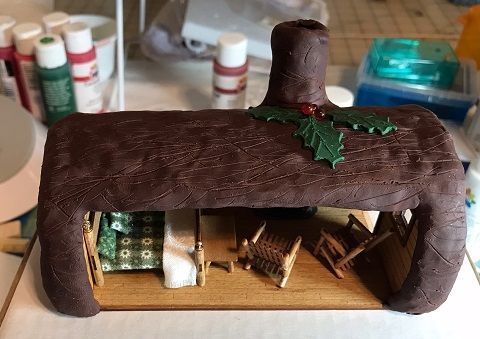
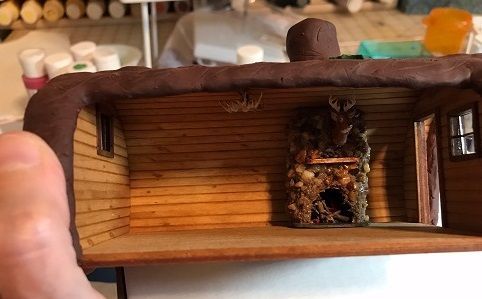
September
All the furniture is glued and it is electrified. I’m so grateful for this year long challenge to give me deadlines.
Final Update
I finally finished my Ruth Stewart Yule log home. Nothing like waiting till the last minute. This was a wonderful idea and I hope we do it again next year. The background is a calendar picture.
Cassidy Beeman
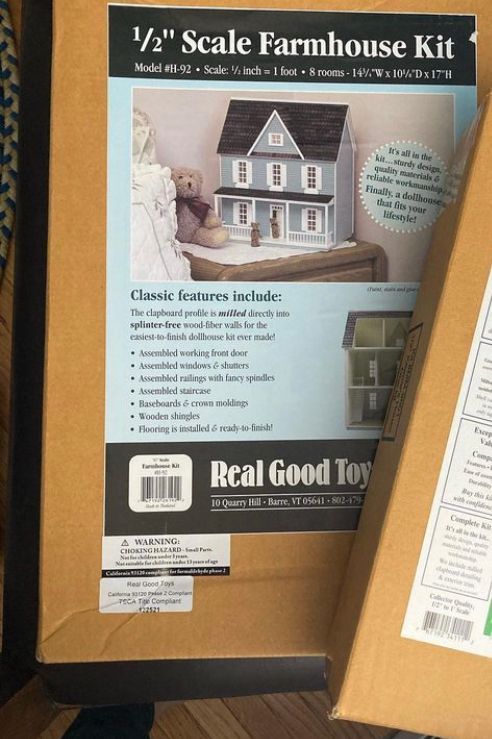
I am hoping to start and complete a Real Good Toys 1:24 scale farmhouse kit. I plan on making it more modern and trying new techniques. I build most of the furniture from scratch because it can be difficult to find pieces that will work. I enjoy the smaller scale because I don’t have a lot of space and this allows me to have a few houses to try different styles on
March
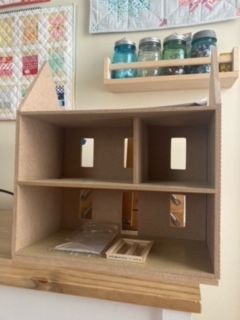
I haven’t had a lot of time to work on this project but I did order a new double door for the front. I also set up the shell to get an idea of layout: the first floor will have the living room and kitchen, second floor will have the master bedroom and bathroom, and the third floor will have 2 kids’ rooms and a book nook in the middle.
June
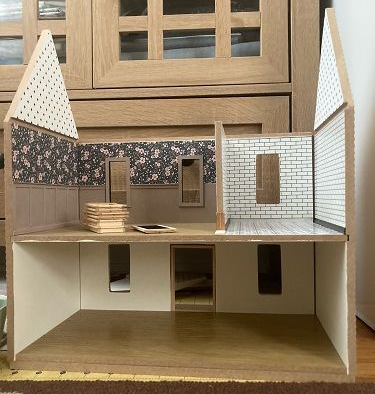
I expanded the front door opening and decided on wood doors with white trim. I painted the entire bottom floor, wallpapered the 3rd floor, and am struggling with the 2nd floor. I might end up changing the wallpaper in the bedroom and floor tile for the bathroom, but in the meantime, I’m going to work on painting the windows and priming the exterior.
September
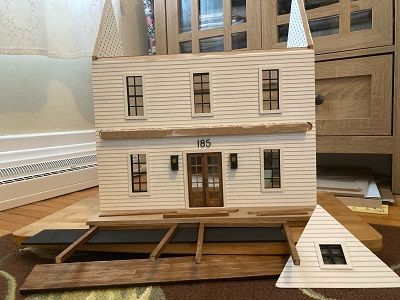
The exterior is all painted, windows and doors are installed. I added numbers and (non-working) lights to the front. I was able to paint the front porch roof and add a wood ceiling underneath. Also did a lot of staining for the front porch beams and posts. I bought a turntable for a small TV and it’s a great addition for working on the dollhouse. I’m hoping to have the entire shell complete by the end of 2023.
Final Update
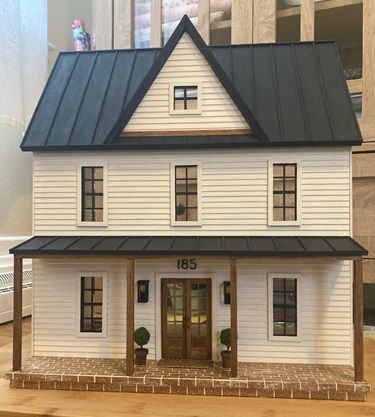
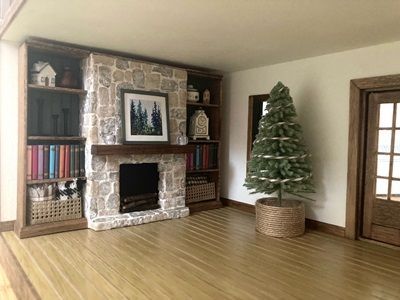
The exterior is complete and I’ve begun working on the interior. Most of the 3rd floor is furnished and I made a fireplace with bookcases on either side. I'm really happy with all of the work that was completed these last 3 months of 2023.
Jene Bondi
My year long project is a cactus boot. It was given to me 10 years ago. My fellow club member bought it in April of 1999. I have never done anything with it as nothing really ever appealed to me as I don't like to do "normal" in an unusual container. I was talking to another mini friend and she gave me some great ideas. It will be decorated inside and landscaped as well.
March
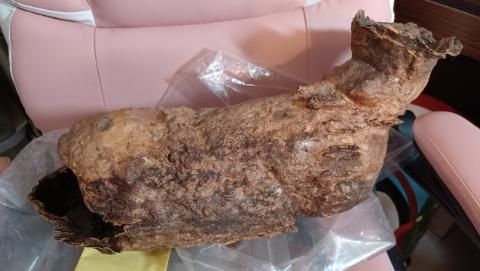
I got the inhabitants of my stump house, coming up with ideas of how I want to dress the cockroaches and what they are doing in their lives and ideas for the nuisance creatures (fairys), manage to drop the stump house after the picture and break it.🙁 And trying to find a container to fit it in and realized I'm going to have to have one special made unless I stick it in a glass fish tank. That might work now since it's broken.
June
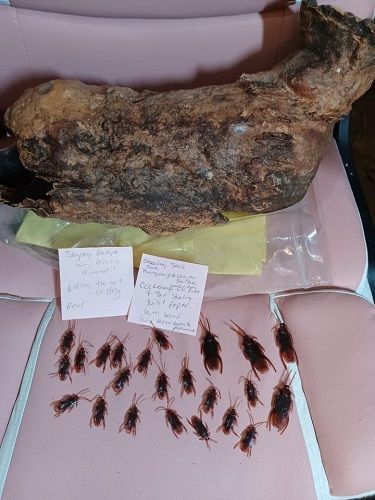
Well the tip of the shoe is broken, but I still am too afraid to cut the cactus boot. I don't want to ruin it. Any suggestions anyone? I have the naked fairies and wing material, have some furniture that I will embellish. Cockroaches don't like plain brown furniture. Leaves they like leaves. Just need to actually get cutting ... after I finish a few more other projects ...
September
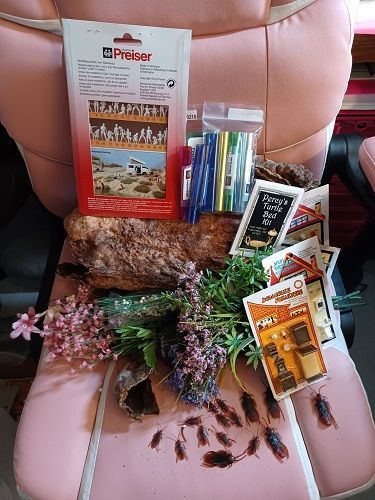
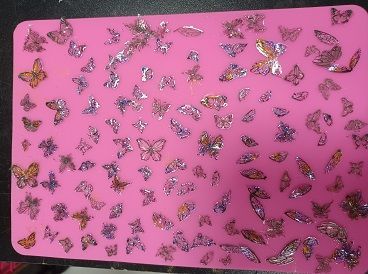
Here are prototypes of my fairly wings for the annoying fairies that is bothering my cockroach family. I like about 2 or 3 wings so far and will tweak them so my fairies can be as annoying as they possibly can to the poor cockroaches.
Right now all the cockroaches have insisted that they aren't wearing clothes. Wrong .. they WILL be dressed like good little proper cockroaches. After all they won't be scurrying about in the dark.
Final
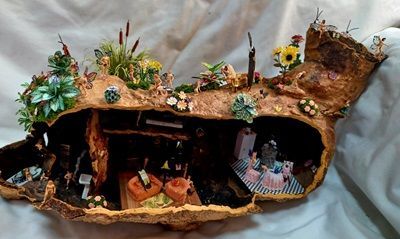
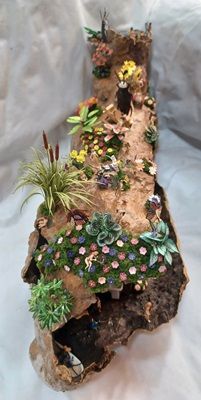
The fairy are busy annoying the cockroach family. The fairies are stealing the toilet paper, getting hit by a fly swatter, taking a bath, writing on the walls, hanging out, taking a nap in the flowers & "watering" the flowers.
Cindy Bottasso
I’d like to attempt to finish something each deadline. I like to build houses and never finish them/decorate them.
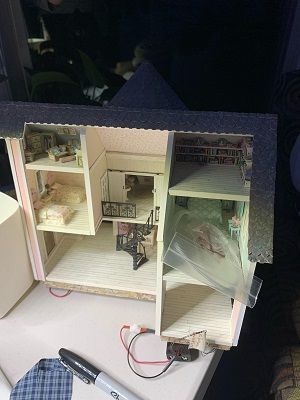
Betterley's Petalstone -- it’s missing pieces so I need to laser cut the sunroom and finish furniture.
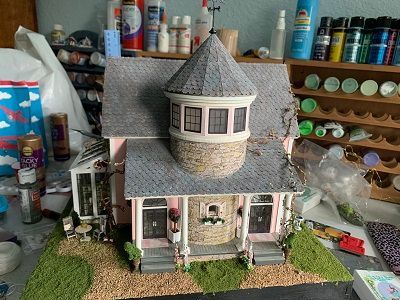
March
Debbie Young’s Cape Cod beach house, all the furniture and landscaping
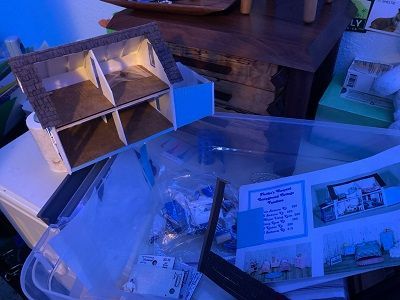
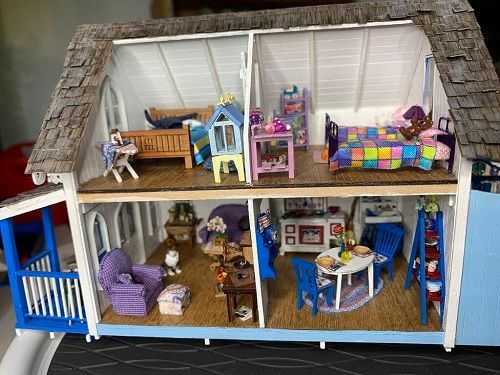
June
Debbie Young’s Aurora, all furniture and finish porch and landscaping
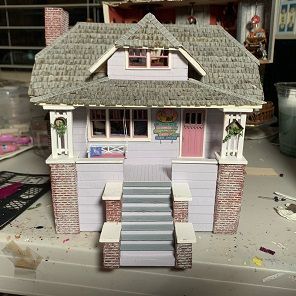
September
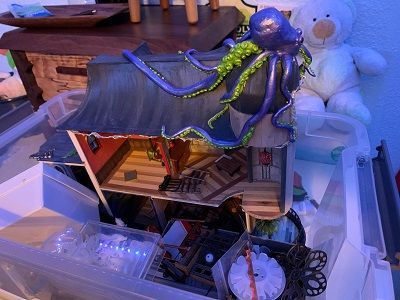
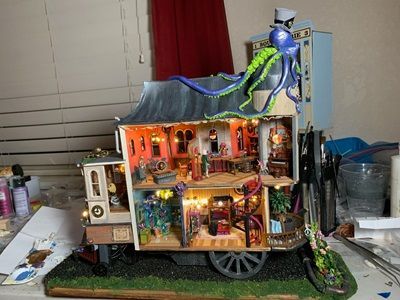
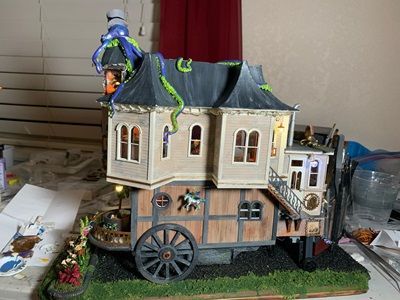
Michelle Miller’s steampunk train, fix lighting and all the furniture
Final Update
Yeah! I did it. When I started this project I had no idea what steampunk was or that I could build a project with wood and matte board. Thank you Michelle Miller for all your encouraging words.
Barbara Bower
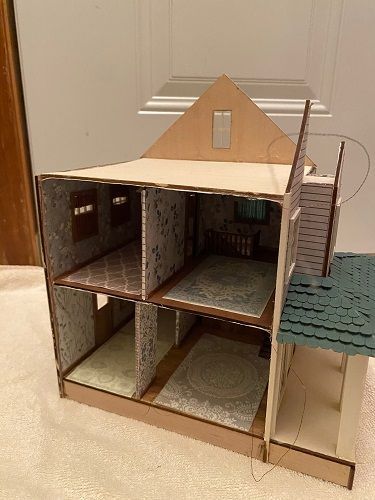
Bramble Wood from Indy Houseparty
March
I need to add more accessories and then I will glue the appliances into the kitchen. I am also working on one bedroom and the dining room. I have been having trouble with the roof. Hope to get it on by June.
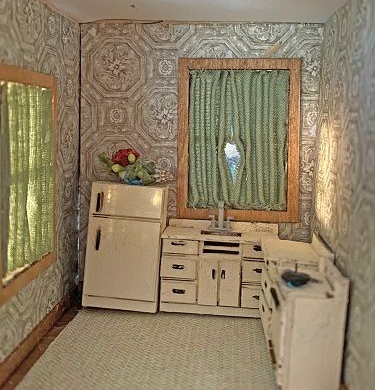
June
I need to add accessories and finish dressing the beds. Also I need different glue for the lamp -- which is laying on its side.
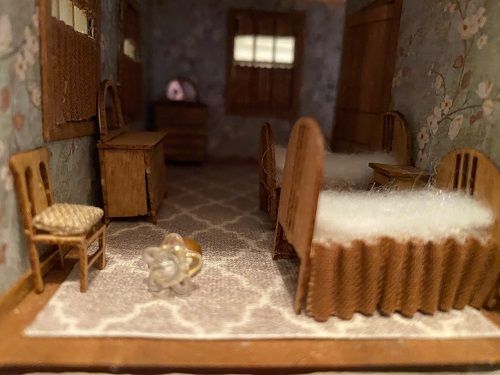
September
Here is the Living Room of my house. I need to put the cushions on the sofa and the rocking chairs.
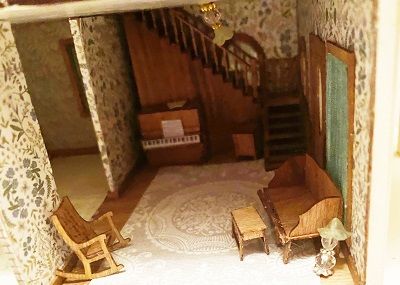
Final Update
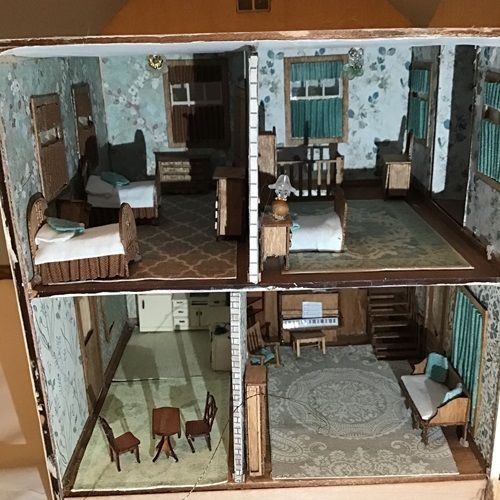
I never finished my project. I did get the furniture finished. I had the roof shingled in early June but it warped. I had a friend cut out new pieces - then I lost them. She then cut new pieces again.
The past six months have been busy with surgeries and chemo. I did have my last chemo on Dec 14. I will find out the results of the scans I had on Dec 28 on Jan 2. Most of the time I was too tired to do anything. I will continue to work on the project in 2024 because I really need to finish it.
Jackie Browder
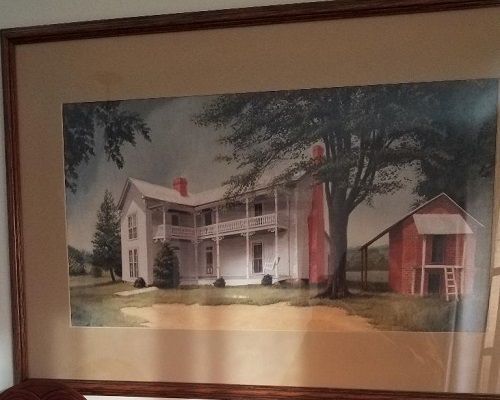
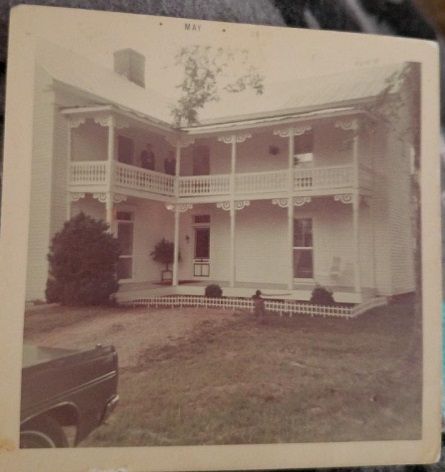
My husband's family once owned a house of some small fame. Built in 1872, the outside of the house was the filming location for a movie in the 1970s, and was the subject of a painting by a distant cousin of some artistic renown. All we have left of the house is an artist's print hanging on our wall, a commemorative plate illustrating the house, a mantle clock that once lived inside the house, and clips from the movie. The house is now gone, and so are the memories of its interior. I have drawn a rough interior floorplan in a manner that will function as a dollhouse with fifteen rooms. I have NO kit, and NO cut pattern for this house. My goal for this year to to draw a dollhouse pattern, hire someone to laser cut the pieces (or cut them myself), and assemble the house (no furnishings, out buildings, or landscaping).
March
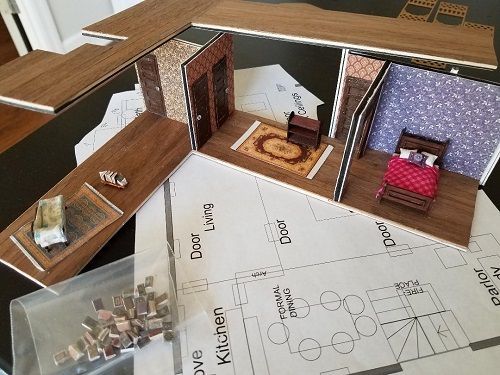
I started by doing some research and gathering all the old photos and movie clips that I could find of the house. None of the historic photos had the chimney that was shown prominently in the painting. Since the finished dollhouse would be displayed near the framed print, and the second chimney would be useful for wiring, I decided to add it. I got a few small hints from family members, like "I remember rain on the roof being very loud" (It had a tin roof!). I measured all the scanned photos, to get dimension estimates. I was surprised to discover that the first floor had ten foot tall ceilings, but the second floor ceilings were less than eight feet! I made a computer drawing of the entire house's floorplan, taking a few small liberties to make it work as a dollhouse, or guessing when my research left gaps. I assembled all three floor bases, printed wallpaper and fabric rugs, and started collecting furniture (love the peacock chaise lounge!). The floorplan is complete, and the first floor only lacks the staircase.
June
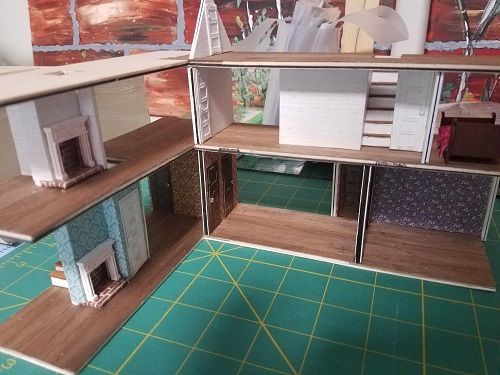
For the second quarter, I finished the wallpapered interior walls for all three floors, two interior fireplaces with hollow interiors for wiring, interior doors, and two staircases. The doors are layers of printed paper with "cut glass" broken jewelry doorknobs. I have also continued to collect furniture and accessories (not part of my year long goal). I decided to alter the floorplan to include two more rooms for a total of 14 rooms. I have not decided how to decorate or use most of the rooms, but I intend to stage the house for a family of seven with parents, four boys, and one teen girl.
September
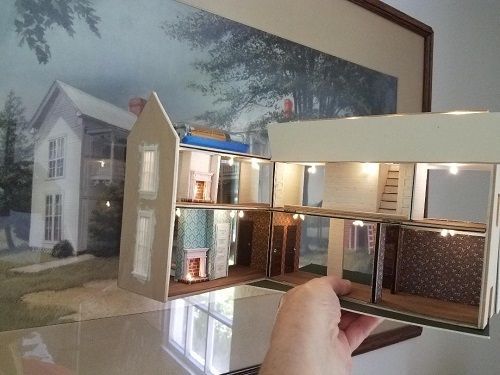
For the third quarter, I finished the interior floors/walls/ceilings, added most of the unfinished exterior walls, and did the electrical wiring. I had to custom draw and 3D print the front windows, which were very distinctive. In the real world they would be two feet wide and seven feet tall. I held the dollhouse up to the print of the old house to check the window design, and was shocked to discover that the print of the house painting was almost exactly quarter scale! Did the painter enjoy O scale trains as a hobby in the early 1900s? I think that I will add a trainset to one of the upper rooms. The house now has 15 rooms, and the back lean-to addition will be removeable to access the main bedroom. Only three months are left to finish this project. I need to fix a few more wall/trim issues, do staircase railings, finish the roof, add shingles, build the entire front porch including the very unique gingerbread trim, design and 3D print the exterior doors, add the chimney with two more fireplaces, and install all the exterior siding.
Final Update
My Year Long Challenge is FINISHED!
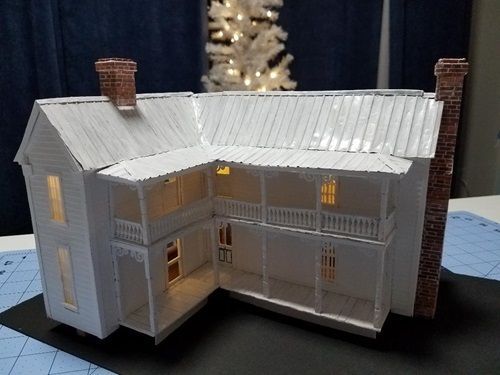
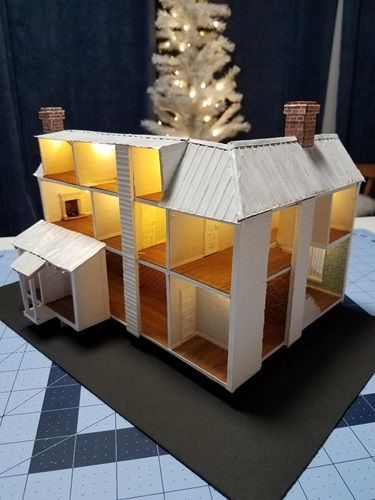
The finished dimensions of my quarter scale house is 9 inches deep, 10 inches wide, and 8 inches tall. It should fit nicely inside a 12x12x12 inch display case. The front porch flooring is painted wood coffee stirrers. The siding is thin pieces of cardstock cut into rectangles with a Silhouette machine. The doors are modified Grandt line stock, or just cut matboard. The gingerbread trim is very unusual, so I designed and printed them with my 3D printer. Most of the trim is simply white cardstock cut very carefully. The porch poles are 1/8 inch square wood stock that I carved with a knife. I couldn't buy the porch poles, because they were unusually tall.
I suppose that there are advantages to buying a kit or taking a class, but I have seen kits/classes for a small house with only a couple of rooms posted for sale for $100-$200. I can not imagine how much it would cost to buy a kit for a 15 room Victorian Farmhouse. It wouldn't be a sentimental recreation of a family home, either. It would have been nice, however, to at least have a pattern!
I made this house using basic items from my stash: free matboard scraps from a local frame shop; scrap lumber left behind from other projects and yard sales, a handful of Grandt line windows from an auction; a couple of small bottles of white craft paint; an old string of miniature Christmas lights; and a few items that I made with the machines that I own, and some wallpaper printed with a color computer printer using free downloaded files. The only item that I bought was the porch railings. I could have designed and 3D printed them for free, but I was running short of time, and they were inexpensive to purchase.
My total cost to build this dollhouse was $5.94 for the porch railings.
Brenda Colby
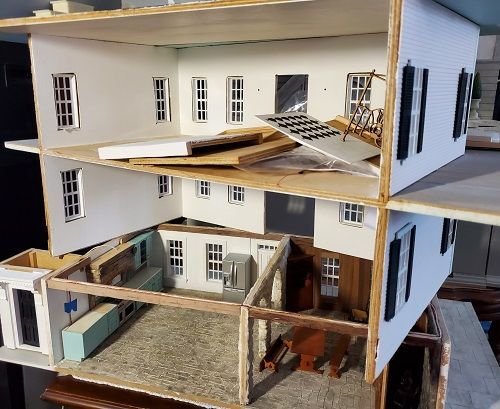
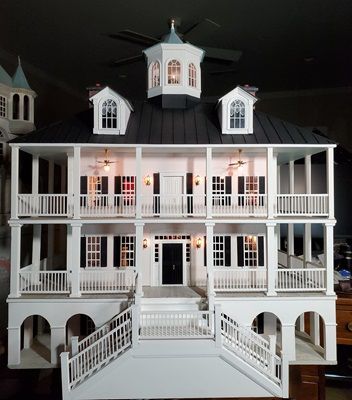
A miniaturist friend gave me a half scale unfinished house that she no longer wanted. Because I love this scale, I was happy to give it a home. Thank you, Pat! I disassembled the original structure and will add a floor or so to what will be a Charleston style house. I hope to finish it (mostly) during this challenge!
March
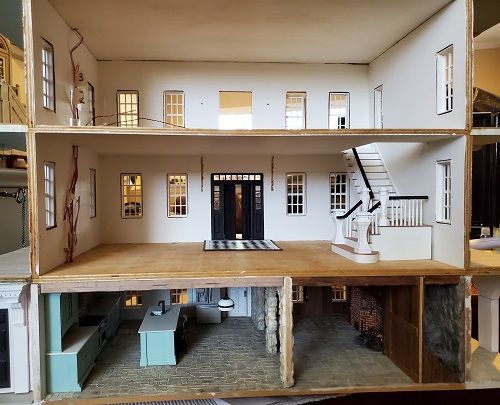
Order is beginning to emerge out of chaos. The architectural details of the lowest floor of this half scale house is generally finished, and the wiring is in place for the other floors. There is a lot of work yet to do, but I am hoping to have the next floor completed by June.
June
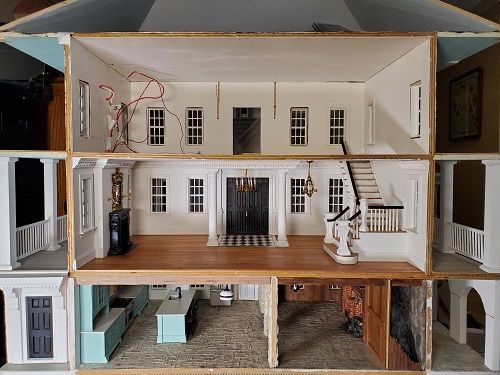
I completed the interior of the 2nd floor of this house just before the June deadline. It took longer than expected because of the wiring and the porch rails. My goal is to complete the 3rd floor and to begin work on the rooftop garden for the September update.
September
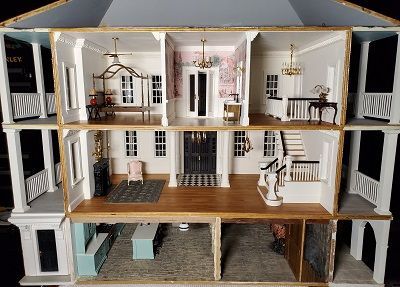
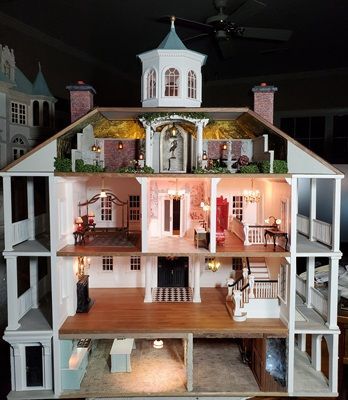
I have finished, as promised, the architectural design of the upstairs rooms of my Charleston-style house. Furnishings, where shown, largely relate to lighting design. I am moving on now to the "rooftop" garden and roof structures, which I hope to have completed by the December deadline. Furnishings will be added after all design work is completed. Hint, hint - I am hoping there will be a 2024 Year-Long Challenge which would most likely be dedicated to furnishings and finishing touches for this home! Thank you NAME; this project would still be languishing in the March update state if not for this challenge!
Final Update
The Charleston House is finished and ready for all furnishings! It was a pleasure to work on and was certainly a challenge. Thank you, NAME.
Debbie Colombo
I have been working on this together with Alician Pearce, on and off for 2 years!!!
March
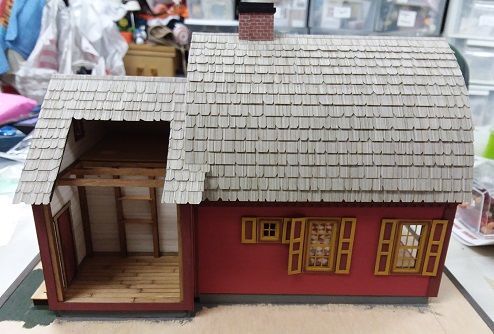
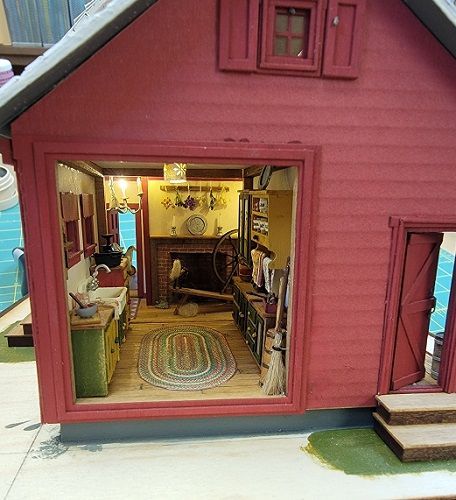
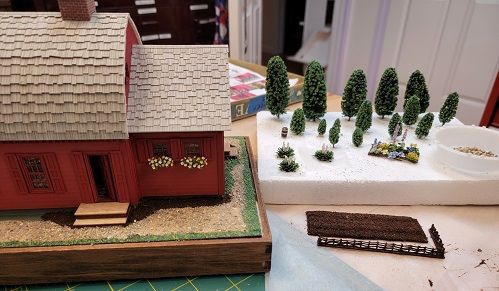
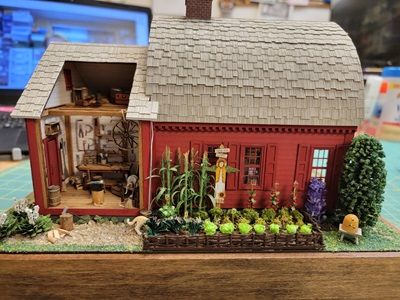
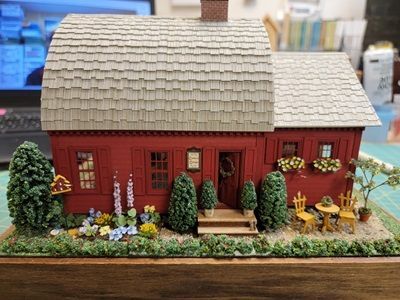
These are the kits I got done for Cranberry cottage this first quarter.
June
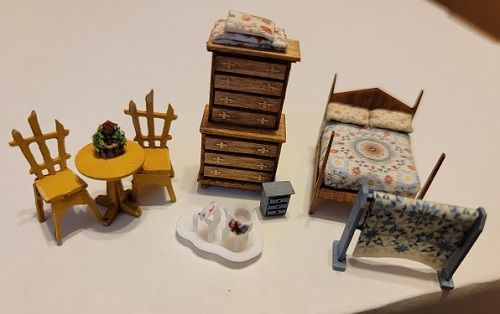
This quarter's progress on Cranberry Cottage.
September
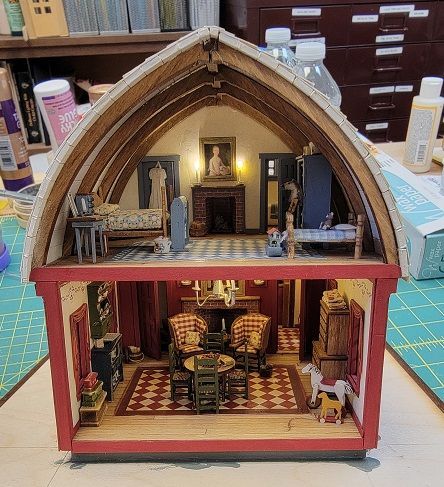
Working on the landscaping components.
Final
Woo Hoo!!!
Tai Corraggio
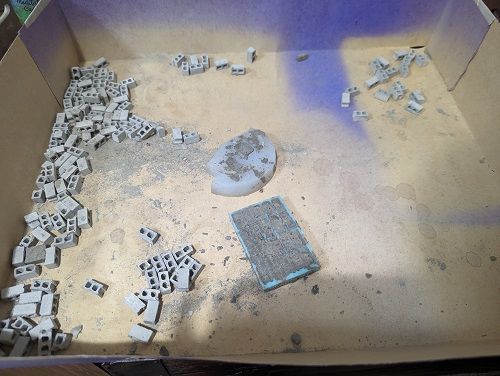
I'm attempting to build a 1:24 scale model of the Popular Mechanic's Famous Concrete Block House, using as many real materials as possible, including real concrete. It isn't very far along yet, since I just started making blocks at the beginning of the year, and it takes about 24 hours to make one batch.
March
Since January, I've made 940 concrete blocks out of the 2024 I'll need. I also laid footings and drainage pipes, and started building up the foundations and air ducts. (Editorial: Love the people sitting on the concrete blocks!)
June
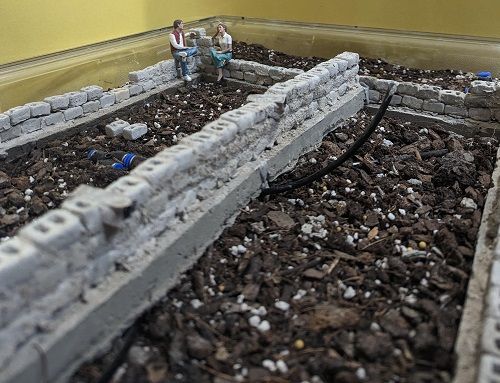
I finished the foundations, cold-air returns, and underground piping, so now I'm building the main walls and the main heating system. I'm hoping to finish the walls and maybe start the roof this quarter!
September
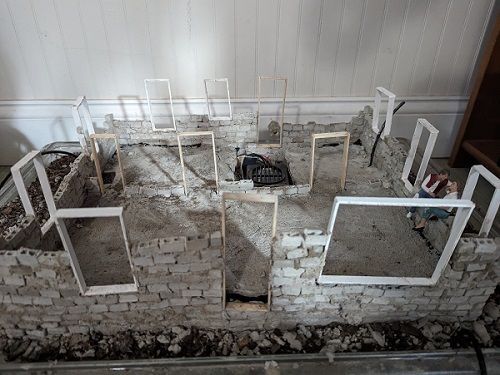
This quarter, I finished the exterior walls, including installing homemade windows and doors. The exterior walls are coated in stucco. To complete this challenge, I intend to build the roof and finish the heating system this quarter, leaving the house ready for its new residents to move in. (Decorating and building furniture will be next year's challenge!)
Final Update
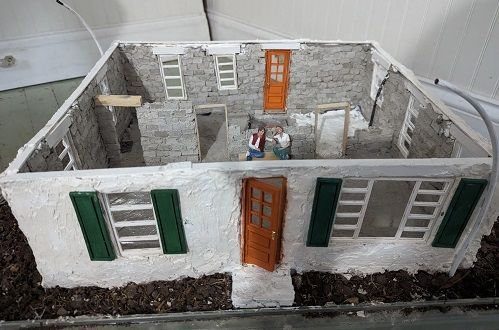
This quarter, I finished the roof (it's removable) and house exterior, so the house is ready to be moved into! For next year's challenge, I'll decorate the interior.
Pat Creagh
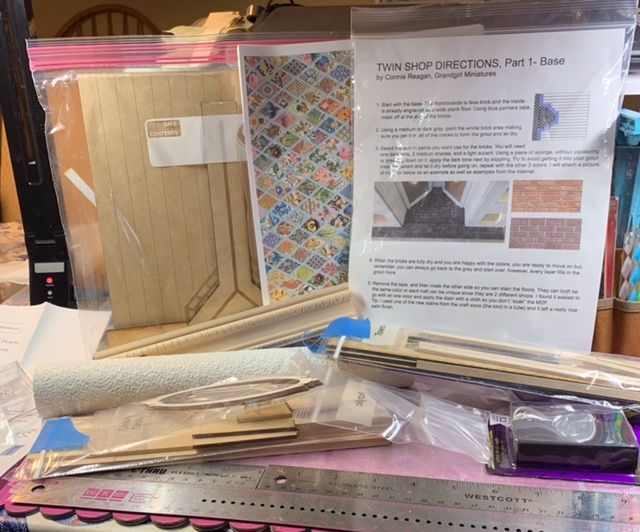
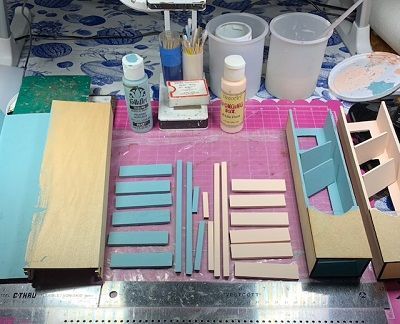
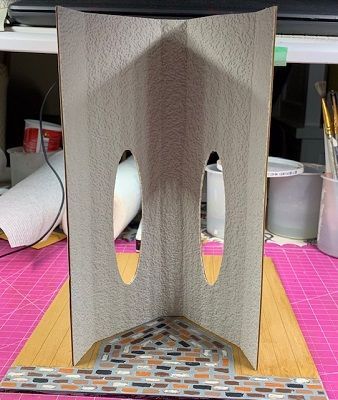
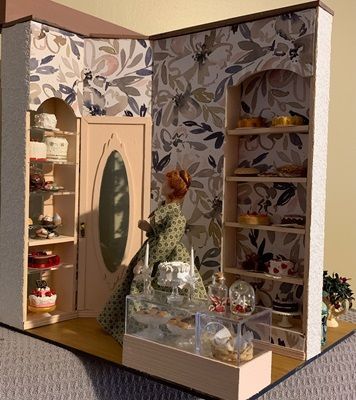
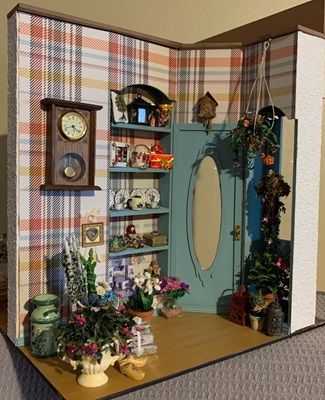
I have been putting this 1” scale project off for a long time. It is the Twin Shops designed by Connie Reagan. I need to build it, choose all design elements and fill it. Here is a picture of my newly opened kit.
March
June
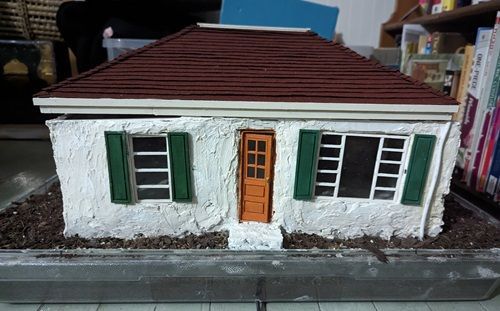
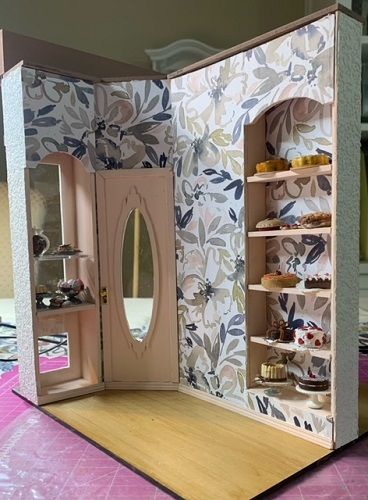
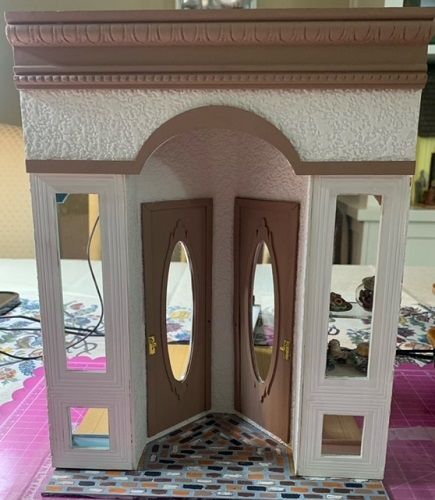
I plan to replace the sidewalk. I have partially dressed the one shop as a bakery. The second side will be a gift shop.
September
I have replaced the sidewalk, “baked” some new items for the bakery and significantly redesigned the floral/gift shop.
Final Update
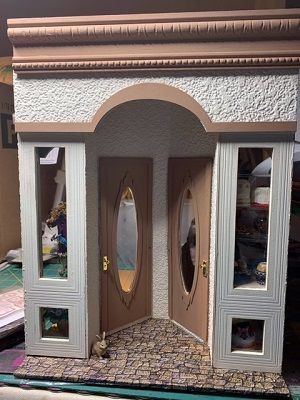
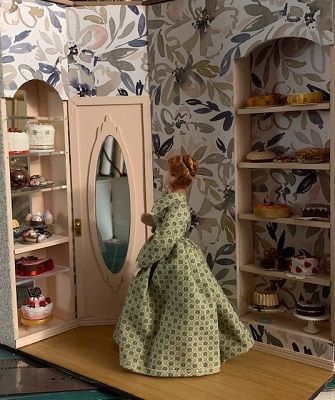
Twin Shops is built and finally filled. One side is a bakery, the other is a flower and gift shop. The shops are filled with 1” scale gifts from the Fitch House mini club and 1” items I have completed and lovingly stored in plastic bins. At long last these items have found an appropriate home to honor them.
Judy Doe
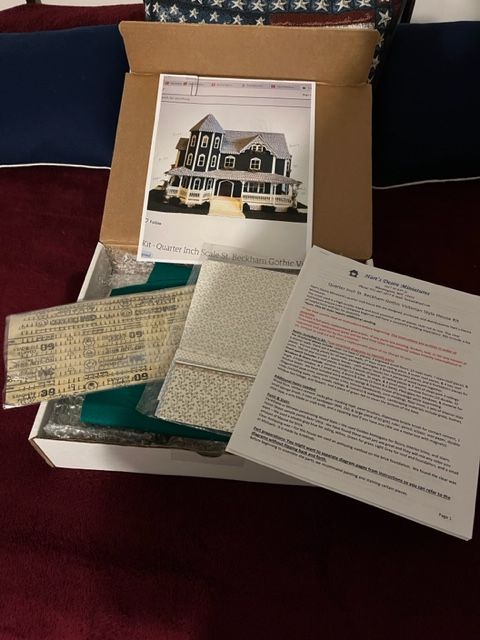
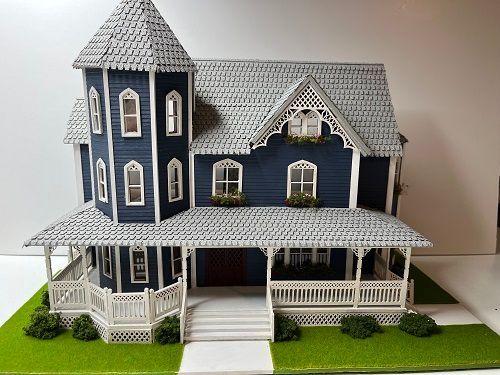
I plan to build, furnish and hopefully landscape the Hart’s Desire Miniatures St. Beckham Gothic Victorian house kit. It is still in the box. Having just been in Galveston Texas at Christmas, and seen the beautiful Victorian homes there I plan to make it a Galveston Seaside Mansion from the late 1800’s.
March
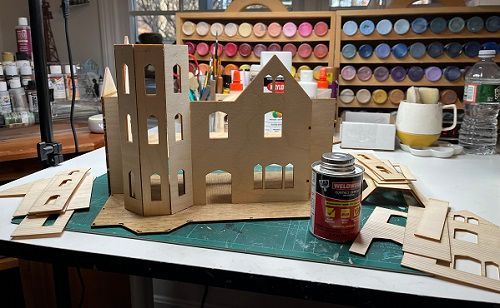
Here is my house - coming along, but at a standstill now because the next step involves contact cement. And because that has to be used in a well ventilated space, I am waiting for the weather to improve so that I can do it outside.
June
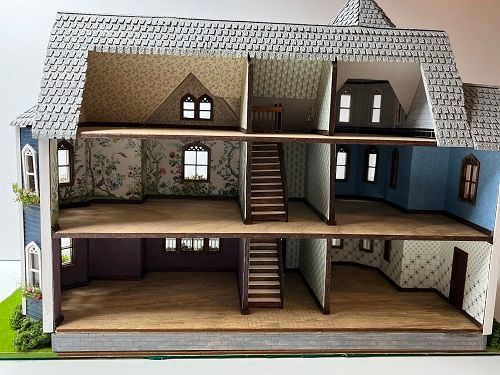
My Victorian house is built and landscaped, and the interior is wallpapered. Now I have to furnish the rooms before the end of the year.
September
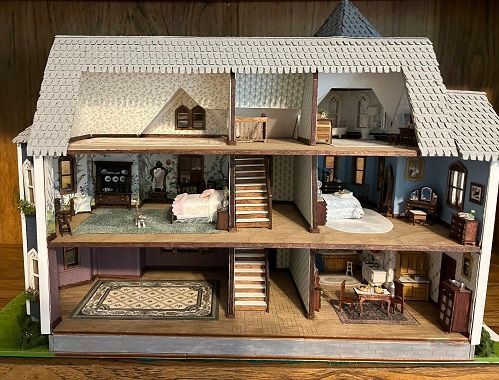
I have furnished 4 rooms in my house - the bathroom, 2 bedrooms, and the eat-in kitchen. I still have the living room/dining room, the child’s room, and the 3 stair wells to finish before the end of the year.
Final Update
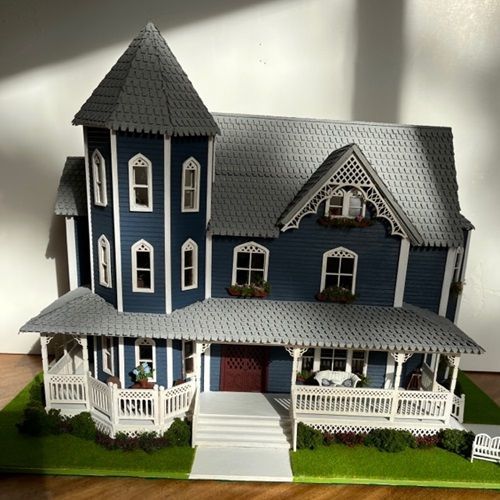
I have finished what I set out to do at the beginning of the year! Which was to build Hart’s Desire St. Beckham Victorian house. Since the last quarter I have added some more landscaping and furniture to the outside, and furnished the last two rooms on the interior. I am pleased with the outcome!
Pam Doran
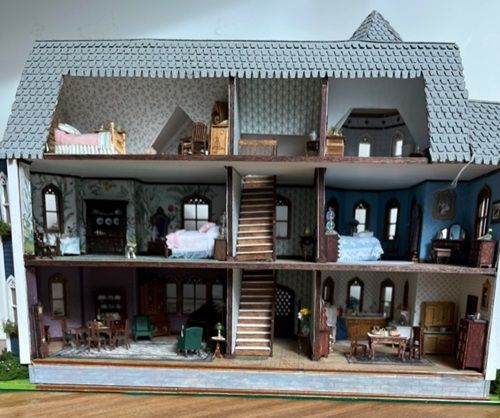
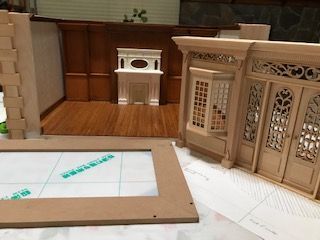
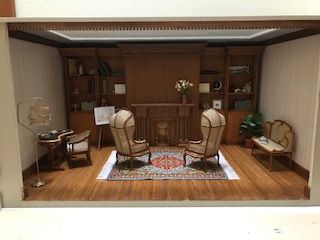
I would like to complete this roombox inside and out as a bookstore. I started with making some bookshelves a few years ago and then stalled from there. This challenge (and especially the quarterly “reports”) is the push I need to continue to work on it throughout the year and finish it.
March
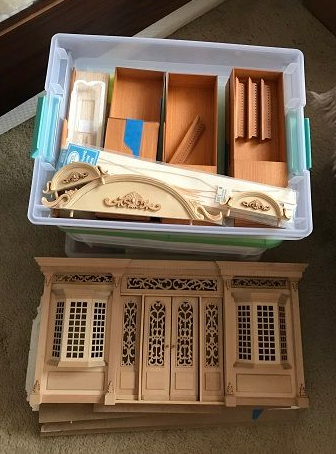
I’m finishing up the bookcase to put in the roombox. I started out small, but the bookcase started to evolve and grow. I now have to add 2” to the wall height and 4” to the wall length just to get the bookcase to fit in the roombox. You can see the “now too small” roombox just behind the bookcase. I’ve now put myself on a schedule so that this project will get completed by the end of the year. Next up - complete the bookcase, enlarge the roombox, decide/install flooring, and install the bookcase. June is going to come very fast!
June
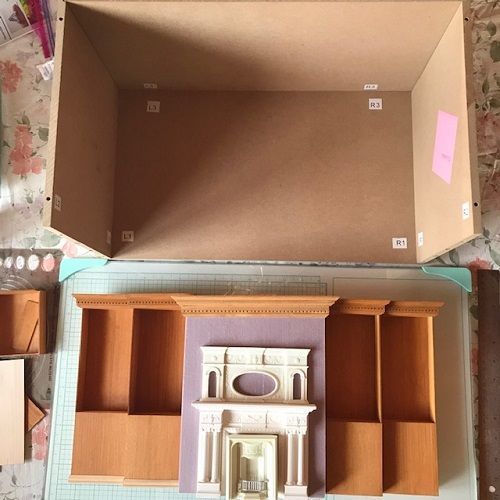
Roombox enlarged by 4” all around, wallpaper done, flooring done, chimney breast done. Staining everything next. Real life got in the way, but I'm ready to finish interior this next quarter and hopefully most of exterior.
September
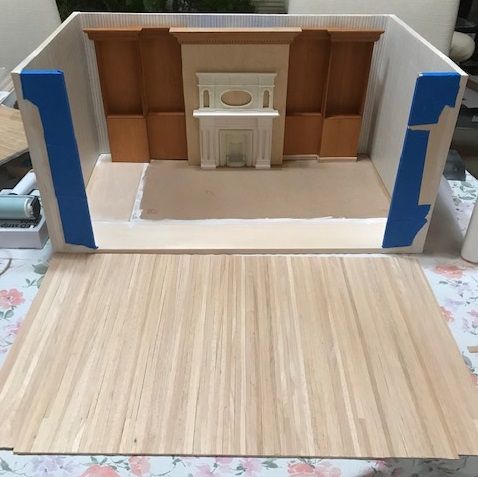
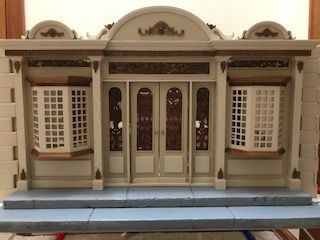
This was a challenging quarter working on miter cuts for the baseboard and ceiling, but with Murphy’s Law and numerous boards to keep me company the inside “bones” are now completed. Now to work on the facade and top, then onto finishing touches.
It’s coming together! 😊
Final Update
It took the entire year, but I am done. Everything kept getting larger and taking longer than I thought. Wrote my list of what to accomplish and followed it through.
Carolyn Eiche
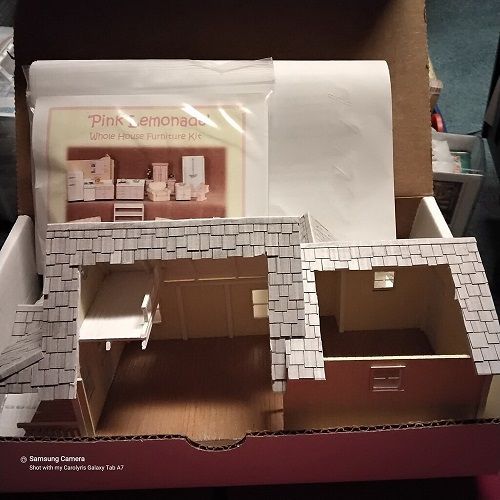
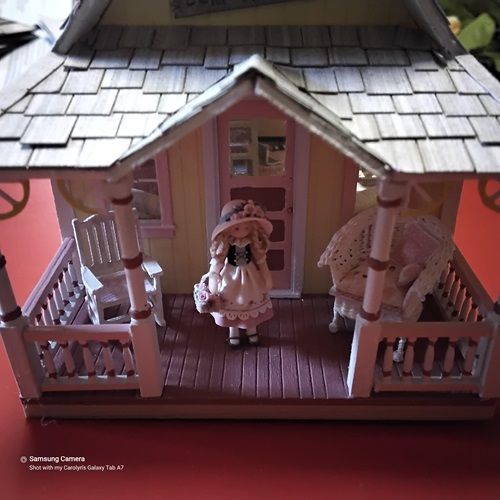
I'm going to work on my Debbie Young Lemonade and Lace house. I started it last year and stalled out when I had a problem with the bathroom walls. It needs all the furniture, accessories and possibly landscaping.
March
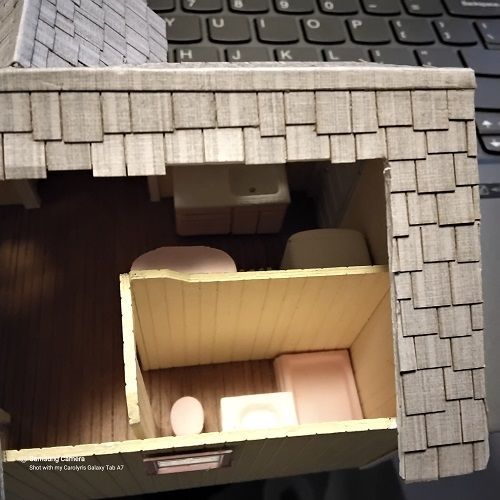
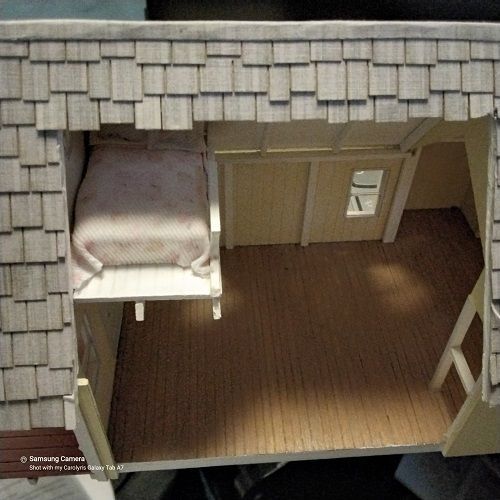
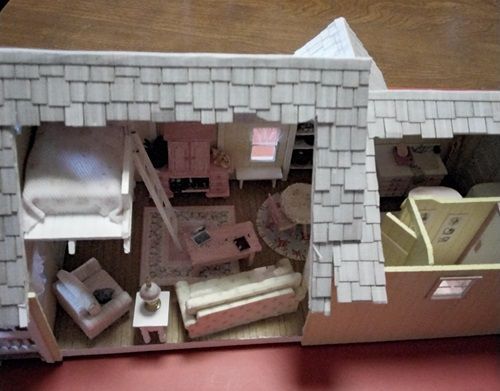
I added the bed loft to the house and painted installed the kitchen pieces (sink, frig, stove and cabinet) and the bath fixtures.
June
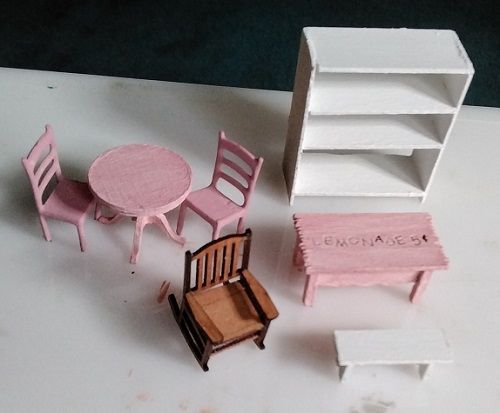
Some of the completed furniture pieces for my Debbie Young Pink Lemonade house. Getting there, just a few more pieces to go plus accessories for the house.
September
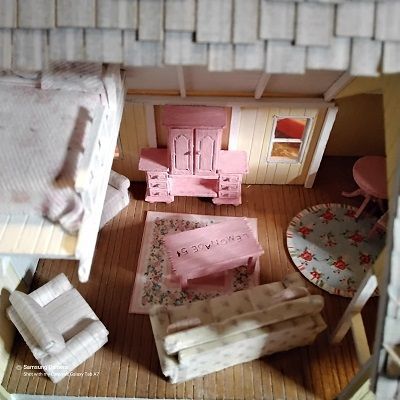
I've finished and upholstered the sofa and 2 chairs and made the entertainment center. All the furniture is now finished, I just have to accessorize.
Final Update
Finished!
Cathy Ellison
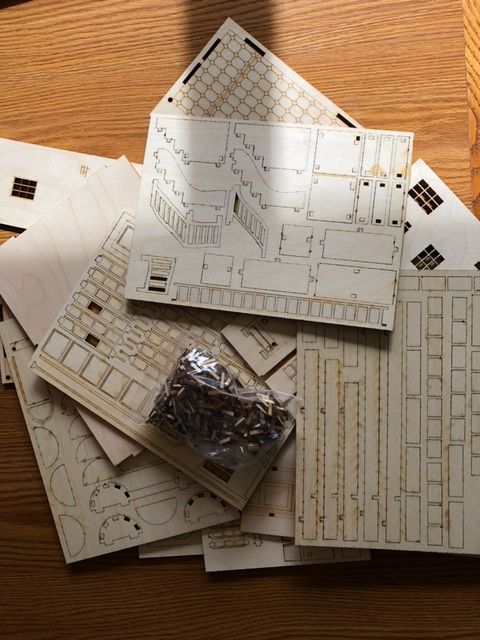
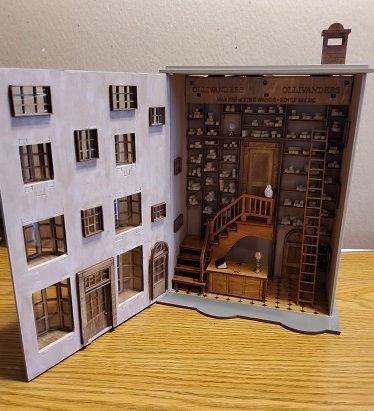
I will be assembling a Magic Wand Shop.
Final Update
Here is my finished year long Magic Wand Shop. It was a fun build.
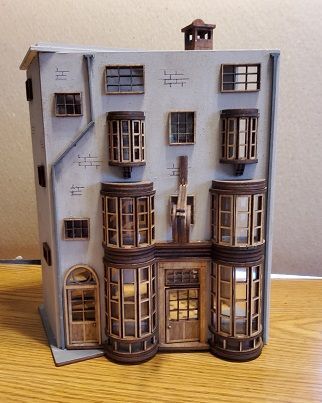
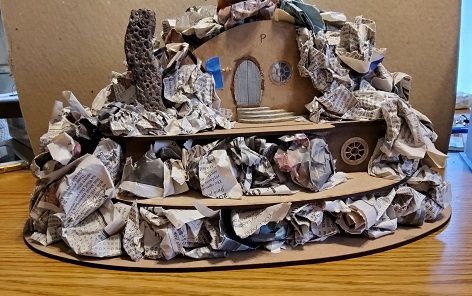
Since I finished so quickly I am going to finish my Tufty Burrow by the end of December. I hope we do this again next year!
Kellie Ellison
I will be assembling a witch’s cottage in 1/4 scale.
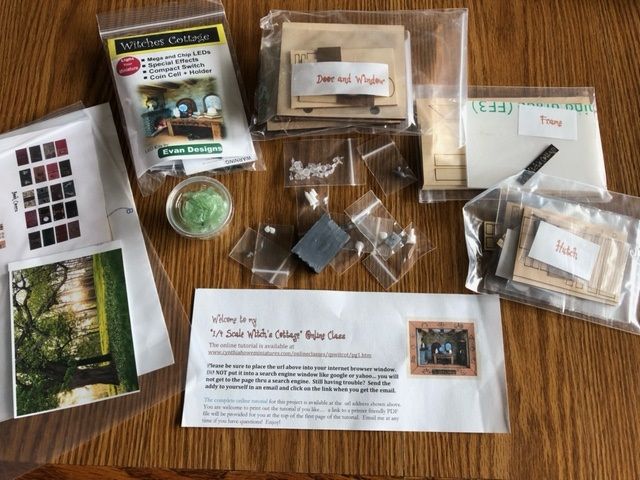
March
This is the progress of my Witch's Cottage. Slow going but I am determined to get it done.
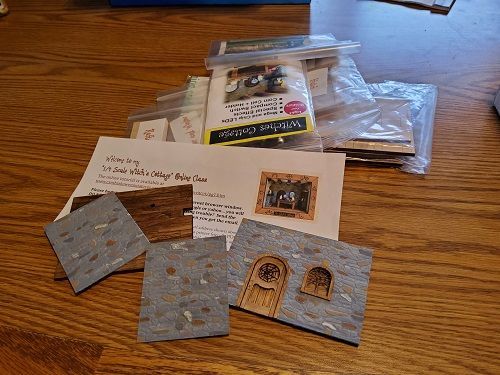
June
Well, slow as usual. Planning my wedding got in the way. Lol
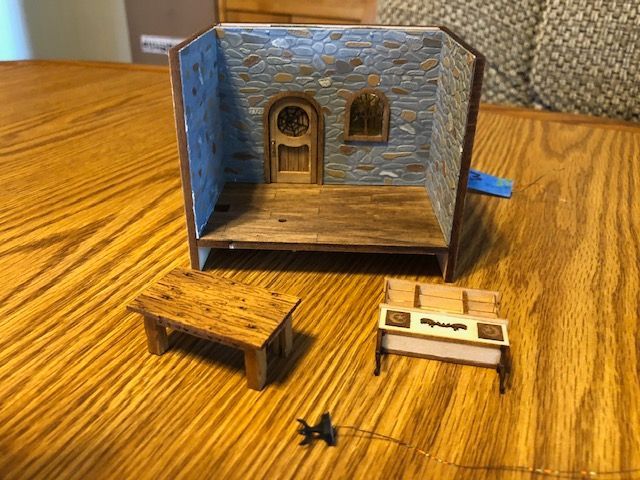
September
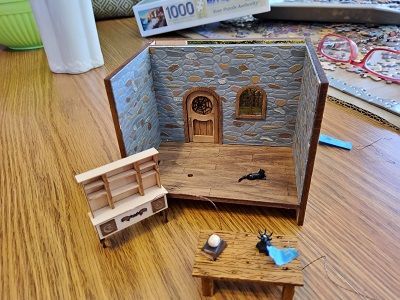
Final Update
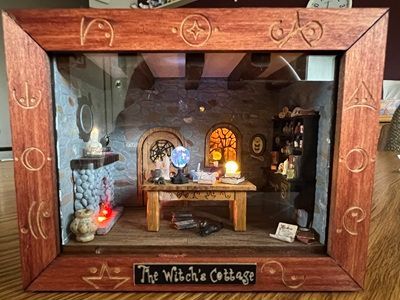
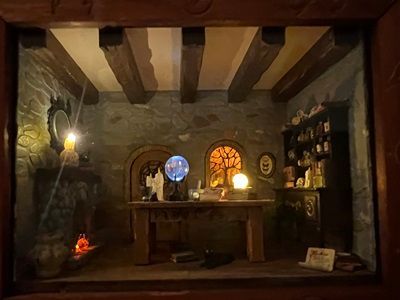
I finally finished my year long project; The Witch’s Cottage!
Jean Ellsworth
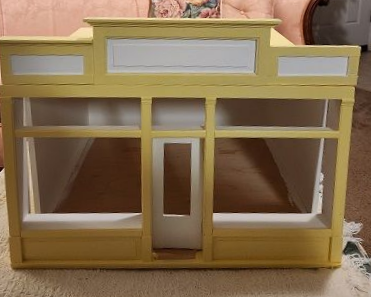
My project is a 1:12 scale replica of the Dollhouse/Miniature Shop I owned from 1976 - 1982 in Madeira, Ohio. It was called Manor House Miniatures. Two local men made the room boxes I sold in the shop. They made me a replica of my shop. I kept the unfinished shop box safely put away for 40-45 years. In the spring of 2021, before my move, I got it out and painted the outside. It is time to get it finished. Hopefully the challenge will encourage me to accomplish that goal.
March
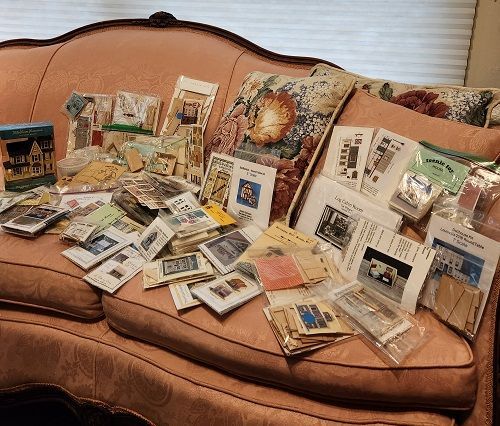
I have found all the kits I have been collecting, for 40+ years, for my dollhouse shop. They are finally all together. I have not counted them, but it is obvious that I cannot use all of these in my shop. Guess I will have to pick and choose. Hope I can get a few of them put together in the next 3 months. This is beginning to feel like a 5 yr project!
June
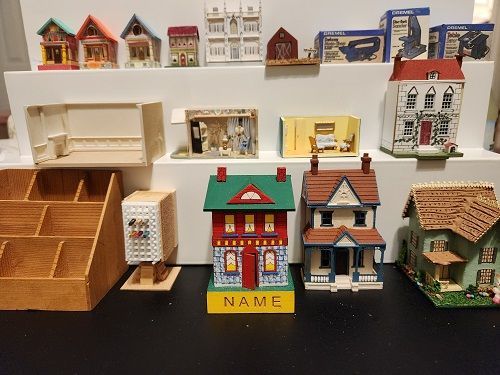
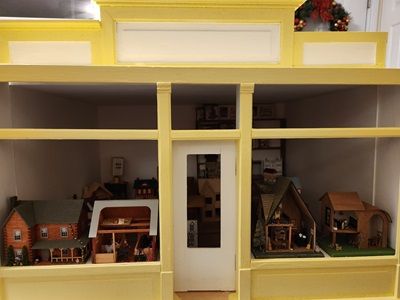
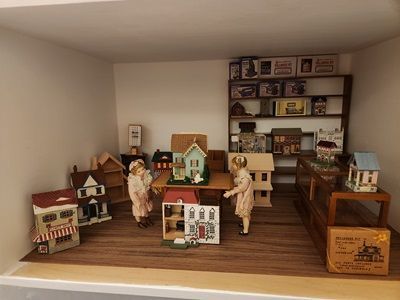
I have been working on the contents for my dollhouse shop. Some are kits I have put together and a few of the items were gifts I received.
September
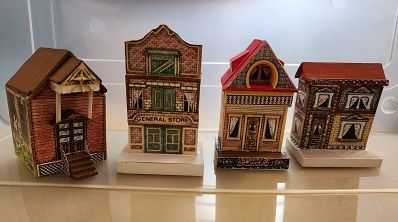
Been a busy summer, but finished a few more Mott Miniatures kits for my dollhouse shop.
Final Update
I did not finish completely, but I have come a long way. It was a big project. I did not get all my shelving finished. Hopefully I will get it finished in 2024.
Barb Engel
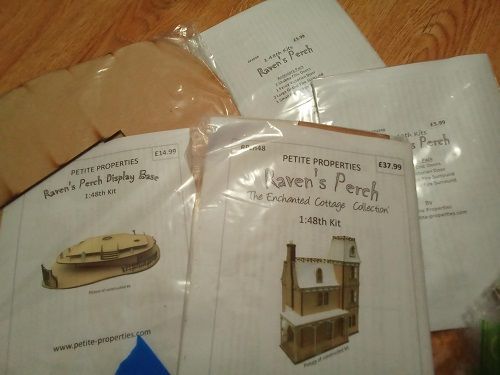
I just inherited this kit from a dear friend. She envisioned it as an elegant home, not haunted or enchanted. During the year there will be much kit bashing to get to my vision and her vision for the project.
March
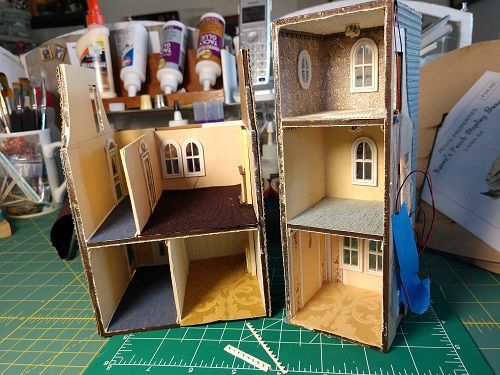
The build continues and now has a theme. This is now The Pines B&B. Five bedrooms and a guest parlour are in planning stages.
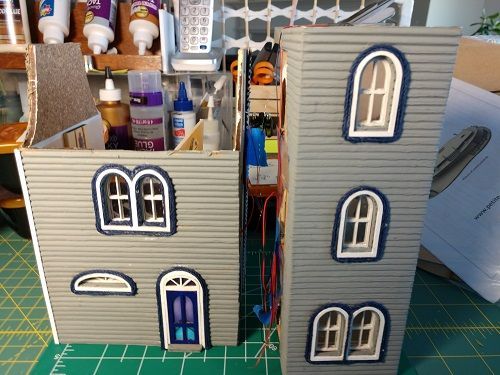
June
The main building and tower Are now attached with electrical wiring running between them. I have finished the landscaping and construction part of the project. Next I will work on decorating and furnishing my B&B.
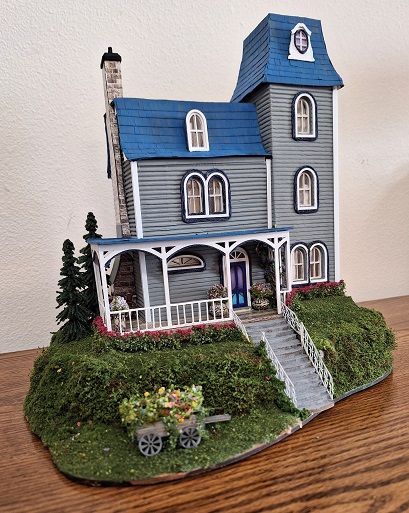
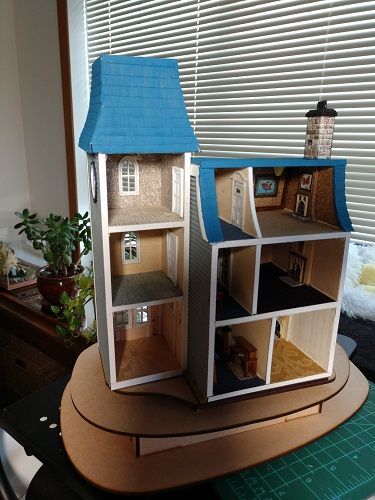
Final Update
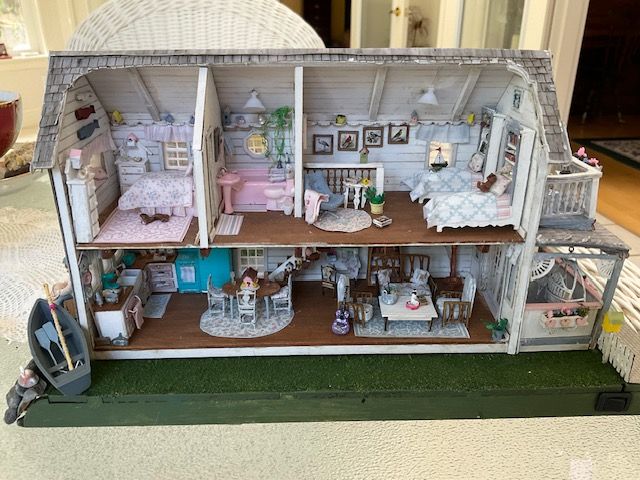
The Pines B&B has been totally renovated and is open for business. Each room has a different theme and some rooms are more luxurious than others. This gothic house is a Petite Properties kit that is usually turned into a haunted house. I loved the basic structure and decided to make it a renovated B&B. Imagine that it is in a forest setting located near a lake for fishing and relaxing in northern Wisconsin.
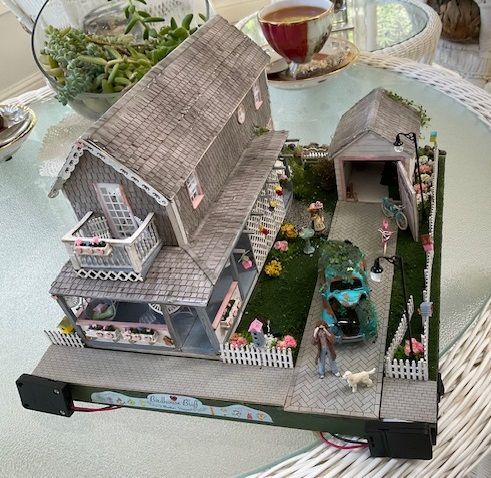
Kirsten Enzinger
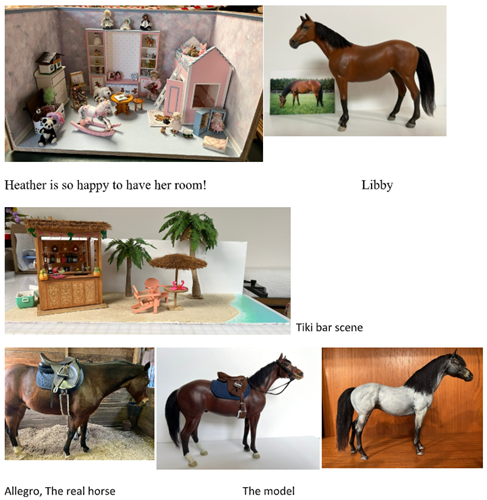
1. Remake 3 horses plus English tack for one. One will be a replica of my daughter’s horse, another a replica of a friend’s horse, and then to try to remake the 1/4 scale horse (its so tiny!}.
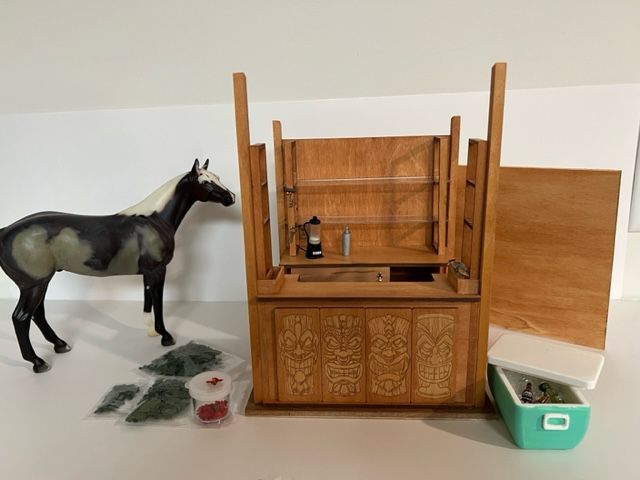
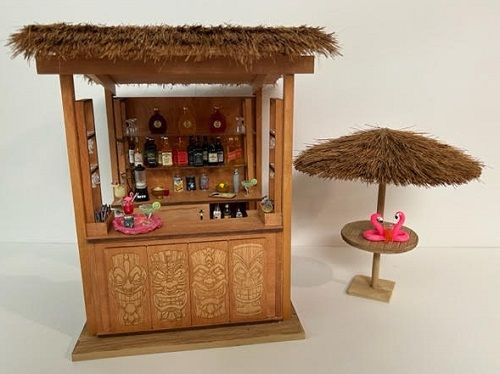
2. My other big project for the year will be to finish my tiki bar. Will it be on a base, or in a room box? I don’t know yet. I will have to dress and wig two dolls representing me and my husband on our diving vacations. Needs a thatched roof table, lounge chairs, drinks – lots of drinks! Lots of plants need to be made – palm tree, hibiscus, etc. I have lots of ideas, now just need the time!
3. The contemporary furniture set was bought many years ago, waiting to go in a doll house. I still don’t have a dollhouse and I’ve been in miniatures for over 30 years!! So, I’ve decided to make room boxes instead. I hope to make a roombox for this furniture set but will not plan to complete the scene this year. Next year’s project!
4. And Heather wants her room finished too! This is the other roombox I want to make this year, and again I’m not sure I can manage anything besides getting the box made. Decisions still need to be made about electrifying or not, plexiglass lid or wood lid, etc. before the design of the boxes can be made.
Whew! It’s going to be a busy year!
March
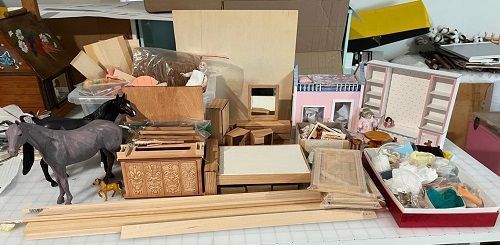
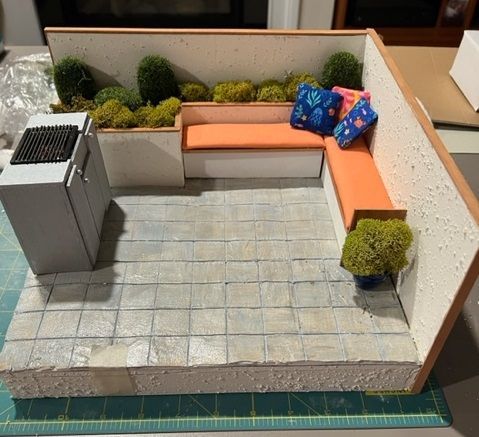
I haven’t made much progress on my goals for this year yet ... too many side tracks! I have started working on one of the horses but waiting for better pictures of the real horse before I can continue. A little work has been done on the tiki bar-- roof supports have been installed and the roof cut and stained. Cabinet door installed. Made a cocktail shaker, blender, drink umbrellas, cut and punched leaves and petals for hibiscus, finished the cooler. Still trying to decide if this will go in a room box or on a platform. Most of the year has been focused on designing and making a patio which is being taught to my local club. Prototypes made, 18 kits made by Suzanne Spooner Munch and me, and first part taught at last meeting.
June
I worked on my tiki bar, the thatched roof took a long time! The two flamingos sharing the rum punch are Barney and Wilma ... they have many interesting stories to tell!
September
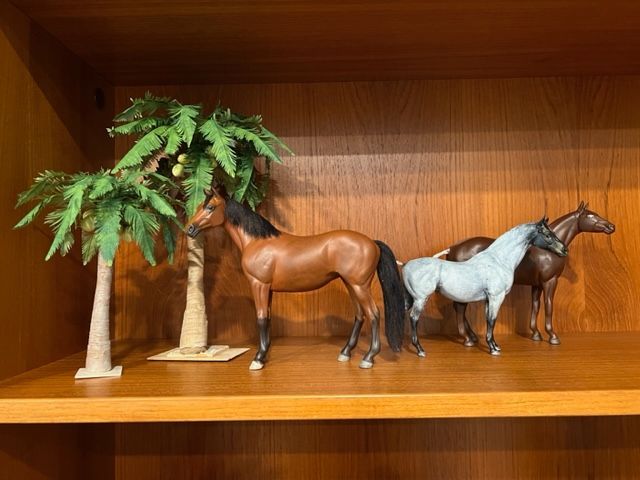
I made two coconut palm trees and taught this to my club over two workshops. I finished one bay horse. Two more have had all the prep work done and are now in the process of getting painted.
I also decided on how to display the tiki bar, so can now go forward with getting the scene finished.
Final Update
This was a busy year and although I didn't get all my projects finished, I feel that I made good progress. Besides finishing these projects, I taught 7 workshops to 2 clubs and submitted an article to the Gazette on making a butterfly weed plant. I didn't add the dolls to the Tiki bar, they didn't look right. The ¼ scale horse is the wrong type of plastic to be able to work with so I couldn't do that one. But Heather is happy with her new room, the three 1" scale horses and tack were finished, and I'm pleased with the tiki bar scene. The only project I didn't get done is the master bedroom room box. Guess that goes on next year's list!
Diane Fisher
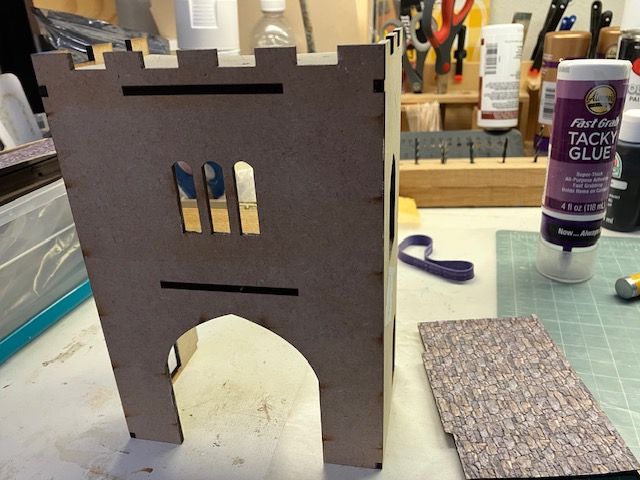
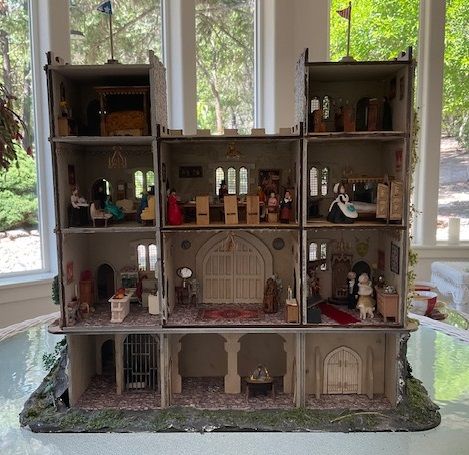
I rarely do challenges, but this one sounds engaging. I just started Petite Properties Turrim Castle. This is what my project looks like at the beginning.
March
This castle is a delight. I have created the five towers and the dungeon level. Furnishing has begun. Next is to complete furnishing and assembly, then landscaping and hiring a staff!
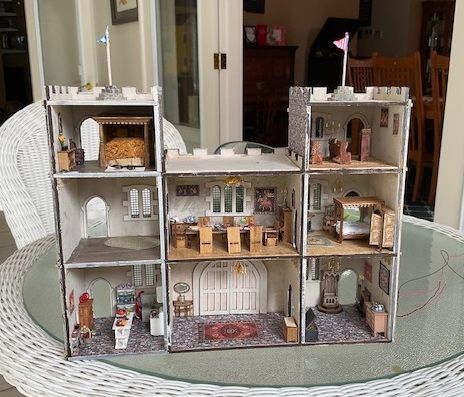
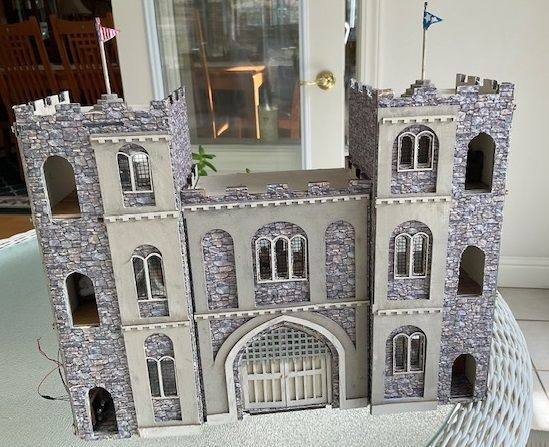
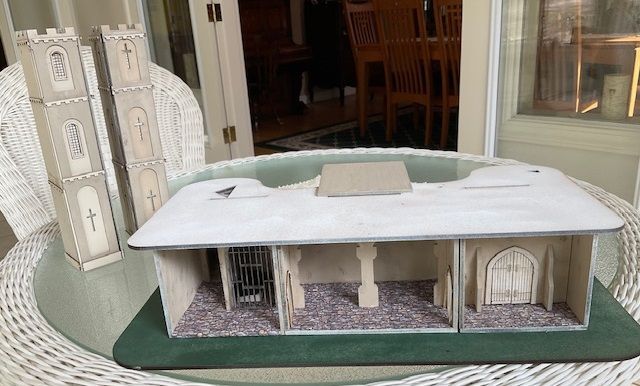
June
Whew! My castle is completed. I’m so happy with it.
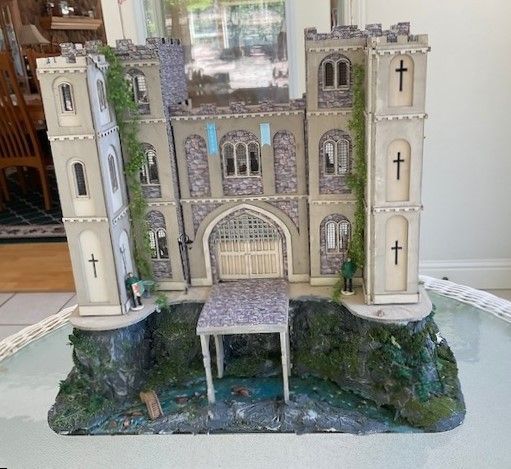
Bev Fleming
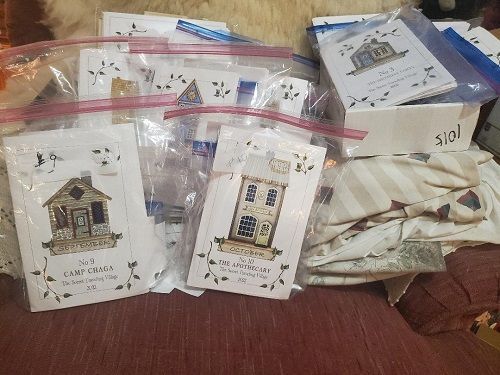
I want to finish my unfinished kits from the 2022 calendar club. Here is what I have left to do -- the last six buildings and the first four months furnishings only The first four buildings are done.
March
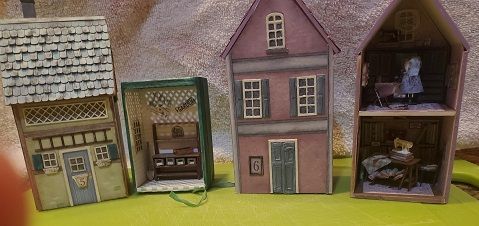
Here's my progress on Robin's traveling village. I've finished #5 & # 6.
June
September
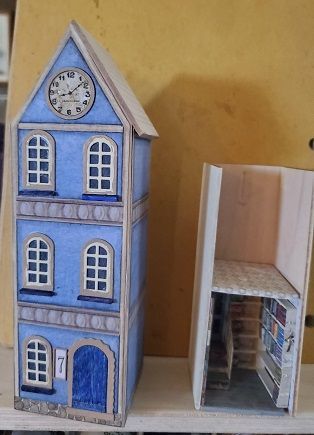
I finished the roof and the first floor. I got some of the 2nd floor furnishings done.
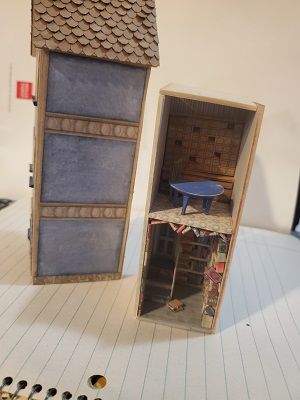
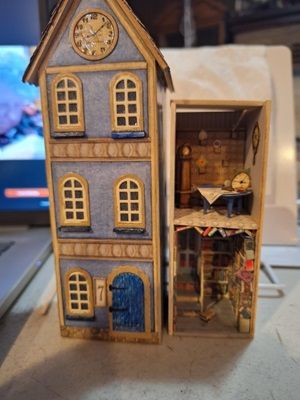
Final Update
I almost finished #7 end of 2023 progress
Paula Francis
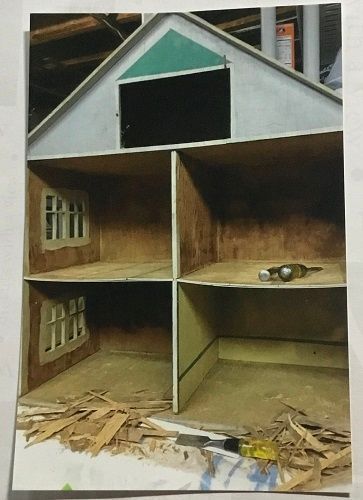
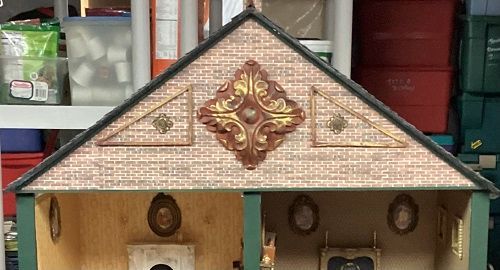
Thirty-two years ago at a local flea market, I noticed the saddest of sad dollhouses sitting in the back of a truck. Since I can never pass by a once loved dollhouse, I instantly bought it. It has been silently sitting in my basement all these many years, waiting to be loved again. This challenge is the perfect time to bring it back to life.
March
So challenging and rewarding … seeing a discarded dollhouse start to come back to life. Rotted, warped wood, rooms that are not square, screws, and nails sticking out everywhere. I refuse to be discouraged. New roof, reinforced sides and base, and one room finished (the kitchen). See you in 3 months with more updates.
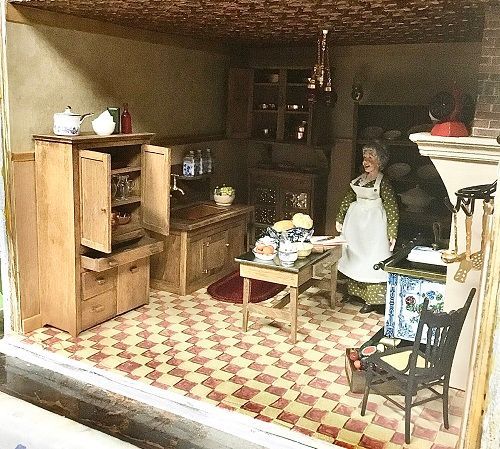
June
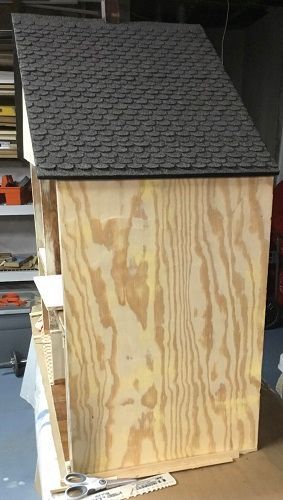
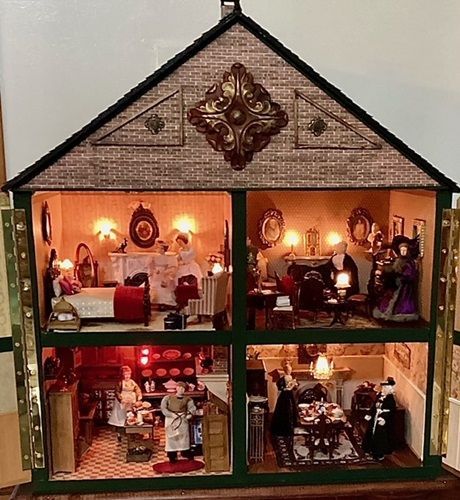
Moving along with the restoration of my Baby House. I have finished 2 more rooms … the Dining Room and the Parlor. I have one more room to complete and it’s on to the front which will be a center opening, two door facade.
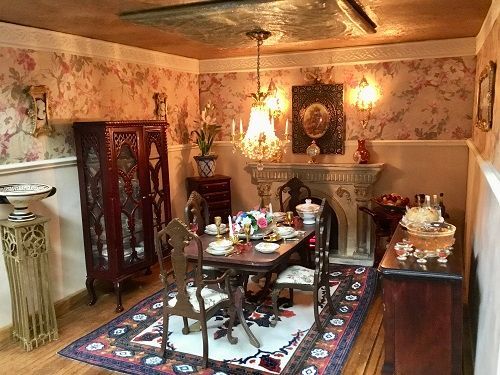
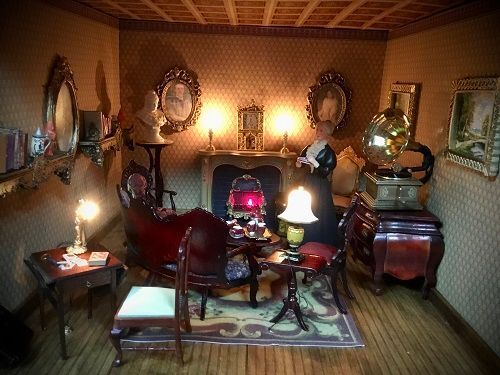
September
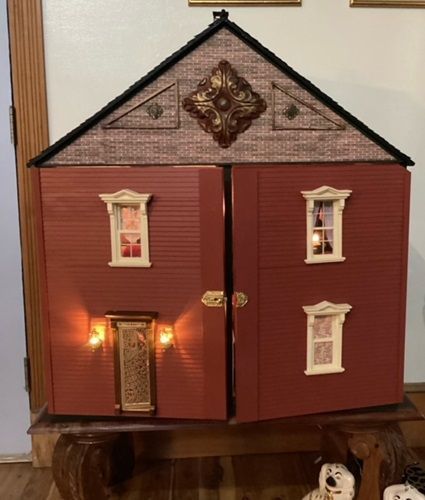
I'm getting so close to finishing my year-long project. All the rooms are finished, the exterior is sided and painted and the apex of the house is done. The only things I have left are the 2 large front doors that will show the windows and the front door. I can't believe it's been 9 months since the challenge started. What an adventure.
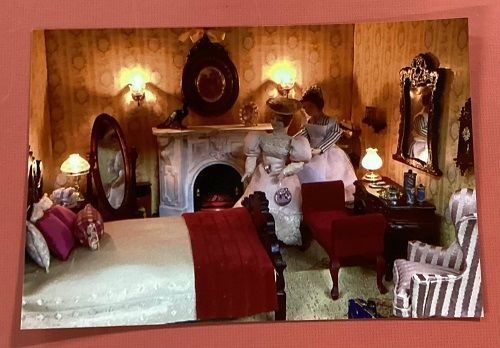
Final Update
Finally finished…. You and the Create team came up with the most creative idea to help keep us all connected. Thank you.
The end of a “challenging” year. From a neglected, worn out shell to a fashionable 19th Century home ... my goal was to prove that no once loved dollhouse is beyond repair. A true labor of love.
Carol Gambrill
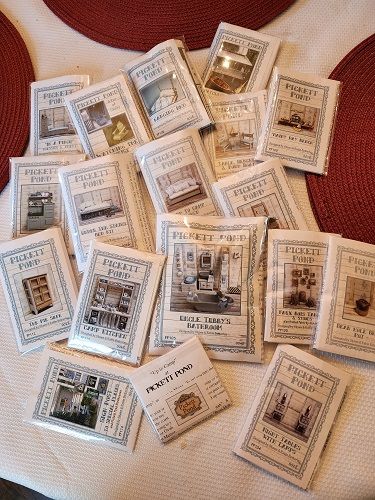
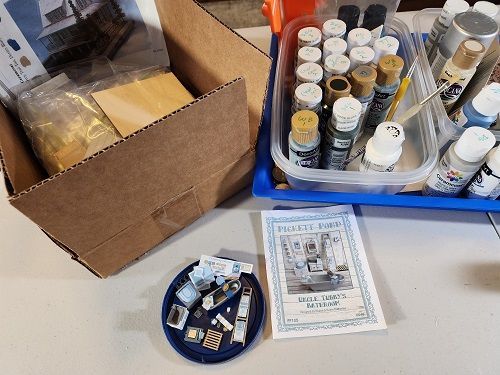
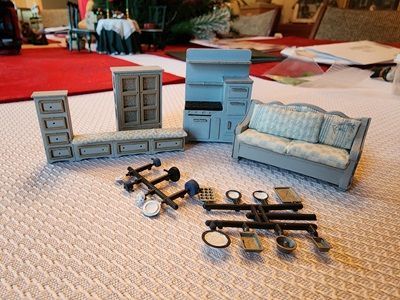
My big project for 2023 is to construct and furnish my Pickett Pond kit. Attached is a picture of the furniture and accessory kits in their pristine packages. It will take me a few days to unearth my kit for the Pickett Pond structure, also still in a box, so I’m just sending the one picture.
March
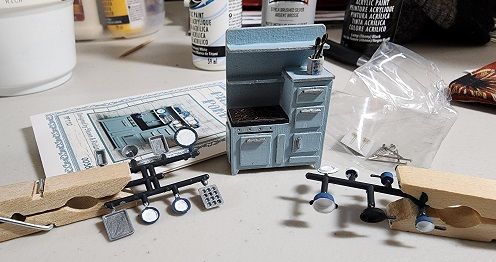
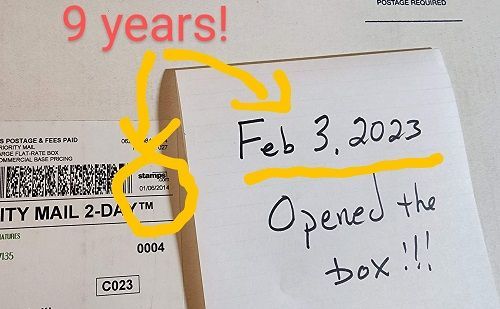
February 3, 2023 I opened the large parcel post box from Betterley Miniatures. The postmark date was January 6, 2014! I reviewed the instructions and ordered, again, paints for the Pickett Pond structure and for all the furniture kits. To get back in the swing of quarter scale I decided to start with the furniture kits. So far I’ve done the bathroom and the stove. Moving onward!
June
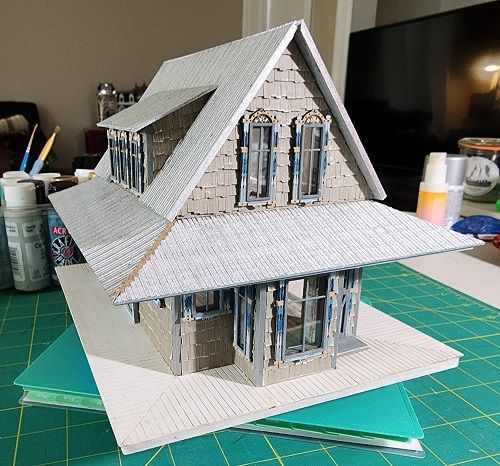
I made great progress on the Pickett Pond structure! The main building is almost complete. The inside just needs the fireplace and upstairs railings. The outside needs railings, chimney, aging and landscaping. Many thanks to those who've posted tips on completing this kit. Most notably Jenn's Mini Worlds and whoever advised installing the bathroom furniture before adding the room to the house!
September
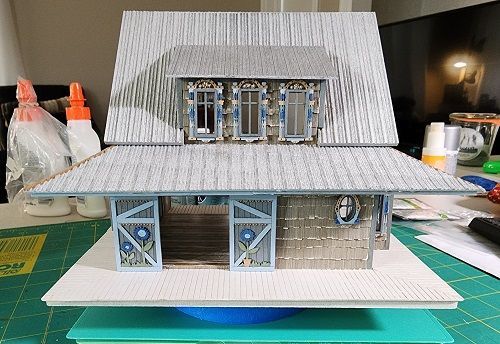
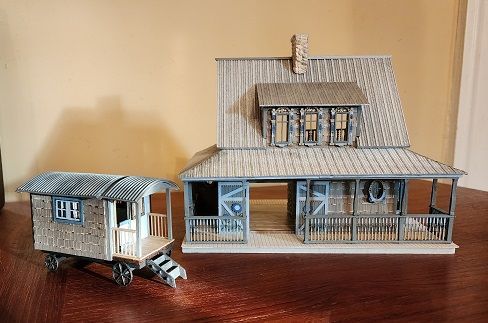
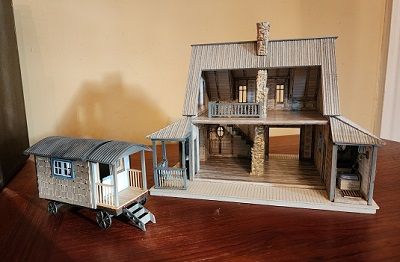
I finished the Pickett Pond structure - WooHoo! Then I was totally distracted by Debbie Young's shepherd's hut. Since my craft table was full of paints and supplies from Pickett Pond, I used them for the hut. Soooo, now I have to rethink the landscaping. In the next few months, I'll work on the furniture kits.
Final Update
My GREAT 2023 accomplishments: OPENED the box and FINISHED the Pickett Pond Structure. Only the third 1/4 scale house I've completed! Even better, I actually completed at least one furniture kit for each room! So, though I didn't get to do the landscaping, I'm proud of what I've done. This was fun. I'm already planning my 2024 Project!
Jean Gibson
I love this concept and would like to enter two items. They are two complete house kits that I have been meaning to do but the process is a long one and I haven't taken the time. Now I have to! One is the Veranda house including a garden, and the other is the Pocket babyhouse.
March
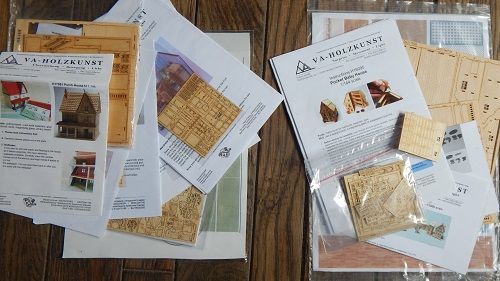
I started with the 144th Baby House by Volker Arnold. There were 6 rooms of furniture and all the extra toys that needed to be painted. Still needs quite a bit of work on the furniture before moving into the house and am curious to see how much is going to fit. Then the plan is to decorate the interior and fill the window boxes outside for the next time.
June
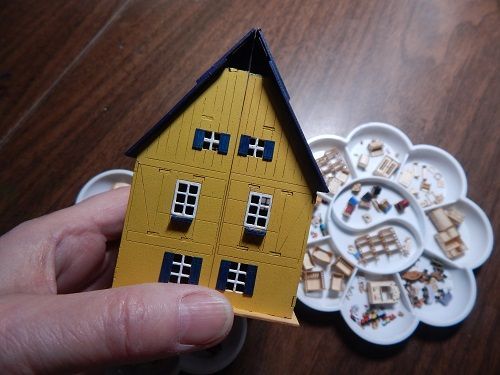
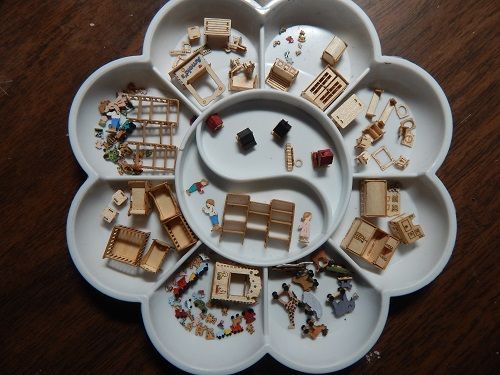
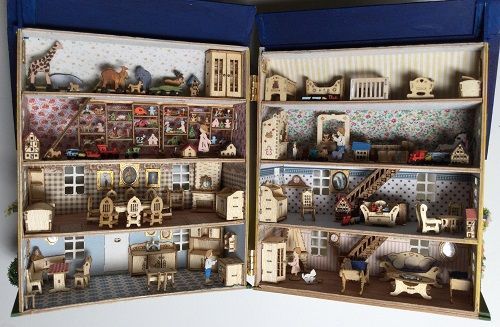
I am finished with my first project (Pocket Baby House designed by Volker Arnold). The kit was a cute idea and involved more hours than I thought. Very fun and challenging. Even though it is 144th scale, it was a huge project! I love the smaller scales and thank you for offering the challenge.
September
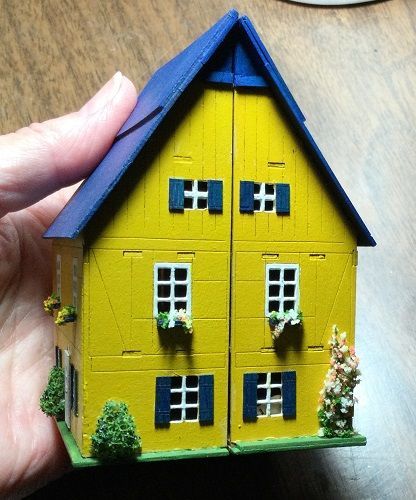
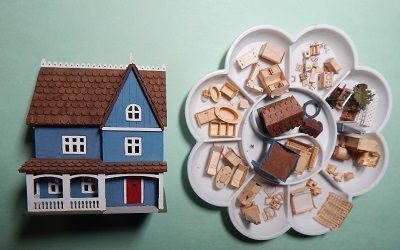
My progress on this 144th scale House with a Veranda. Everything is assembled and ready to arrange on a base and to decorate the house interior. There are four rooms of furniture and an outdoor garden area that are included in this complete house kit by Volker Arnold.
Final Update
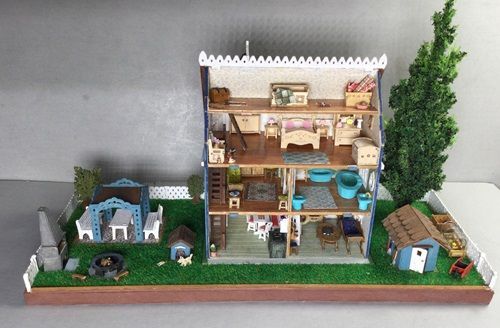
I am pleased to be finished with the challenge for this project. It took much longer than it would seem. Happy dance.😃
Ruth Goodger
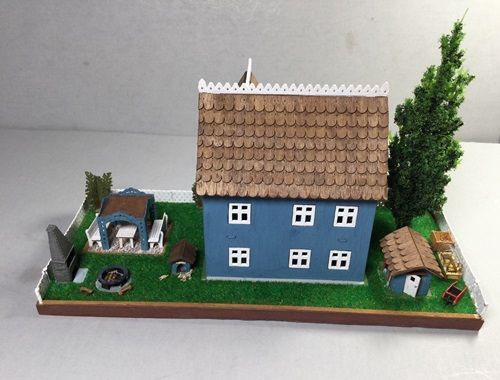
I’ve had the kit since before the pandemic and then could not find the paint I wanted. I have it now, so time to move on it.
March
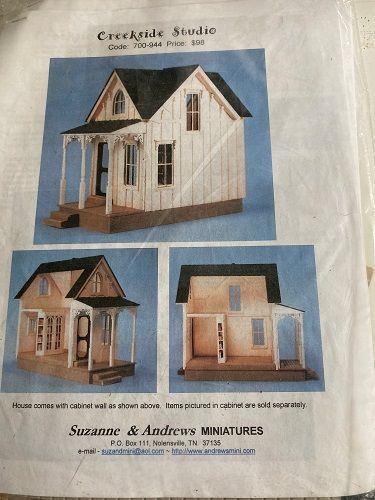
I'm waiting on furniture to add the roof on the creek side project.
June
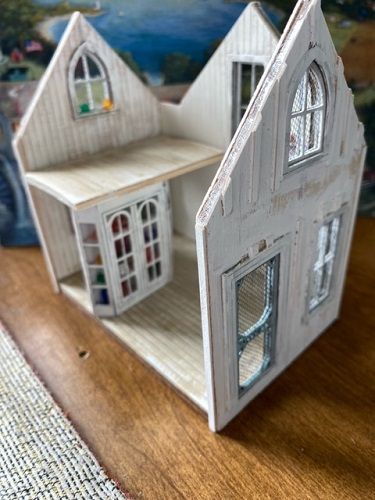
I still have the kitchen area and the landscaping to do.
September
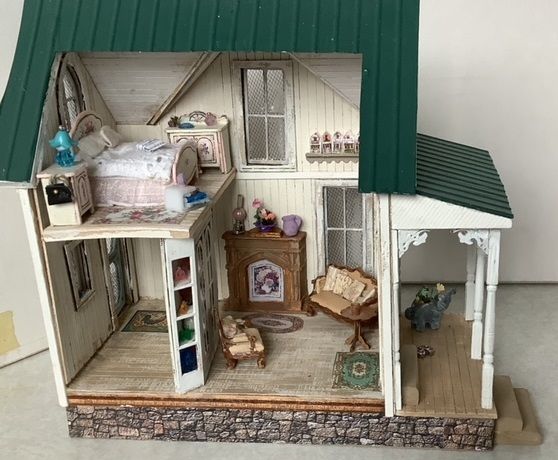
I did the landscaping, but still have to finish the kitchen. It’s so tiny.
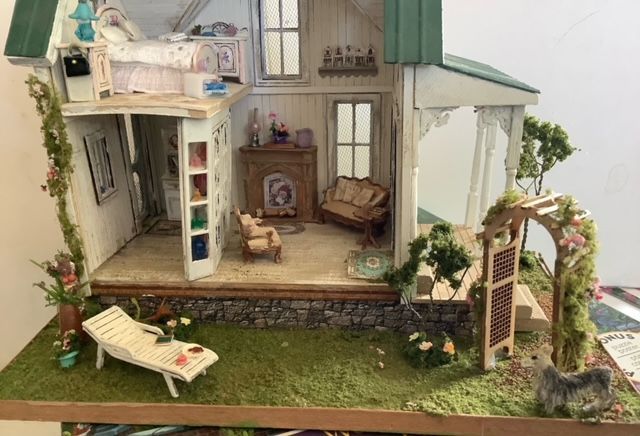
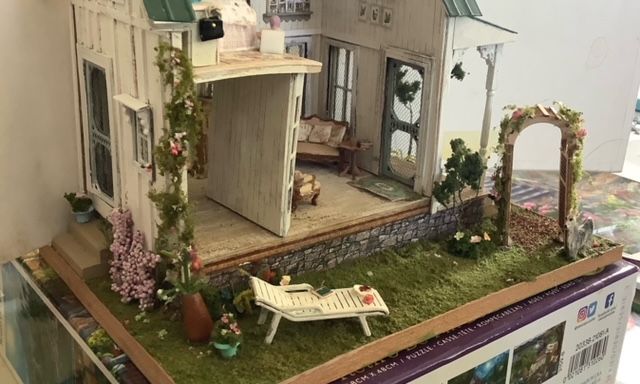
Final Update
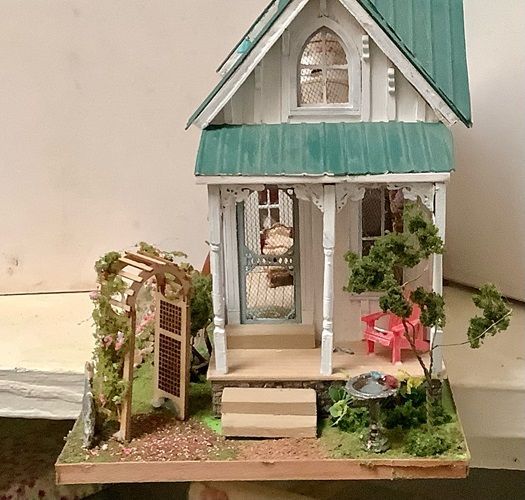
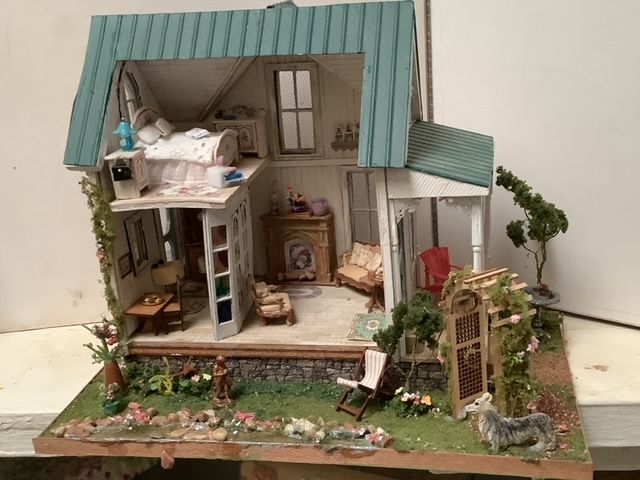
The Creekside by Suzanne. I bought it just before she retired and finally completed.
Sandra Hambley
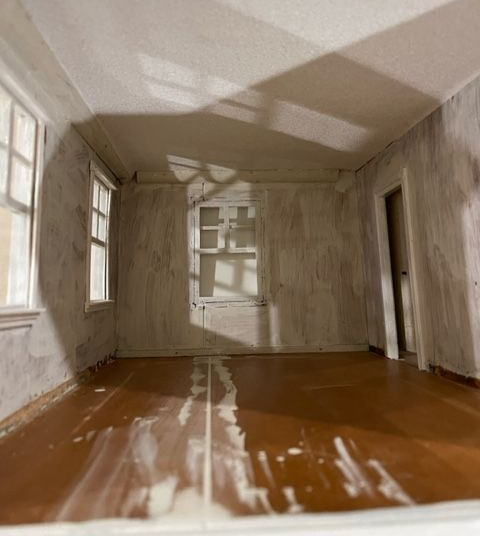
I have my childhood dollhouse made by my dad (55 years ago). Thought I’d aim for renovating the whole house but it was daunting to think about. I think I will aim for just redoing the living room. It needs it!
March
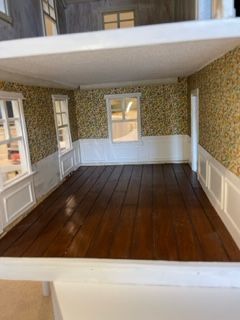
I keep thinking I’ll make a wee bit more progress before sending my update photo in, but the time has come. Added flooring, wallpaper, and wainscoting. Next up baseboard, chair rail, and fireplace! Great idea for a challenge. It keeps me going!
June
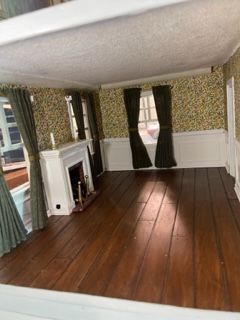
Coming along, slowly! The curtains and fireplace are just perched there right now. I have to figure out how to attach them.
September
Pretty much done! I'm going to have to start another room!
Final Update
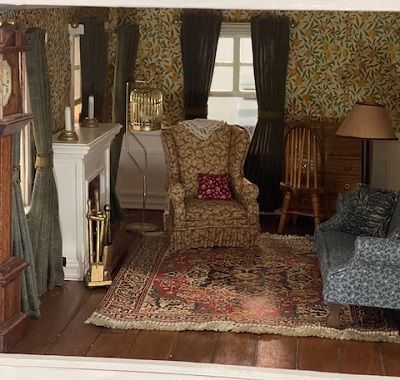
This was a great boost to getting my living room done. Thank you!
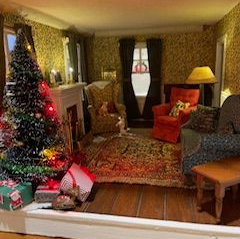
Pat Hartman
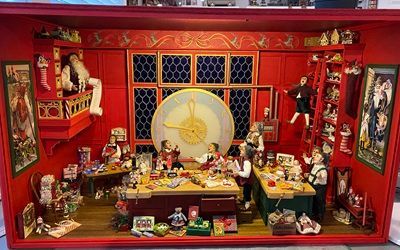
Well, nothing like a deadline for motivation so, I’m up for the challenge. I’ve been planning to do one more large project and this is the perfect opportunity.
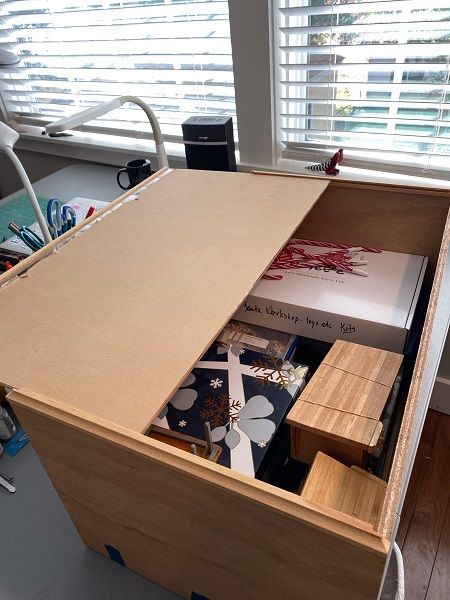
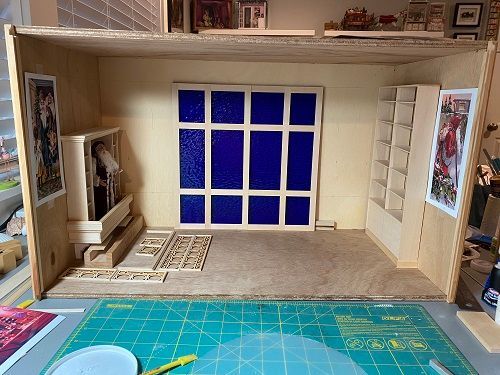
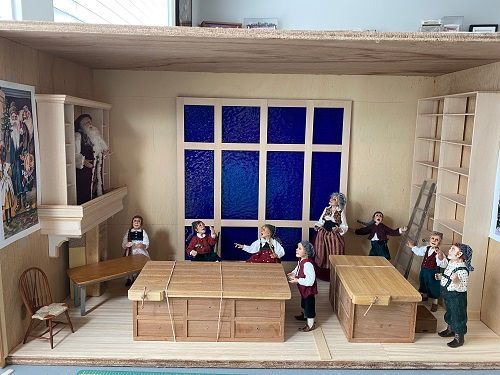
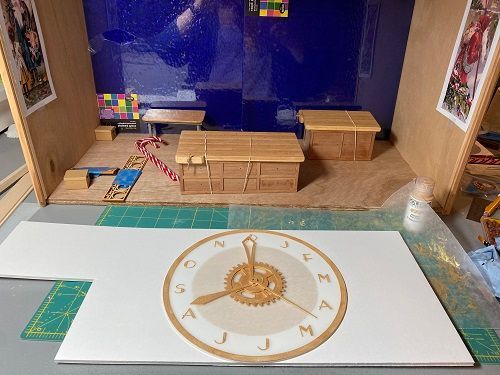
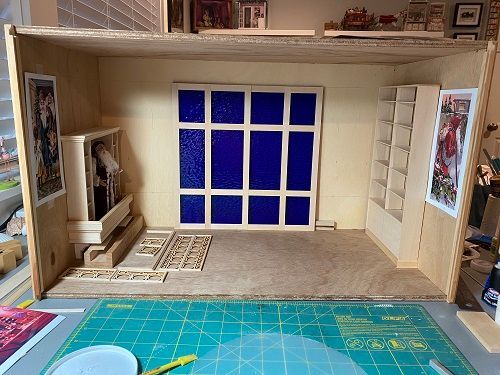
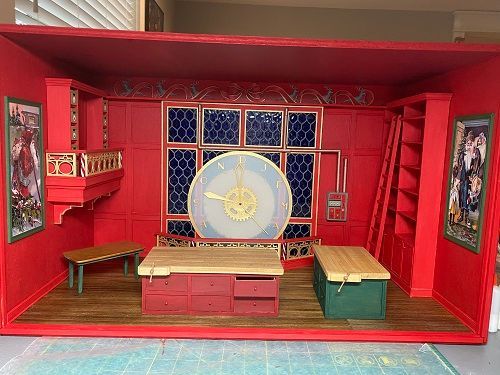
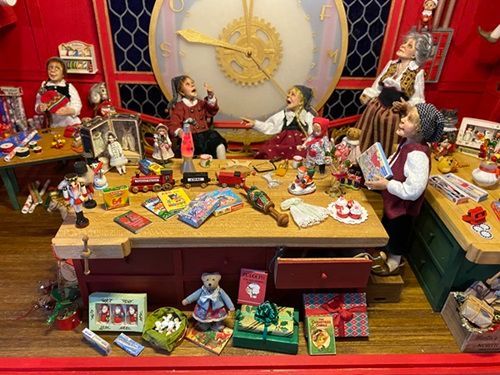
I’ve been collecting (for a long time) to make a Santa’s workshop based on a picture I saw of a Christmas window display in Toronto, Canada. Primarily it is in a very large box in its current condition🤪
March
I've been building the main furniture pieces.
June
I haven’t had time to do much but will have more time to work now that many of my prior commitments are over.
September
Here is a picture of my Santa’s Workshop as it is now. I have completed the construction, the next thing is to decorate and finish a few kits to go in the structure.
Final Update
Bonnie Helterhoff
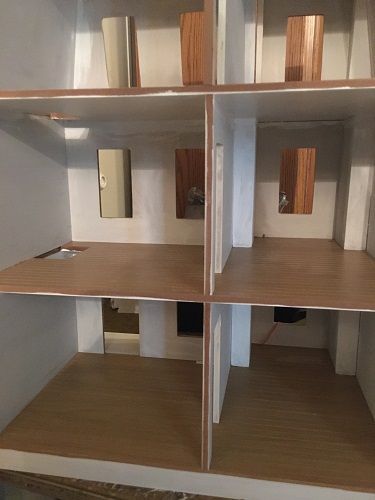
I am hoping that since this is sort of a competition and I happen to be extremely competitive that this will spur me on to do this project. I found this Real Good Toys house for $40 at a miniature flea market. It has some but not all of the floors, no wallpaper, and the outside is just primed. My goal is to redo it as a Mary Engelbreit themed house. I would love to see this happen but I just keep putting off starting ... We all know how that goes…lol. I’m hoping that by committing now I’ll get it done!
March
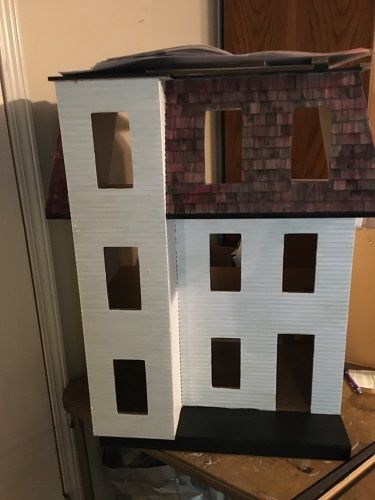
I have gotten the exterior painted white; the trim painted black, and the roof shingled with black paint wash and a wash of red over that (may need to add more red later). I’ve decided which rooms will be what; bought wall paper, and found some furniture that I can redo in the Mary Engelbreit style. Real life has taken much of my time and will also dominate the second quarter so most of my progress will be the last half of the year. I’ll do what I can the next quarter and then one room each month along with unfinished bits for the balance of the year.
June
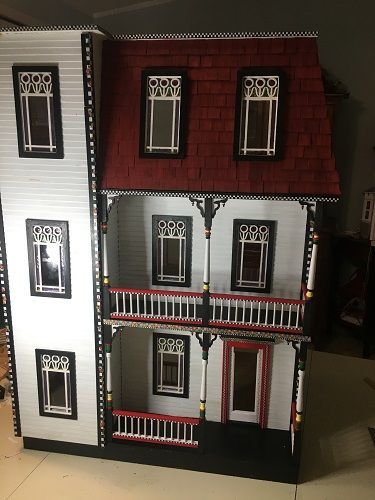
Second quarter was hard as I had two shows; two classes, a fun day, plus projects I needed to complete to display at my club's show ... so actually pretty proud of myself for making some progress. I decided I needed to paint the roof red and did that. Painted and added the porches; wallpapered inside (actually so that I could just glue in the windows); added tiny checks and other trim; got the cool windows with flowers (Miniature Designs) - painted and added gallery glass. The door is missing the plexi as I hope to do a leaded design on it if I can figure out that something that will work. I made shutters; glued them on, and hated them. Sometimes life goes that way. I've found a couple more pieces of furniture that I will be redoing in Mary style. There are places that need touching up but I plan to catch all of them at the end. Actually pretty pleased with where I'm at and looking forward to some interior design.
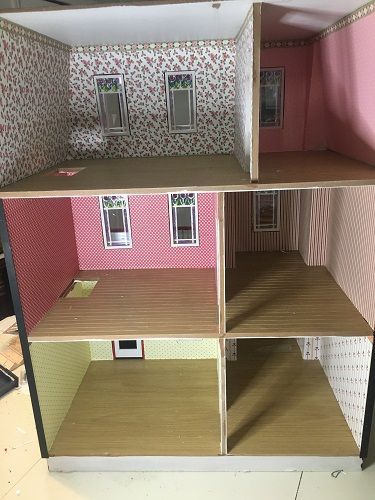
September
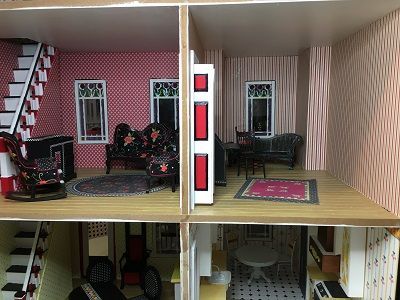
I added the staircases and walls next to the stairs on the first two floors and enclosed the stairway on the third floor for more wall space. I printed some rugs (need a few more). I’ve used mostly furniture found cheaply and painted it/added paper detailing. I dressed the bed and recovered the living room set. Built the kitchen cabinets from illustration board. The kitchen table was a plastic set painted and the dining room was from Hobby Lobby - painted and trimmed.
For the fourth quarter I plan to complete furnishing, add lamps, accessories, and wall décor. It’s exciting to see the house taking shape and I hope that I can manage to finish this by the end of the year.
Final Update
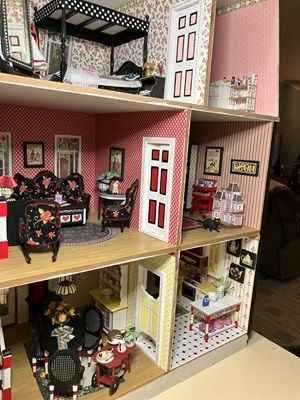
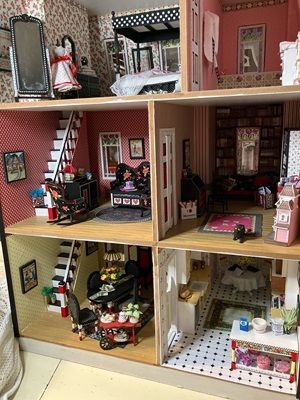
I will admit that somewhere down the line I will probably add to my Mary house as I find things that will work. It’s pretty hard to call anything “over”. The outside didn’t change much except I added the porch chair with a needlepoint pillow (yes I did that!). I planned for my curtains and spent days making them only to decide I really didn’t like them! Ditto several other things: this has been a one step forward - two steps back kind of project, but I’m happy with where it’s at now.
Eileen Herrstrom
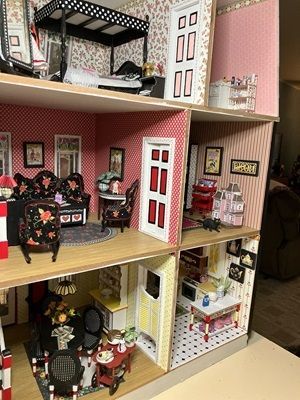
I started this Jamestown dollhouse from the Real Good Toys New England collection in 2021. Its current state: the exterior is done; some rooms are nearly complete, one is barely started, and most are somewhere in between. I plan to complete the interior this year, although I suspect the house will never be “finished”, and landscaping will be added later.
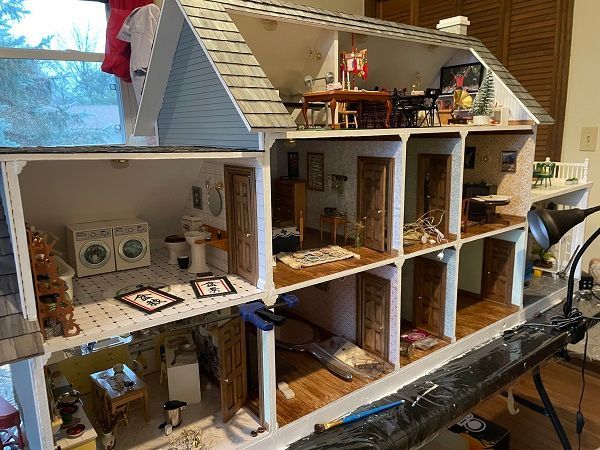
March
I will admit that somewhere down the line I will probably add to my Mary house as I find things that will work. It’s pretty hard to call anything “over”. The outside didn’t change much except I added the porch chair with a needlepoint pillow (yes I did that!). I planned for my curtains and spent days making them only to decide I really didn’t like them! Ditto several other things: this has been a one step forward - two steps back kind of project, but I’m happy with where it’s at now.
June
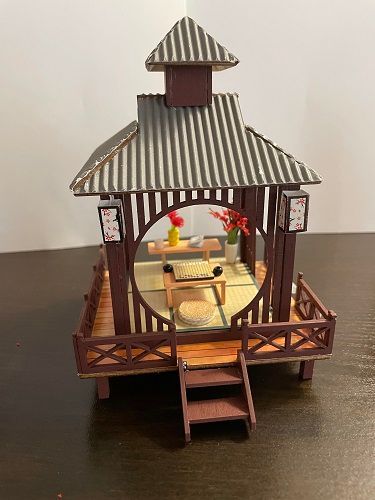
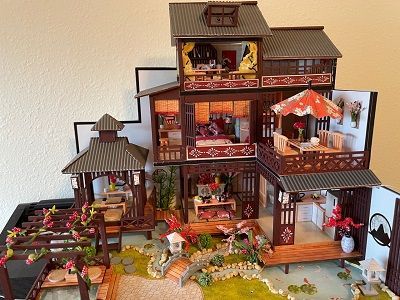
Here is the completed tea house for my Japanese dollhouse. I’m still working on the main house, but the tea house will be in one corner of the garden.
September
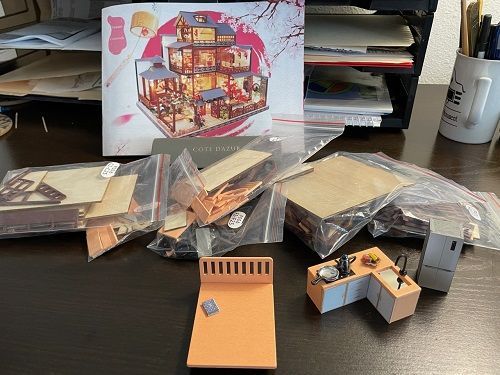
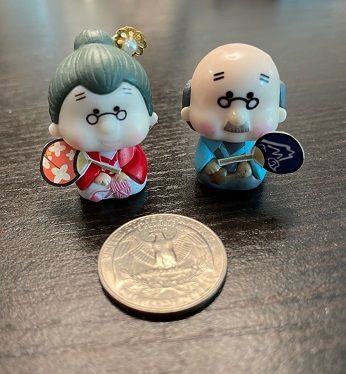
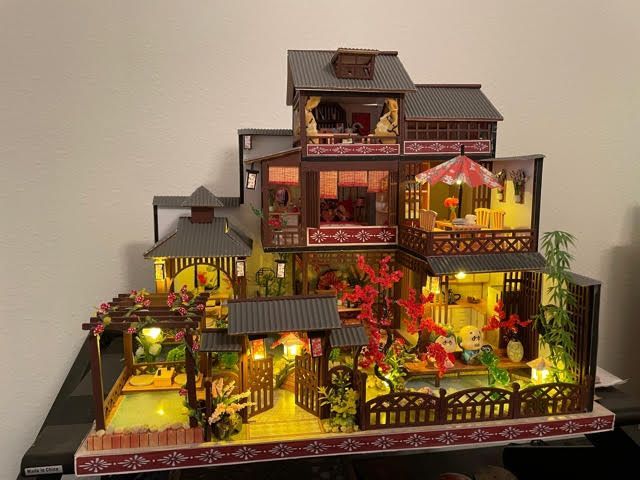
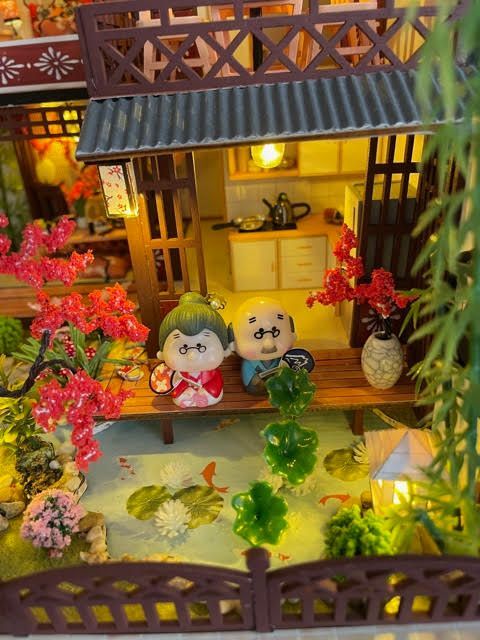
My 1/24-scale Japanese dollhouse project is coming along, although work space is tight. Since our house fire in March, we have been living in a 1-bedroom apartment while we rebuild. Our real-life house now has walls and a roof, and so does my dollhouse. Electrical work comes next. The inhabitants of both houses are eager to move in!
Final Update
Kristie Horrell
I am going to complete Carpathian Cottage. I want to have it completed by the end of this year. It is still in the package.
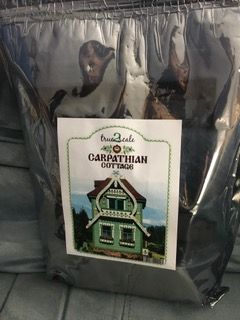
March
New Paragraph
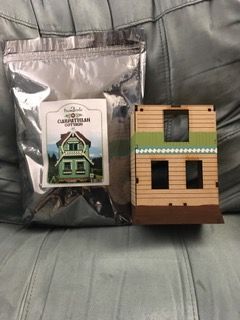
June
I completed a little more on the house.
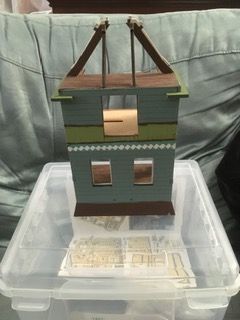
September
New Paragraph
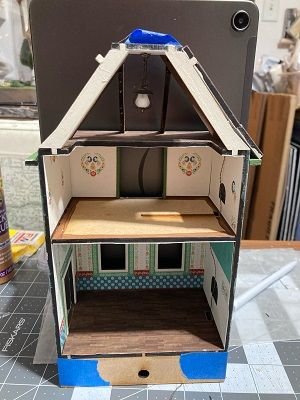
Final Update
I only made it this far. Maybe next year I will have it done.
Carol Johnson
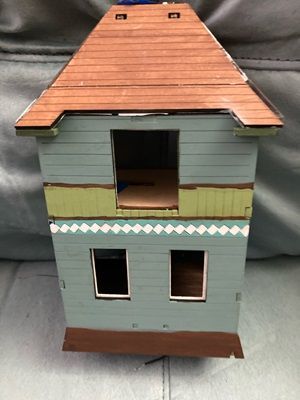
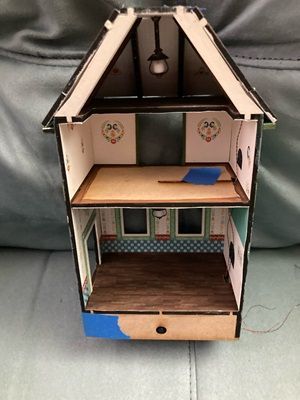
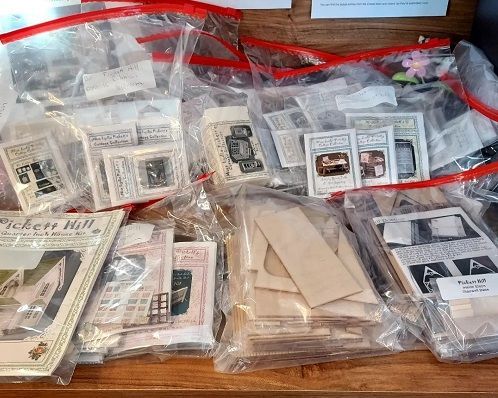
My goal is to complete the Picket Hill house and all its furnishings. My kits finally arrived and here they all are.
March
I have attached a couple of photos of my progress on my Pickett Hill house. I have completed most of the interior accessories and am about to install the second story in the Picket Hill house. I am enjoying every moment of this challenge. 😊
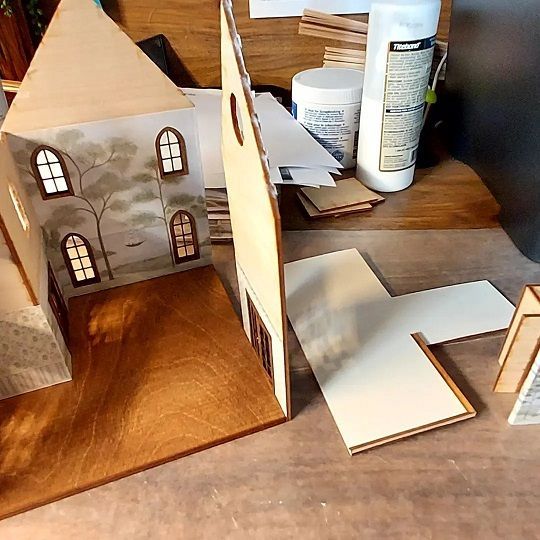
June
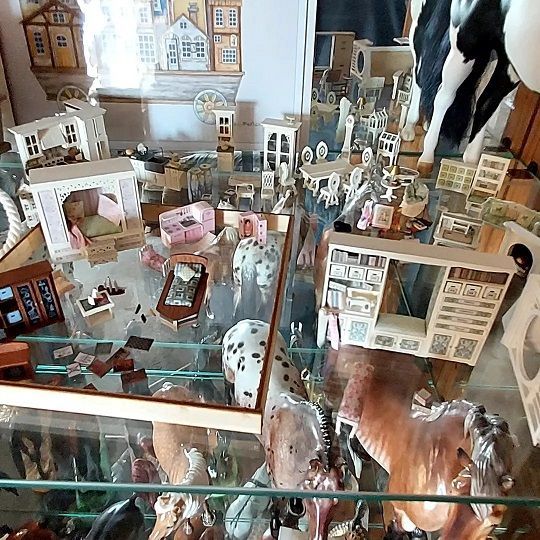
I was able to do some work on the first floor of the Pickett Hill and installed the hallway on the second floor.
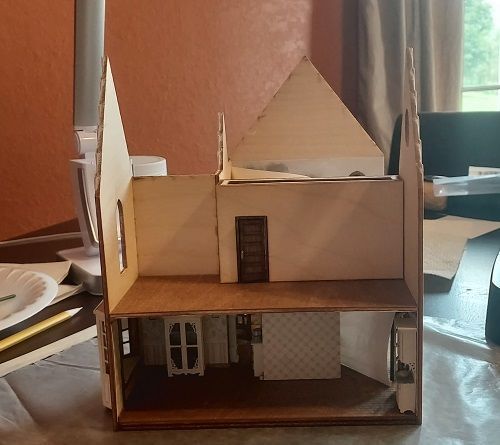
September
I have completed the Pickett Hill house and accessories and am now working on the landscaping.
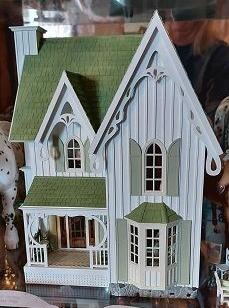
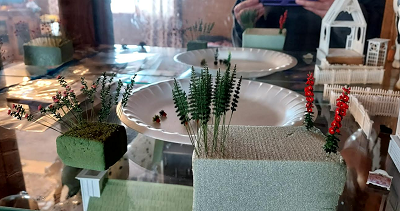
Final Update
I finished my Year Long Challenge. It is my Pickett Hill house and all the furnishings. I also made all the flowers from kits for the flower beds and throughout the house and portico. It was a great project!
Julie Johnson
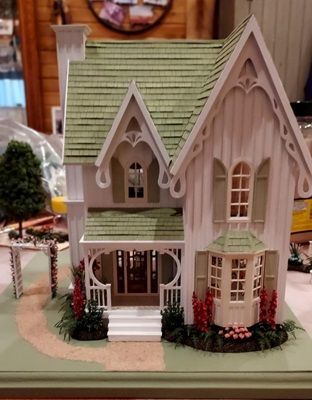
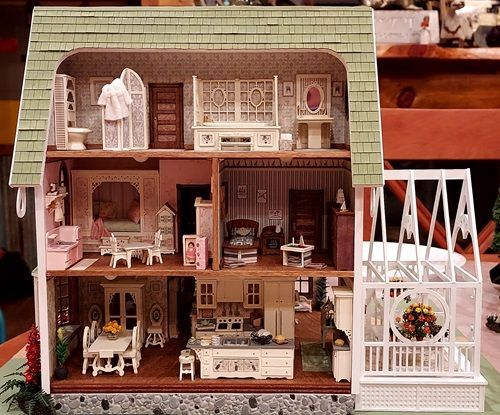
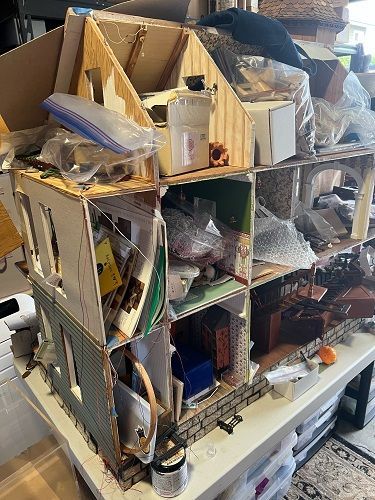
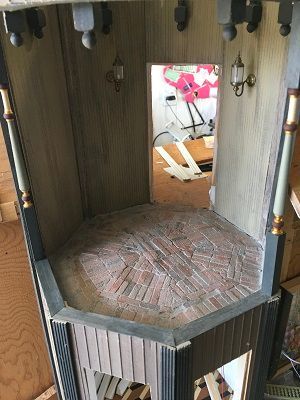
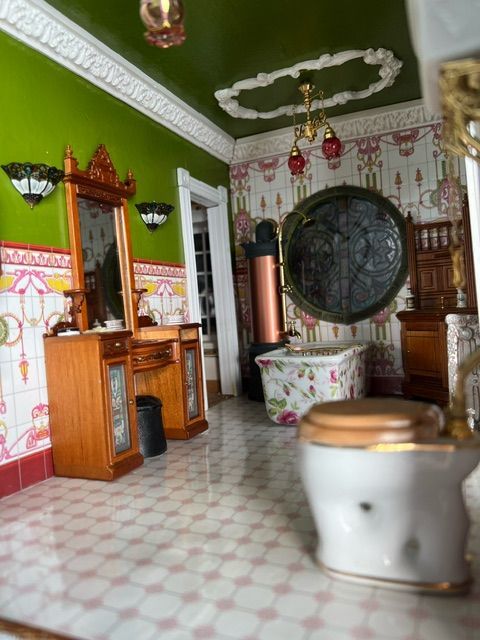
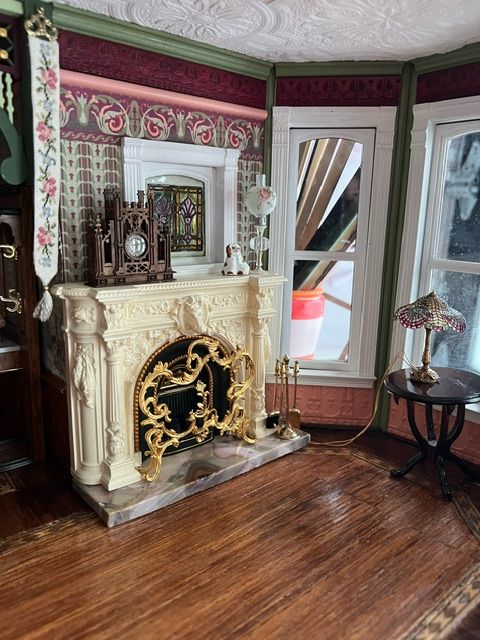
This beauty is a Joseph Angel house signed by Clell Boyce, #10. I purchased this at the NAME convention in Alexandria. I had to dismantle it to get it home. A year later I put it mostly back together and did some work on it. It has now sat for two years. It survived a move, but the electrics didn’t fare so well. I have spent last year trying to wedge my minis in a small garage space. Everything I unpack needs fixing, so that’s what I do. Unpack, fix, and try to find a spot for them. Here are pictures of my storage house.🤣😂 it became the repository for everything I didn’t know what to do with!
March
Thanks for doing this.
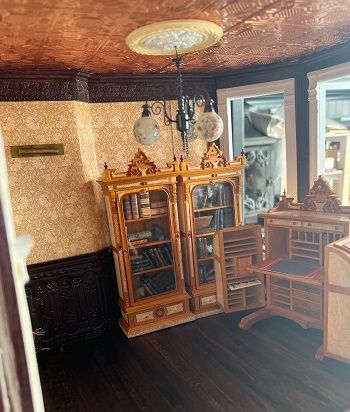
June
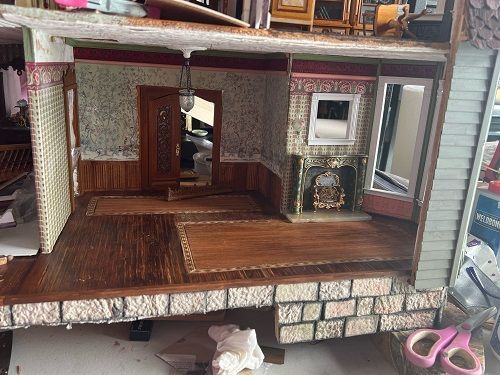
I have made progress. First picture is an almost finished laundry room. Next a chandelier has been painted. Installed a pie cooling window in laundry room. Siding going on. Repainted the shingles … only for the third time🤣
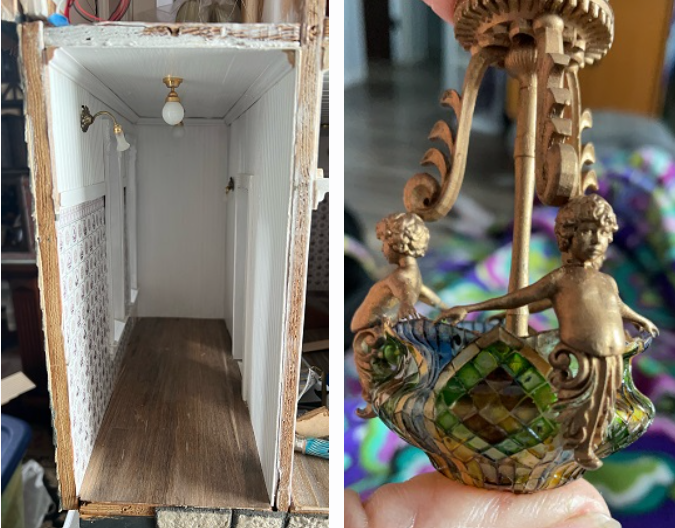
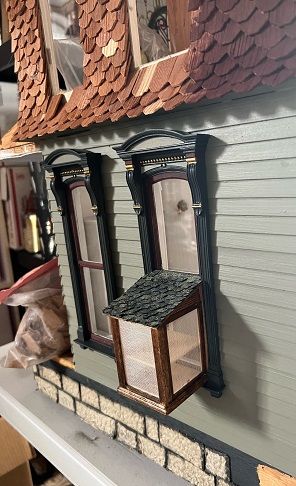
September
Laundry room, done! Turret railing is hard! I cut it wrong, didn’t have any more, glued my pieces back together, fingers crossed, but the floor and walls are done. The kitchen is progressing ... stove and sink installed. The game room is close too. I'm painting the window frames. The floor is laid in the turret. So much to do and lots more painting!
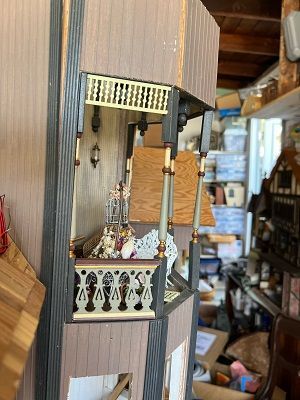
Final Update
Sadly I did not finish…but very happy with progress made. Maybe another year🤣
Laura Johnson
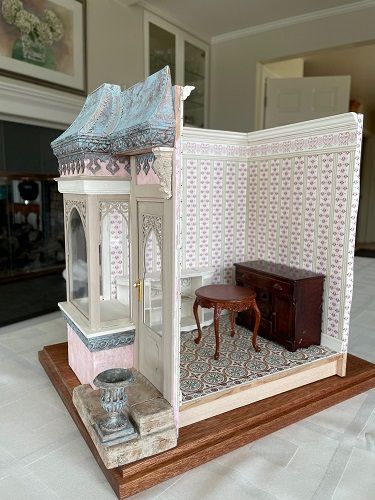
I intend to finish a bridal accessory shop.
March
My latest photo. The challenge was a great idea!
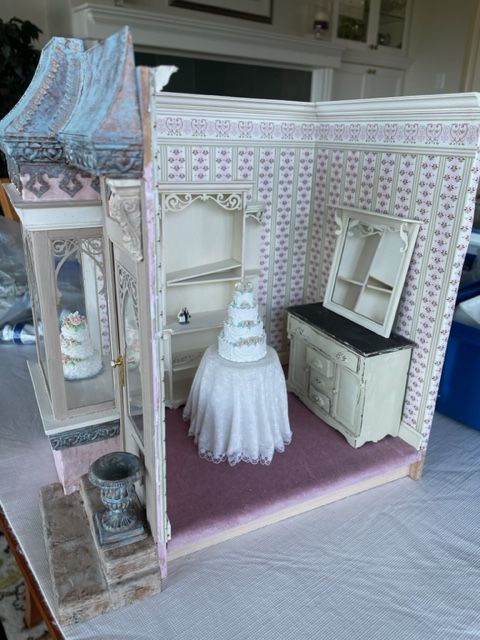
June
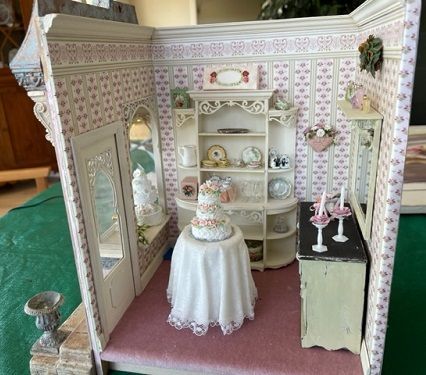
September
Here is what I've done so far.
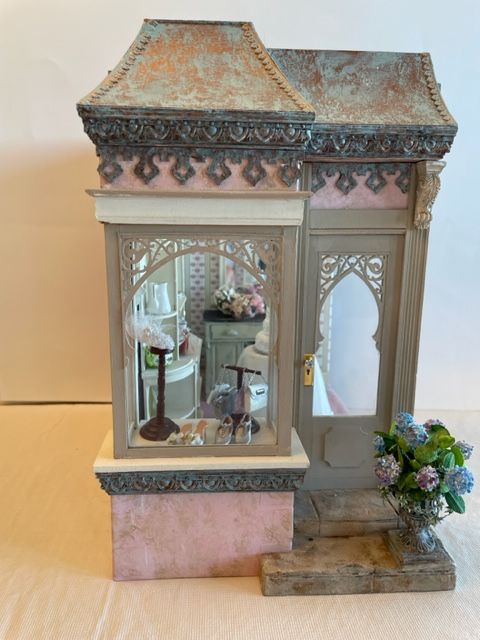
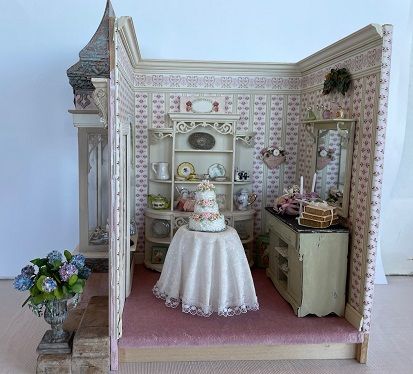
Final Update
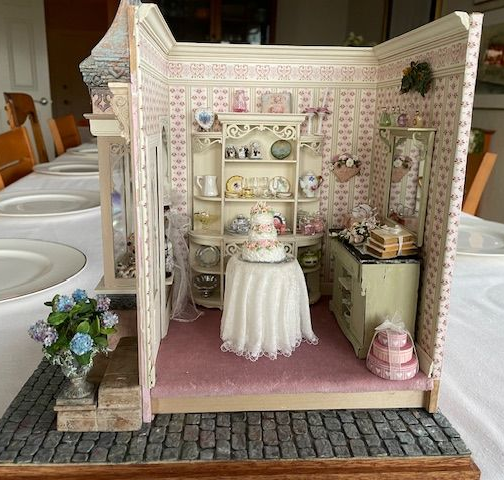
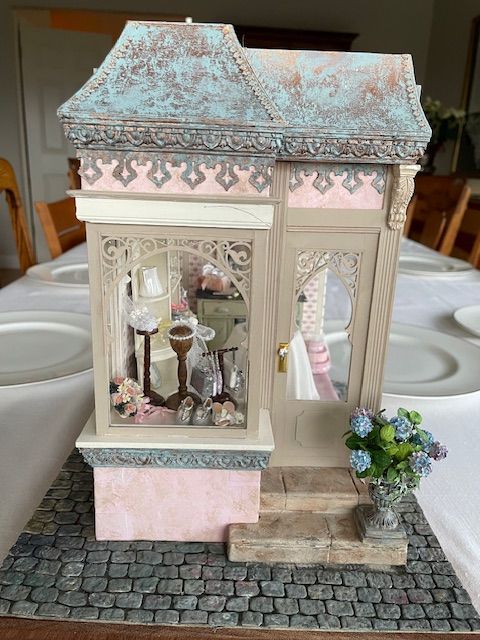
I finished my Carl Bronsdon workshop that I made into a bridal shop.
Tina Kase
I spent a lot of time last year thinking about this project. I'm hoping this challenge and just knowing other people are waiting to see what I can finish, will provide the additional incentive I need to let me finish the first part of it. (The whole project should take me and my grandkids years. 😂) The first part of the project is to create the base of a tree that will contain living quarters for my grandkids Sylvanian family (calico critters) dolls. Aside from building and decorating the tree house it will also involve creating a lot of the furniture. There will be the additional challenge of making it playable and safe and engaging for toddlers and up. It would be nice, but unlikely, if I could start on some of the structure for the rest of the tree, which will include spaces for me to create rooms and houses thereby satisfying my miniature hobby (perhaps with the help of my grandkids as they grow up if they become inspired to join me in my hobby.) I will consider this year's project project complete if the toddler section of the tree is completed this year. I have no photos. I've not started. Everything is in my head.
March
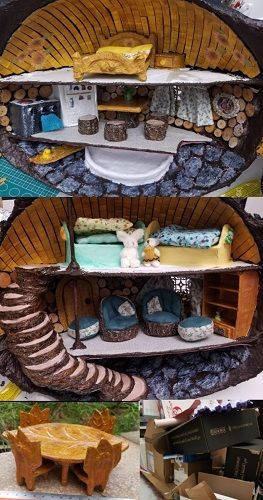
I have tested materials, methods and "playability" by making a set of chairs and a table for the (Sylvanian Family) tree dollhouse and squirrel drey -- which ultimately will sit on the tree. I discovered a few things that really will work, and quite a lot that won't. Also discovered that it's a very time consuming project. 🤗 Looking forward to getting rid of the huge pile of cardboard boxes that I've collected for the tree.
June
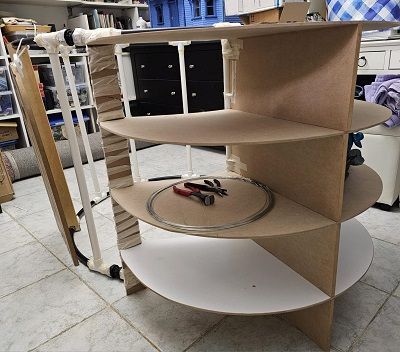
A very busy couple of months, wherein I completed 2 projects unrelated to this challenge, (Ramadan box and 3 x 2023 advent calendar gifts) and now I'm on a month holiday. For this year long challenge I finished off a few minor details on the squirrels' drey and constructed the framework for the tree base. (That's the part of the tree I want to complete for this challenge.) It completely monopolizes my craft space. It feels a little daunting and more than a little crazy. This segment is hopefully going to fit through the doors to get to its home place if it is turned on it's side. It's made of wood, hard and soft plastic water pipes, and joints and is nailed, screwed, and wired together. I had some assistance from my son with this part.
September
The skeleton of the tree house and 5 of the 6 sylvanian family dollhouses (the 6th house is the squirrel drey completed first) have been covered in paper, some also with joint compound. I've started on a few pieces of furniture and decor like these stained glass bits that are pretty much child poking, dropping and punching resistant. (She writes with crossed fingers.) I've also completed one 'stone' and 'wood' floor covering for one of the houses. I plan to have at least one 'architectural feature' and one 'personality imbued' piece of furniture per dollhouse completed by the end of the year, even though I want the entire structure to be "complete" and playable by then too. (Having said that, Miss 2.5 (oldest grandchild whom I babysit daily) now regularly plays with one dollhouse or another and daily asks if her house is finished yet. 😂) My current big challenge that I'm grappling with is making child safe doors on all the future secret nooks and rooms that I'm trying to provide all over the project. These will be "filled in" with scenes from books etc (I have a bunch of ideas for these including automata and holograms😂😂😂) as my grandkids grow and have favourite books or interests. 2 or possibly 3 will be completed this year, including lighting. Lighting is the other enormously challenging problem my brain is focusing on now too... As it is now time that I should have figured out how to put child safe, and yet still accessible (for maintenance) lighting everywhere. 🙄🙄😂😂
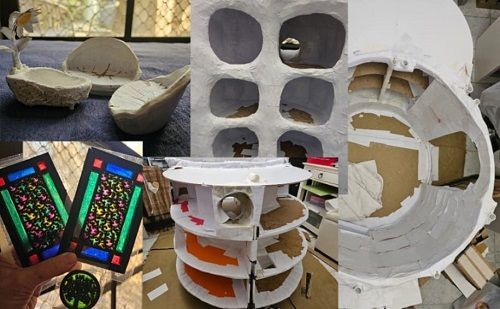
Final Update
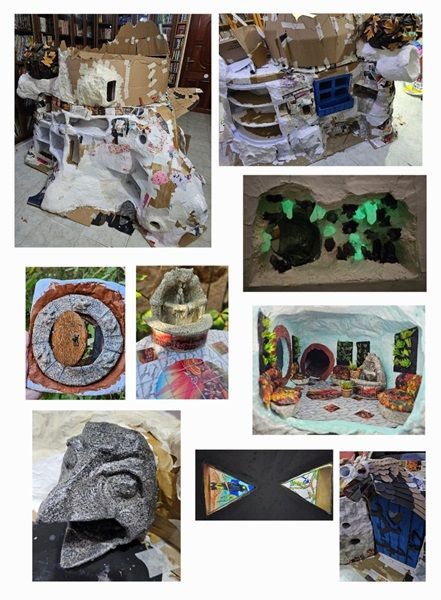
Well, I didn't finish ... but I'm so happy and thankful for this challenge. Thank you so much to the admins who put it all together. Without it there were a few times during the year that I felt like the whole thing was the biggest personal folly on the planet. But by pushing myself to do as much as possible in a year I now have all 6 doll houses ready to be furnished. I expect a few more months will see them all finished. The stump (kids playhouse - not miniature) part of the tree is almost complete with painted window and door, falcon shaped roof over door and stained glass skylights and blue led lights in the ceiling. (Glow worm colony😂) I have made (and adapted) several pieces of furniture and floors and walls for the different houses, completing one whole room, hallway and front door (the rabbits' home) That was a pleasant break from the constant paper mache work! As well as the 6 dollhouses, spaces have been made for 5 booknook type scenes including a 1/144 scale space, a shop, a playground for the sylvanian family kids with a tunnel into a secret crystal cave (finished) with 'amethyst' crystals lit by fairy lights and glow in the dark crystals when the lights are off. Another tunnel is available for toys and matchbox cars to slide down, ending with a 'stone' birds head. The squirrel drey has its own branch to sit on, which ends in a burrow for the owl baby hand puppets. 😂I really have a few months of great fun left, since 2/3s of the the hard construction work is all done. (And then hopefully years and years of fun as the tree changes and develops with my grandkids help!) Best of all my eldest grandchild (who just turned 3) loves it and has already helped with the construction. So again thanks. 🤩
Kim Kehoe
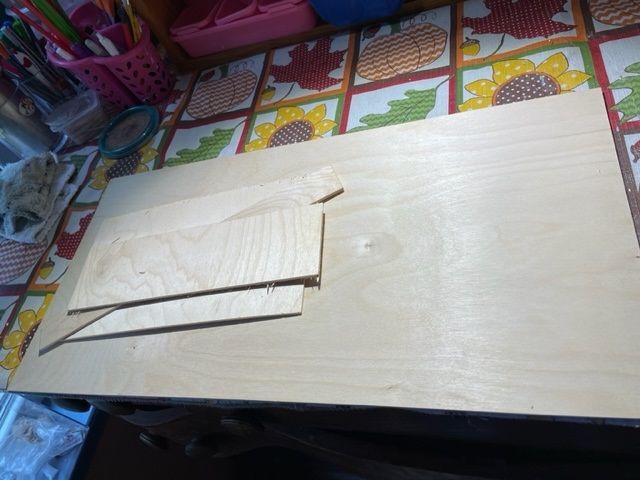
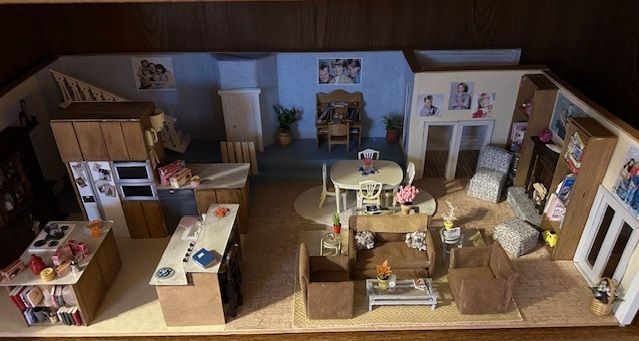
I want to build the living room and kitchen from the TV show Home Improvement. All I have done is take a picture of my wood and making a list of ideas and sketching it out.
March
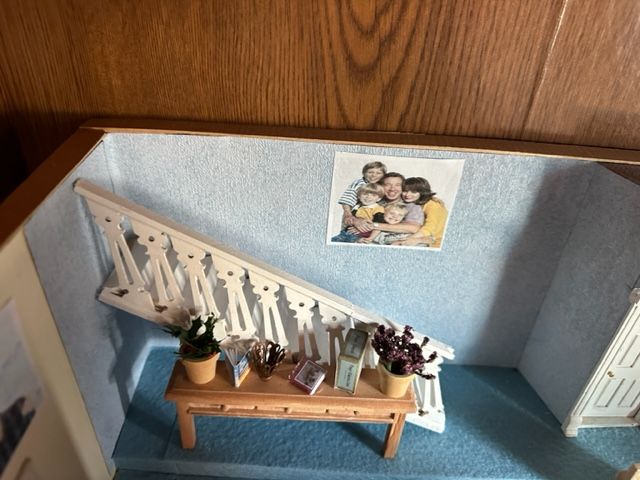
I am working on the Home Improvement TV show house. This is the stairs and the desk area that is behind the kitchen in the show.
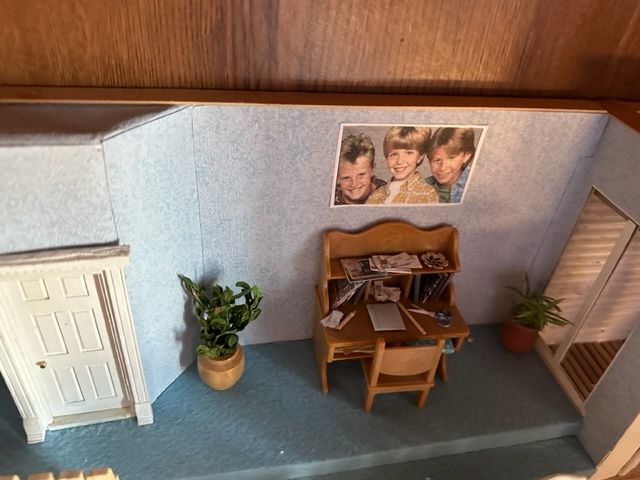
June
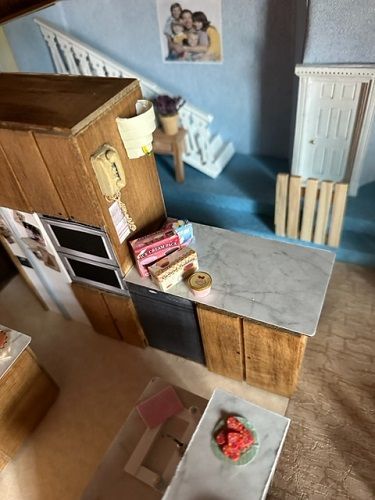
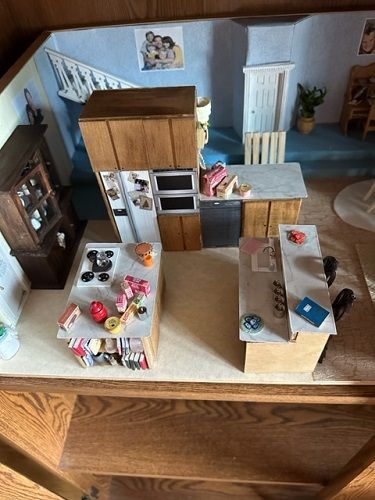
September
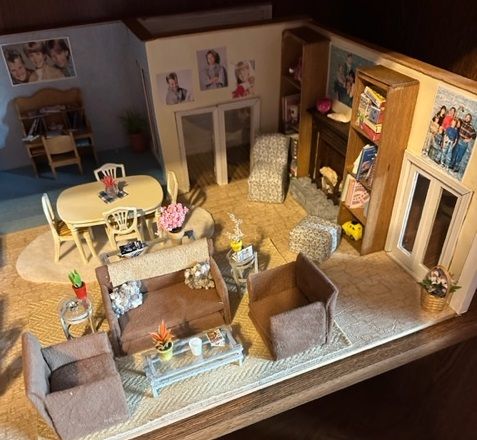
The living room and dining room for the Home Improvement house.
Final Update
I completed my scratch made Home Improvement house. What a fun build. Thanks for the fun for a whole year of building one project.
Carol Kira
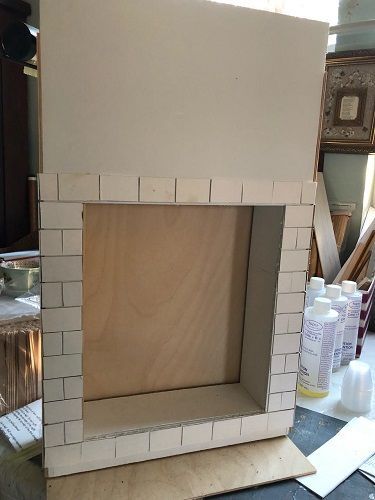
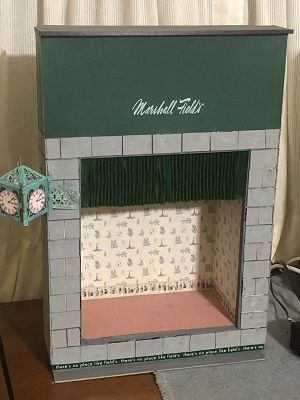
This is a department store window which I started a couple of years ago. This is a great opportunity to get me started on it!
March
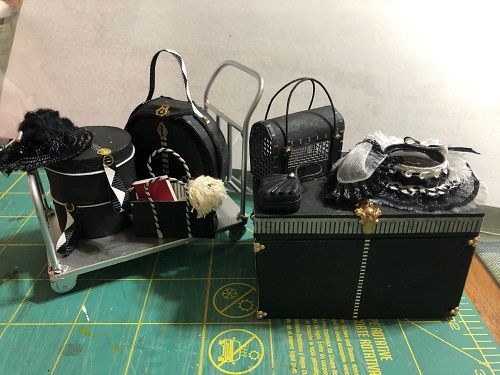
I completed the class offered by Ginger Landon Siegel “Annabelle Goes to Paris” luggage which will be an integral focus of my project.
June
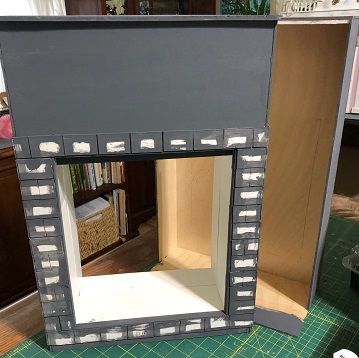
This quarter I added to walls, framed out the window space, and base coated the outside. Much more to do - watch for September report!
September
It’s September and I thought I would have my project finished, but some medical issues slowed me down. One quarter to go. Moving along and still a bit of finishing touches on the building needed and complete the window dressing.
Final Update
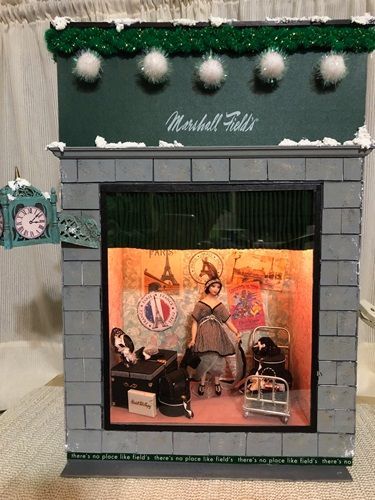
When I picked this project to finish, I didn’t anticipate it taking all year to complete. It is an original design and so working to get the look I wanted took time. My niece in Chicago sent me a gift box with the logo which became the upper facade of the building. A paper mini gift box is the base of the famous Fields clock. But the real challenge was learning to design the window display. I had the luggage and doll but designing the backdrop and lighting and placement from front to back was a new experience for me. After three separate designs, I finally settled on this one and feel it is what I wanted.
Katie Kirby
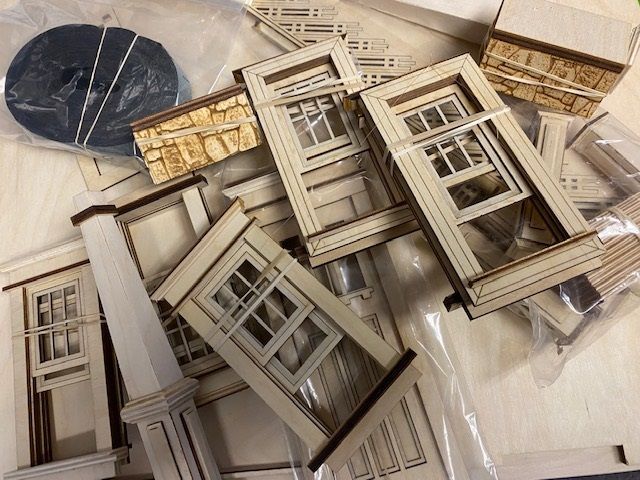
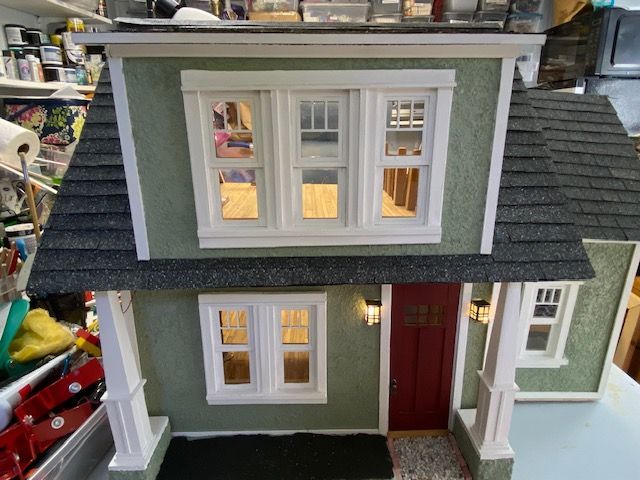
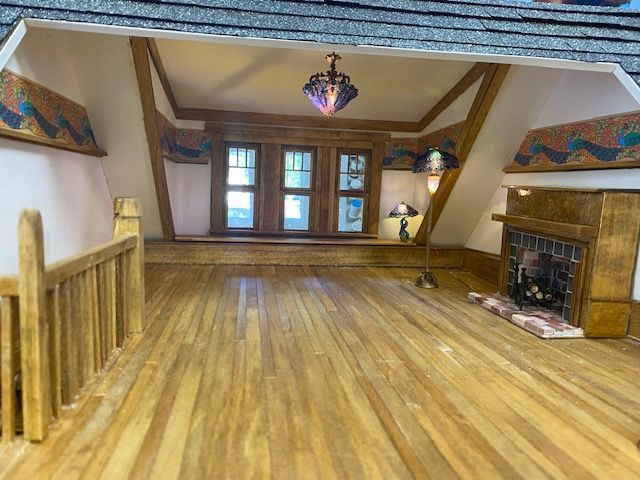
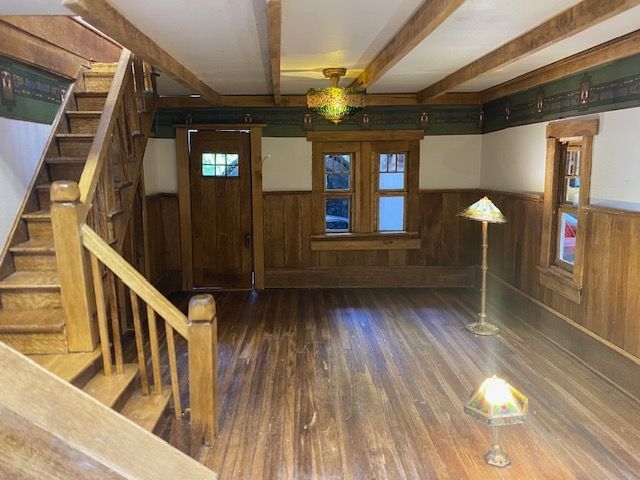
In 1976 I became involved in two lifetime pastimes - miniatures and genealogy. For the past 15 years I have been planning (in my head) a way to combine these two pursuits. I will be kit-bashing Laser Dollhouse Designs’ Craftsman Garage into my dream genealogy space with an office/workroom downstairs and a sitting/reading room upstairs. I expect to make 90% or more of the furniture and accessories. Time to get started!
March
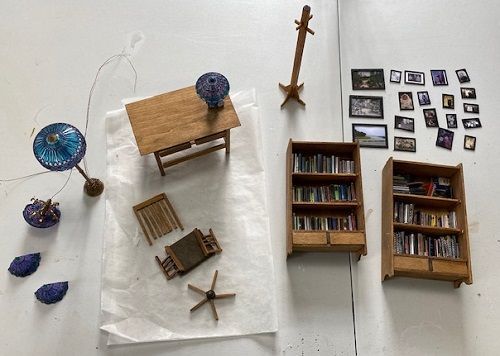
It doesn’t look like much, but I scanned, printed and assembled copies of 150 books in my “real” genealogy collection, cut, sanded, and stained all the furniture and started assembling some of it, scanned, printed and framed family photos, artwork, and painted the marvelous Esther Marker Tiffany lamps.
June
The building is 99% finished; now on to the furnishings and landscaping!
September
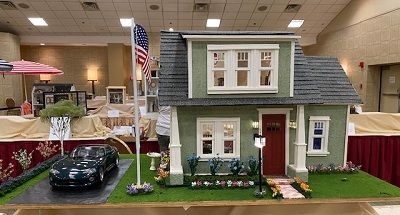
Both the exterior and interior are finished, as is the furniture. Now I need to add more accessories. In the last quarter, I also plan to make a winter landscaped base.
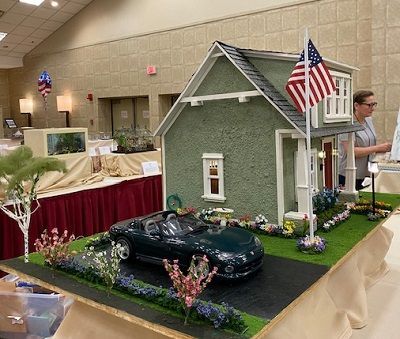
Final Update
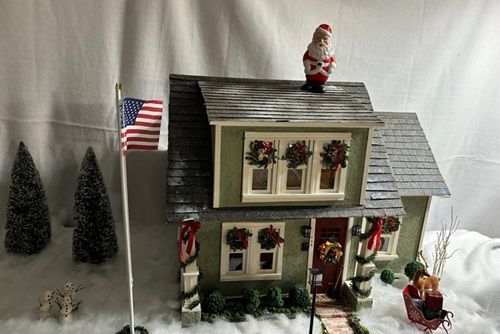
Kathy Koons
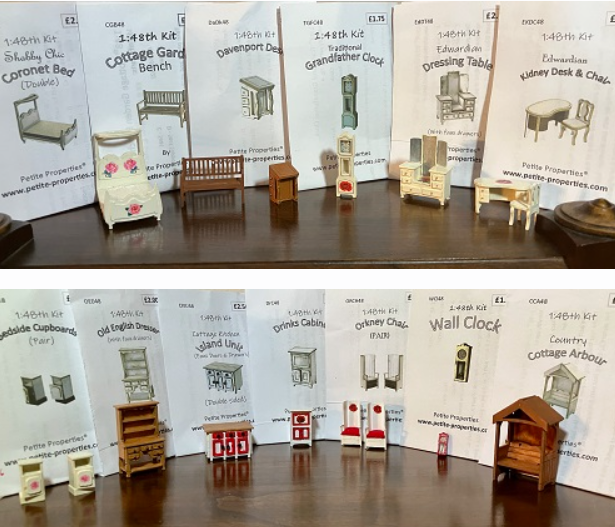
In 2021, I was fortunate enough to get one of Petite Properties' 1:48 scale Advent calendars. I faithfully built them until the middle of December, when I realized that I did not know what color to paint these pieces of furniture because I didn't know what I was going to put them in. I got the 2022 Advent calendar, too. During 2022, I got their June Cottage, as that is my birth month. My resolution is to build the June Cottage and all the rest of the Advent calendar kits and fill the cottage with as many as will fit. Some are exterior items and I hope to get landscaping done to include them.
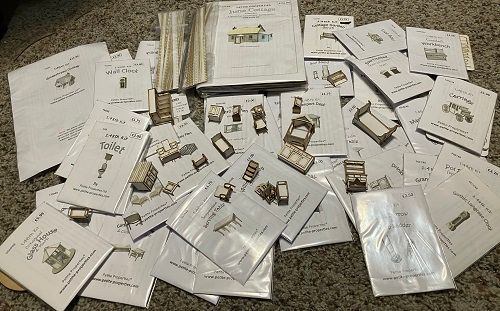
March
I've made my Petite Properties' bathroom fixtures, most of the kitchen ones, and the dining table and chairs. I discovered that I have no stove, so I ordered one from PP. I've decided that this June cottage will be "Rose Cottage" for me -- my favorite flower and the birth month flower for June. Planning the actual construction and look of the cottage has been exciting!
[I work on this project as a palate cleanser after working on my backlog of Robin Betterley's Secret Traveling Village from last year. I have 3 more of those to go!]
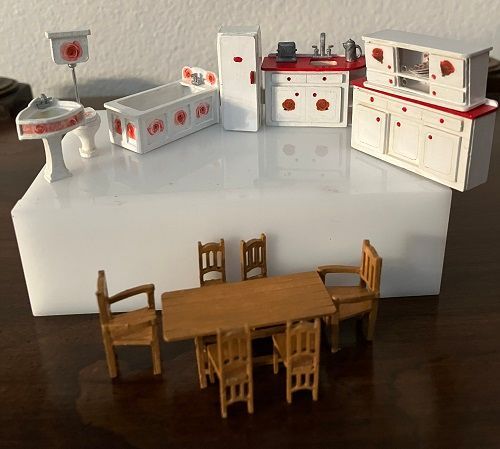
June
I am still working on the Challenge each month after completing one of the buildings from last year's Robin Betterley Secret Traveling Village. Well, not last month, because the second half of May was spent cruising the Rhine and Mosel rivers. But, here are the photos of the April and June completions.
September
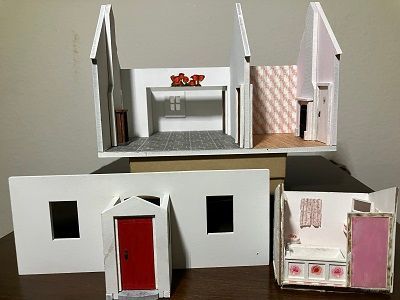
A trip in July and another in September plus doing the Bunny House project for the Quarter Connection have really cut into getting things done on this project this quarter. I began to be concerned about how much of the furniture would fit into Rose Cottage and went ahead and built it. The front is removable and the side room was a lean-to shed that I had to seal the door of and hide to become the bath that will be glued on the right side, but needed to be off for you to see. The outside needs a finish of spackle and I was right - a lot of the currently finished furniture will not fit in these rooms. Luckily, there is plenty more to make.
Final Update
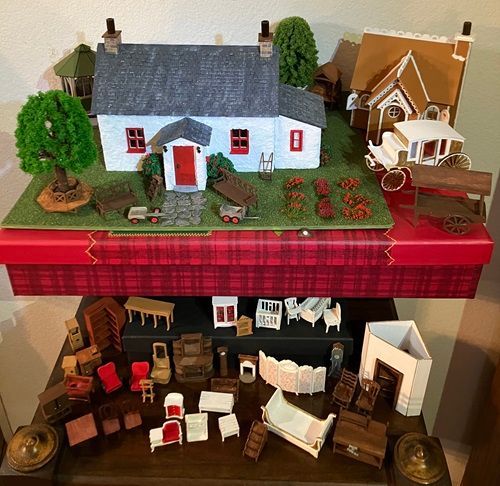
I am so very glad that we've been sending in photos of what we've gotten done quarterly. With 50 Petite Properties Advent Calendar kits AND a cottage to put some of them in, they'd never fit in one photo. Happily, this evening, I did the last bit of landscaping on the cottage, after gluing in the last of the furniture that fit in it, along with a few pictures. My daughter was instrumental in helping me get all the kits I've done since September that wouldn't fit into the cottage into the lower levels of this photo, as well as on the front yard and next to the cottage.😄
Debra Kuckuck
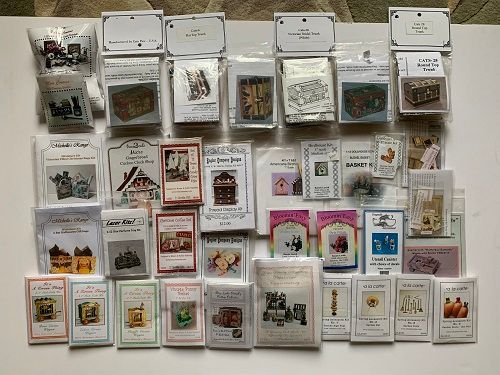
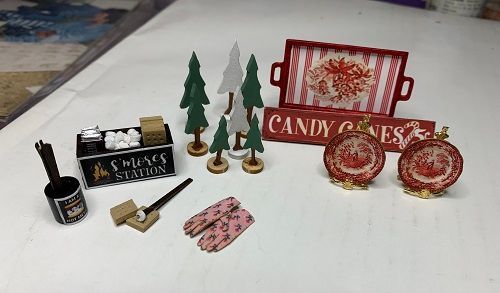
I’m so excited for this challenge to give me the push I need to finally open some of my many, many kits! If I can get these finished this year I will be a happy camper. Of the three dozen unopened kits I chose for this year, 29 are 1:12 scale. Six Cat’s Paw trunks, two Mini Cousins kits, and a bunch of miscellaneous. The final 7 will be my first attempts at 1:48 scale! (gulp!)
March
I still have a ton of kits to finish for my challenge, but here are a few I got accomplished so far!
June
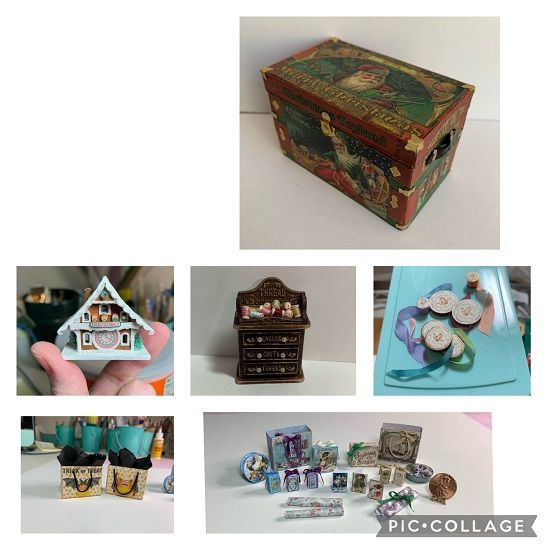
Progress continues! Thanks for the continued motivation!
September
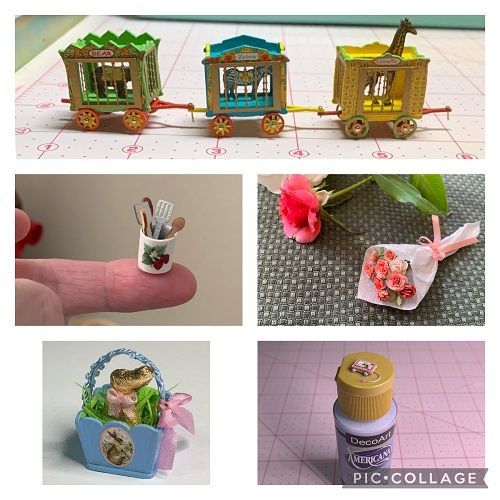
At the end of the year I’m going to be so happy to have all of these kits finished! This challenge has been so helpful.
Final Update
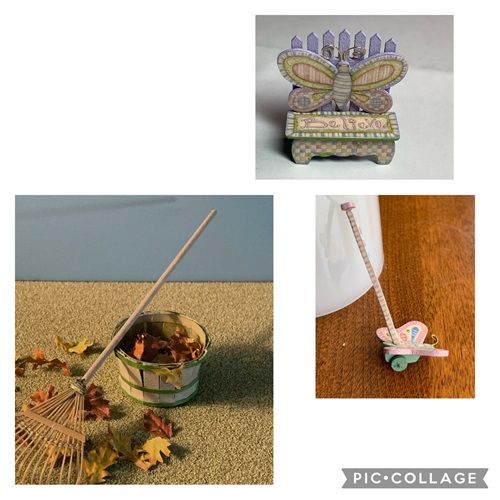
This challenge has been so much fun! I never would have had all these kits finished if not for the challenge. And I already have my goals figured out for next year if we get to do it again! Thank you Debbie, and the whole Create team, for giving us so many fun ways to play together, and with our minis. Happy New Year to you all!
Sherri Lackey
I have decided to do the Elegance Book Nook by Petworth Miniatures. It was a Christmas present from my husband.
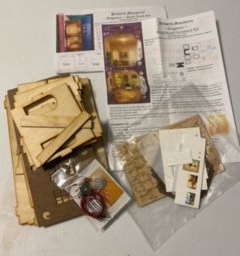
March
I had the inside and outside walls prepared. I wanted the outside walls maroon and used Rustolium 2 in 1 on them. I felt the maroon was too red so I gave them another coat of Expresso Rustolium and I am happier with it. I really like the details on the inside walls.
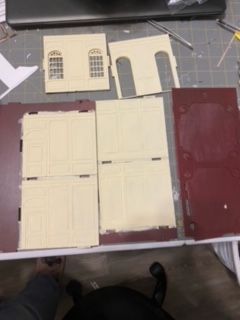
June
Slowly but surely!
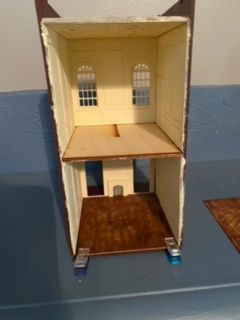
September
I was able to get almost all of the furniture made except for 2 chairs and my chandeliers and wall sconces. Still need to be painted and upholstered.
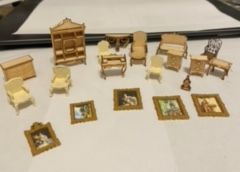
Final Update
I finally finished my Elegance Book Nook from Petworth Miniatures. It was such fun!
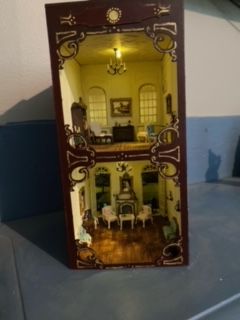
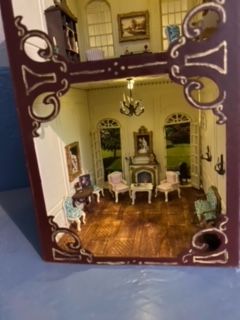
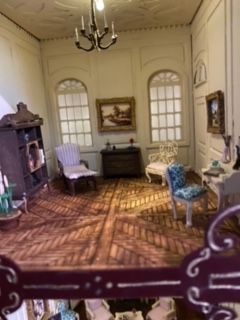
Lesia Lennex
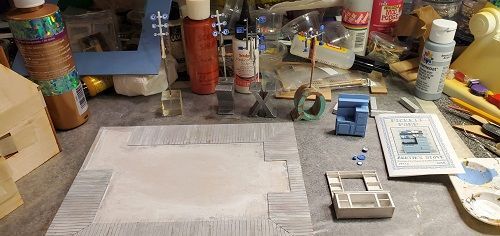
I've agonized over which of my projects should be tackled for 2023. While this won't be the only project, it's a large one and has never been out of its mailing box: The Pickett Pond and furnishings. I have several of the interior and exterior furnishings kits and subbed others that I thought might look good. None of them have been started. I felt awful when I looked at the box mailing label -- June 2017. It's time to work on it and hopefully finish it this year.
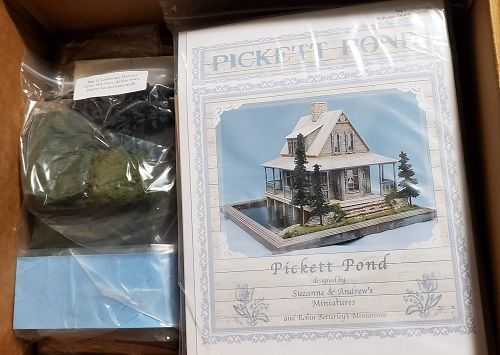
March
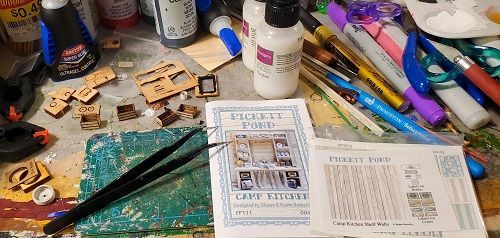
My photo doesn't show this but I've also glued together the house frame. I'm happy with the progress!
June
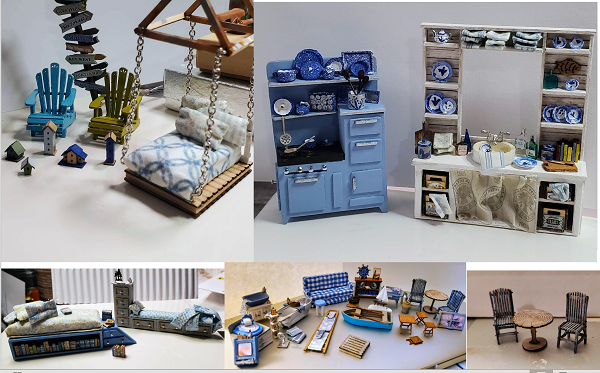
Since I've been in TN, I've been mostly doing the furniture for the Pickett Pond. I've completed quite a lot of furniture. Good thing I brought the structure with me so I can work more on it!
September
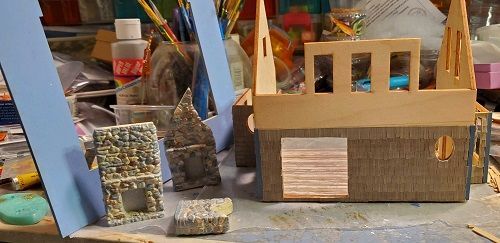
I'm making progress! I've shingled the downstairs, installed the first floor paper, and finished the chimney. I'm ready to start first floor wallpaper and planning the lighting.
Final Update
I've finished the Pickett Pond! And just in time with a couple hours to spare! Yes, it's been a real challenge between travel, work, and all that painting! I'm happy Create had this challenge and that I met it with the Pickett Pond.
Doreen Lindsay
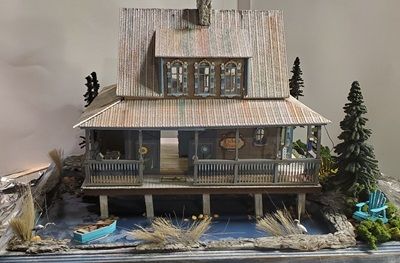
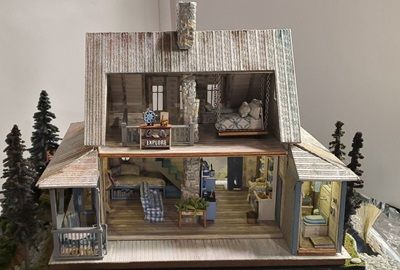
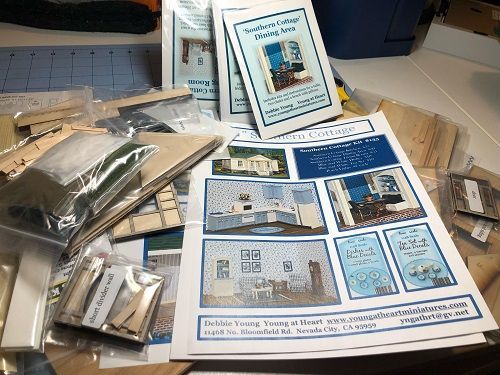
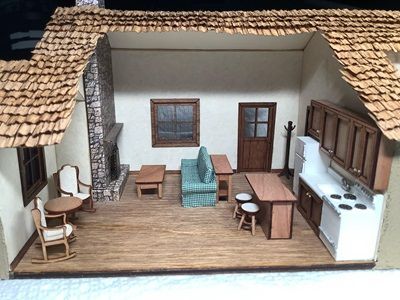
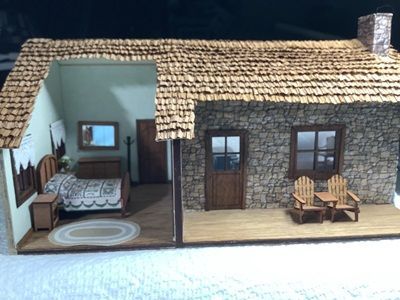
I have decided to enter the year long challenge with two kits - the Summer Cottage by Debbie Young and the Rivendell Cottage by BJ Miniatures. Hopefully this will get me back to doing miniatures again after the loss of Pat.
March
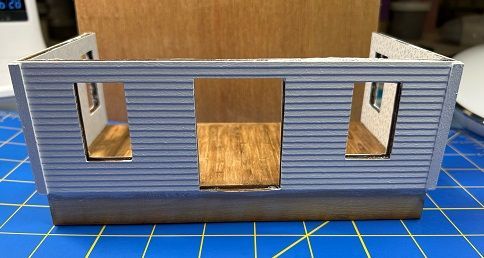
I have built the first house and am working on the interior kits.
June
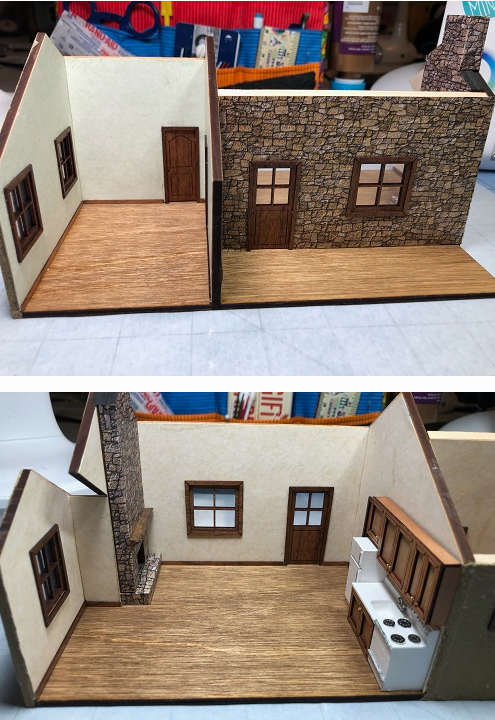
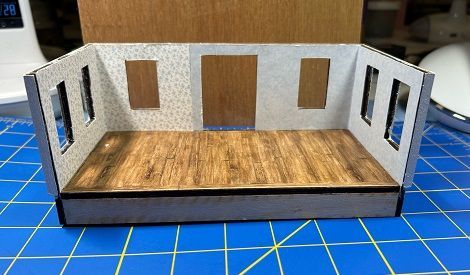
I have started on the second house. Next are the windows. As I have asthma I cannot spray them so I am waiting for my niece to help.
September
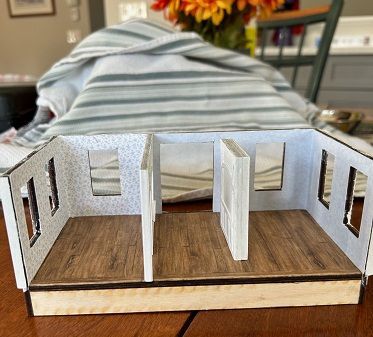
Not much has been done over summer - life sort of got in the way.
Final Update
I have completed both houses and furniture. Still have to put the furniture in the Southern cottage. I will be completing the landscape and accessorizing in the month of January and then to start my new projects for the 2024 challenge.
Cindy Loman
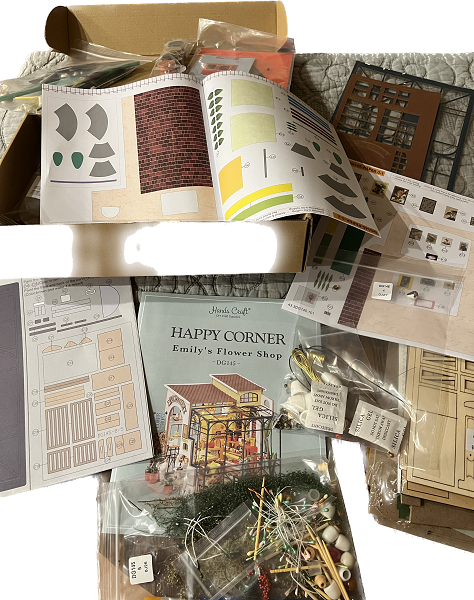
I am so excited by the year long challenge. After all the holiday madness, it is just the kick in the pants I needed to work on my mini projects. I bought the Emily Flower Shop kit recently and it has a zillion pieces. It will certainly take a year to finish what with all my other hobbies and sewing projects.
March
I was so intimidated by my kit that I kept putting it off until I knew that I had a quarterly deadline coming soon. In the beginning of March I started laying out all the pieces and parts. It was confusing at first, but now that I’ve got it figured out, I am so addicted and having so much fun! Thanks for organizing the challenge. Working on it has been such a joy that I’ve barely noticed the dreary weather outdoors.
June
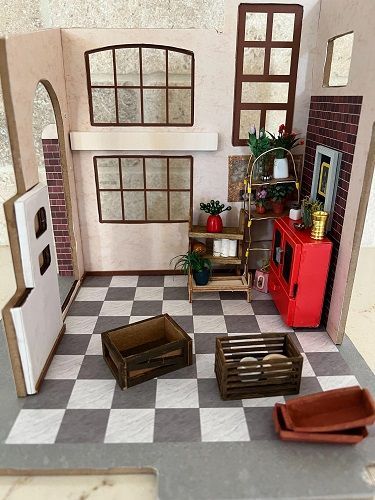
I finished more of small items and furniture. I especially like the rack that holds ribbons and paper and the little oil can and lantern which I have sitting in the foreground for now. The shop looks crowded and cluttered, but I have a lot more stuff to make!
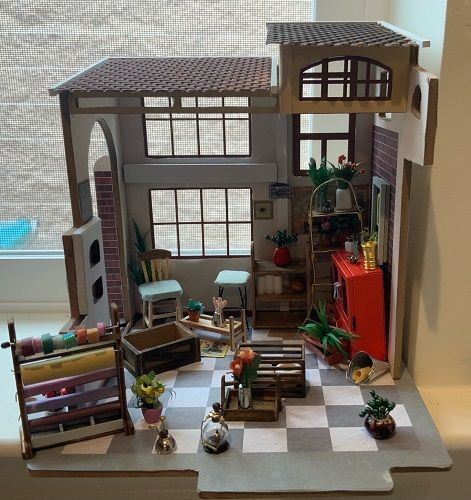
September
This quarter I focused on making the flowers for my flower shop. It will be a challenge to get it all together by the end of the year, but I look forward to finishing it. It would be nice if I finished it before the holidays hit, but I doubt it!
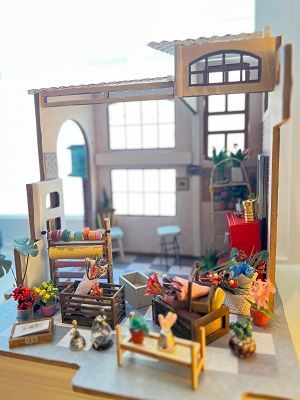
Final Update
I finished my year long project at midnight on October 24. I am so grateful to NAME for creating this challenge! Otherwise, it would probably be still sitting in a box. Instead, I learned a lot of new things and am excited to work on more minis.
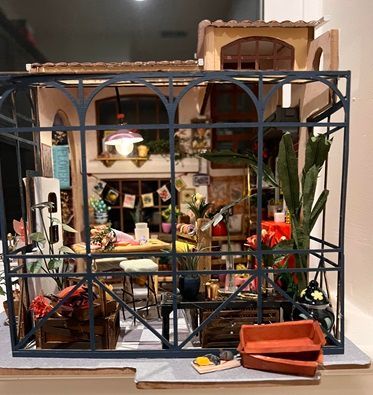
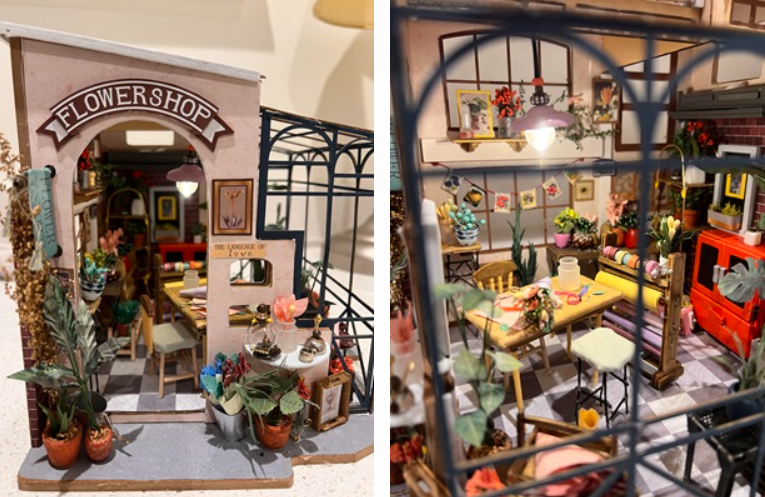
Sally Lonn
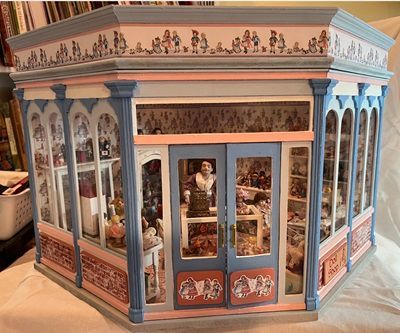
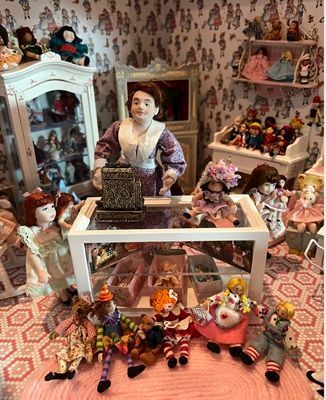
I've put this off long enough ... this is a home for my many, many dolls that I have collected around the world, made, and had kits for. The dolls got finished during Covid, now they really need to be displayed.
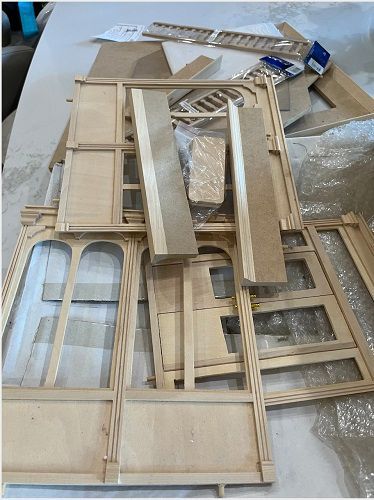
March
No progress update from me for one reason, I am working on the centerpiece for the convention, and if you haven't seen it it is a complicated piece with many, many little cubbies to fill on two sides. It can't be done haphazardly, so my project is sitting there yelling at me!
June
Today I laid out all of my pieces for my corner store. Sealed both sides and went to trial fit it all together! I AM MISSING a whole wall on the right side. I am so bummed!!! Anyway, here are my trial pictures. I've contacted the company online, they are in Victoria BC, online only. So maybe I have a chance. I think when I bought it ... it was a close out. Waiting to hear.
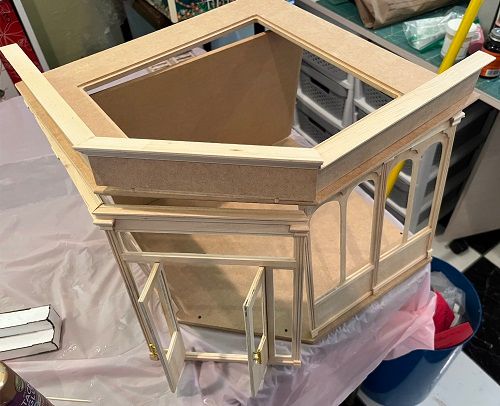
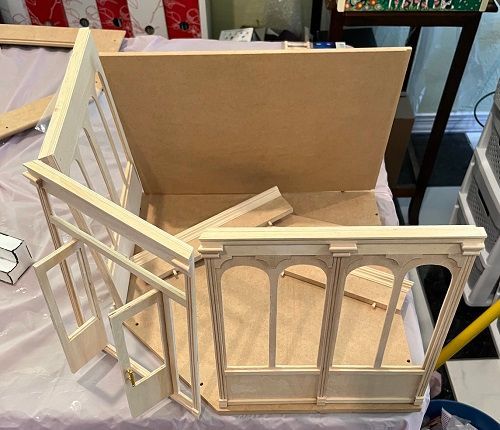
September
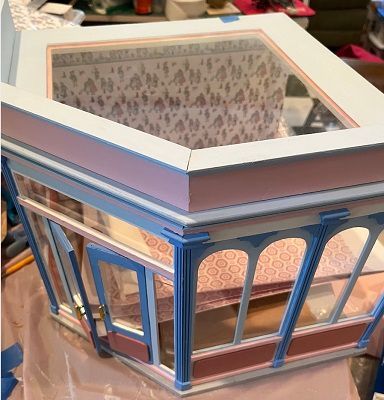
Being gone most of the summer hasn't helped my miniatures. Here is what progress I have been making. The Corner Doll shop is coming along, tricky flooring with the angle to work on. Hope to complete it soon.
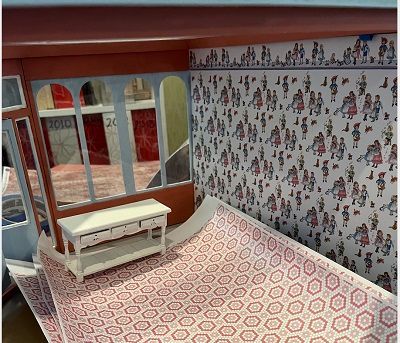
Final Update
It is with a sigh of relief that my year end project is about 99% finished!!! I am very pleased with the results. It is hard to get such a big shop all in one picture. There are many more dolls since I have been collecting for years. The wall paper was designed by Annie Willis of England and she passed away about two years ago. I was thrilled I could get one more sheet for the trim on the outside. The colors are from the wallpaper. This shop had nothing but construction problems with a missing wall and a roof piece that refused to fit .. thank you to a kind friend who has full size tools and helped me out. I love all the windows, because I certainly did not need to light it. The roof is also clear.